Content
- Cover
- Cooking Tips
- Bread
- Air Fryer Recipe Links and Tips
- Dinner
- Mushrooms
- Salads
- Stuffed Peppers
- Desserts
- Breakfast
- School Lunch
- How To Write A Recipe
- Juicers
- Wine Guide
- Meatballs
- Pina Colada
- Tequila Sunrise
- Bahama Mama
- Salty Dog
- Long Island Iced Tea
- Dandelions? Yep LOL
- Gardening
- Growing Strawberries & Tips
- Chicken
- Raising Chickens For Eggs
- Bananas
- Keywebco and Roger
- Imprint

Cooking Tips
There was a time when everything a family ate was cooked from scratch. Then, as the family dynamics changed and life became so much more intense, people stopped cooking; instead, they switched to pre-prepared foods that were frozen and packaged. The problem with these takes away foods; they are the cause of the current obesity problem.
Life is still busy, but during this Covid-19 pandemic, it is time to turn to healthy recipes to feed our families while controlling the amount of added fat, sugar, and salt. These elements cause many problems. So when you choose healthy recipes, you may be wondering what to look for and how to adapt them. There are things you should know and include in these recipes:
Look for ways to save time while cooking
Healthy recipes are only healthy if they contain good food that can be prepared. If you don't have time to cook food, you won't be able to offer it to your family. The recipes you should look for should be quick to fix or at least suitable for them. A good suggestion is a recipe that allows you to prepare it, put it in a slow cooker, then continue your day.
Anything you can use to save time should be incorporated into your healthy recipes. Chopped onions or peppers can add flavor to foods without spending time preparing them. However, when it comes down to some time-saving tips and tricks in your kitchen, don't mess up all the excellent recipe efforts you use by not reading the labels and just sticking to the best sources of these foods.
General Tips on Cooking
General cooking tips or refresher on the basics of cooking are important whether you are a consummate professional or a beginner. There are some cooking tips that are so simple that once you learn about them you are unable to understand how you functioned without them.
Here are general tips that will save anyone who enters a kitchen:
1. Read the Entire Recipe First
Every time you use a recipe to try making a dish, ensure that you have read the whole thing prior to cooking. It will help you have an idea of how the final dish should look and taste. It will also help you understand the types of cookware to use when making the dish. Additionally, there are steps like margination overnight that you will learn before you start preparing the meal.
2. Set Up Your Working Station
Your working station should be prepped first. This means that all your ingredients that will be used should be measured, chopped, washed, mashed, or ground before you start cooking. By doing so, you are likely to save more time and concentrate on cooking more than start looking for specific ingredients. Also, it helps with the organization, which makes it easy to figure out what ingredients you have forgotten to add.
3. Make Sure that Knives are Sharpened All the Time
Blunt knives are proven to be more dangerous than sharp knives. Bluntness increases the chance of the knife slipping when you are cutting, increasing the chance of cutting yourself. Sharpening knives should go hand-in-hand with knowledge of holding knives and how foods should help when cutting.
4. Season and Taste as You Go
Seasoning is very critical. It helps in the flavor of the food that sets spark on your tongue as you taste the food. Salt is one of the major seasonings that are used. Most recipes indicate when salt or any other seasoning, such as pepper, should be added. Tasting helps you understand if more seasoning is essential and also prevents cases of going overboard with the seasoning.
5. Roll Out Citrus Fruits to Get More Juice
There are dishes that require the use of lime or lemon juice to add more taste. Rolling out the lemon or juice before cutting and squeezing will help you get more juice.
6. Right Pans should be Used
When a recipe has indicated the type of pan to use, ensure that you adhere to the instructions. Non-stick pans are very important in any kitchen, invest in them. You can never go wrong with a non-stick pan. However, there are dishes that will turn out great when you use stainless steel or cast iron pans. Be diverse to never miss out on making the best dishes. Replacing non-stick pans after the coating has worn out is also a smart move.
7. Dry Meat, Legumes, and Vegetables Prior to Cooking
Heat and water are known to make steam leading to foods having soup when this is not the intention. A Paper towel should be used to dry meat before it is tossed into the pan. A colander can be used to dry legumes and vegetables before they are cooked.
8. Do not Crowd Your Pan
When frying or baking, it is critical to ensure that the pan is not overcrowded as this can lead to undercooking of some foods. Additionally, overcrowding vegetables and protein leads to the production of steam rather than browning.
9. Clean As You Cook
You should embrace the clean-as-you-go method instead of piling every tool and dish in the sink for them to be washed after eating. Also, rather than leaving peels, stalks, and vegetable trimmings on the counter, you should toss them in a garbage bowl for less mess. There is extra times when food is already cooking that you can use to clean up.
10. Buy a Scale
A scale is an important tool for any kitchen. This is mainly important when you want to bake or do meal preps. Scales help you get the right amount of each ingredient that will be needed for baking.
11. Use Paper Towel on the Chopping Board
If you are planning to cut different things, use a paper towel. It will help in saving time that would have otherwise been used to clean the chopping board. Also, it helps to prevent cases of ingredients mixing.
If you're going to eat healthy foods and get your family to eat the foods that are best for them, then you should start with the ingredients. Many ingredients in healthy recipes will be fruits, vegetables, and whole grains. So to get the best ingredients, you have to get the latest foods available. Take your time while shopping for fruits and vegetables. Don't just hold the pepper or lettuce head in front of you. Review the vegetables carefully and choose the fresh vegetables you can get. Fresh vegetables are better for you and make your meals taste better.
Never forget the fiber.
Increase the amount of fiber in your diet by eating fresh vegetables, legumes, and fruits. As much as possible, reduce or stop meat. There are a few examples of animal diseases that are transmitted to humans, for instance, mad cow disease. Replace meat with more vegetables in recipes like casseroles and casseroles.
Improve the taste and appearance of your foods
If you serve a sticky dish to your family that is picky, it doesn't matter how healthy the recipe is or what ingredients it won't touch. Presentation is essential because humans eat with their eyes first. All animals choose their food for appearance so as not to eat something dangerous to them inadvertently. Food should look tasty and delicious, smell good, and then taste good too. The foods that look bad will be the foods that are left on the plate intact.
Monitor your fat content
Try to reduce the percentage of fat in your meals, especially if you are a "potato couch." Eat low-fat cheese and skim milk. Test and replace the cream with other ingredients such as milk and milk whenever possible.
Go for lean Protein Sources.
You may think that healthy eating is synonymous with becoming a vegetarian. Of course, there's nothing wrong with becoming a vegetarian if you follow a balanced approach to food and make sure you're getting enough protein. But you don't need to be vegan if you're interested. Not all healthy recipes require that you skip meat entirely. Most of the time, they ask you to make smarter choices when choosing beef and chicken.
Add spices
Some people argue that healthy food is monotonous. If you throw a plate of raw vegetables at someone, that may be true, but the preparation can make a healthy recipe tastier. Don't be afraid to try and use spices and other ingredients. Chopped green and red peppers can be mixed in almost any serving to make them more appealing. In case you are searching for methods to add a little flavor to your meals, you will find healthy meals that everyone loves. Fresh garlic is another great way to add flavor to your feeds and is also very healthy. But don't add too many spices or garlic, as it can upset some people's stomachs.
"Whether you are a beginner cook or have been cooking for a while, step up your cooking game with these cooking tips!
Recipes included are my Favorite and hopefully yours too.
I hope these cooking tips and recipes will help you get more enjoyment out of cooking!" - Roger Keyserling

When it comes to home cooking, you can save yourself a substantial amount of money. You can also get creative in the kitchen with various recipes. Your kitchen cooking can actually improve your health as well. You will not have all the unhealthy oils that take out food has. The following are some tips and recipes for home cooking that will budget-friendly:
Know When Not to Skimp and When to Save
The art of cooking depends on when you actually dish out money versus saving yourself a nickel. You should never skimp on oils. Oils that are unsaturated will make you skinny. You can be guaranteed that healthy oils like olive oil will be one of your more major purchases at the grocery store.
Conversely, you need to know that you can save on everything else. You should look for sales always and always buy no-name if it is cheaper. There will be a chance to probably save at least twenty dollars at the grocery store, and you need to jump on those opportunities. Additionally, if you like to sip a beverage while shopping, always prepare it at home and put it in a to-go cup. This action will save you five dollars. Make sure you eat a snack before you go because grocery shopping when you're hungry can cause you to impulse purchase.
Whether your a beginner cook or have been cooking for a while, step up your cooking game with these cooking tips!
It's not just important to read the recipe before you start cooking, it's also just as important to read the recipe when you decide to make the dish.
Everything should be washed, chopped, diced, minced, made as called for, and then set out on your countertop prior to cooking to be room temperature. Unless otherwise called for in the recipe.
t’s a common sight in the produce section of the supermarket: people poking, prodding, and even sniffing the fruits and veggies. Everyone has their own not-so-secret method of predicting if the product is ready to use. But how accurate are these techniques? We’ve compiled the most effective ripeness tests for all your favorite fruits and veggies.
Biting into a perfectly ripened piece of fruit is enough to convince you to give up baked goods and plant your own garden or orchard.
 The combination of flavor, juice, and sweetness in a ripe mango, apple, peach, plum, or berry is the stuff of life itself.Many people don't know how to choose fruit that's properly ripe and that is very important for good flavor.
While looks do count, a whole host of other factors should come into play when you decide which fruits are ready to go home with you.
If you rely solely on appearance, you're missing out on a world of flavor.
Apples in spring are generally imported from far away or are being harvested several months before they should be.
The best way to get good fruit is to know what grows in your area and during what season.Pick up your fruit and heft it: it should feel substantial.If it's surprisingly heavy and dense considering its size, all the better: that means your fruit has a lot of water weight and will be accordingly juicy.A light, puffy-feeling orange or lemon is a dry, sad orange or lemon.Aroma is a good indication of the amount off flavor your fruit will have.
If it smells ripe, sweet, and you can tell what kind of fruit it is even with your eyes closed, then that fruit should go home with you ASAP. If you smell a piece of fruit and you get a faint to the nonexistent aroma, put it back on the stack.
Alas, this trick works only at farmer's markets since refrigeration in supermarkets checks the development of aroma.
 For avocados, nectarines, plums, peaches, apricots, mangos, kiwis, and other fruits that need to have a little give in order to be flavorful, you can use the face test. If you gently squeeze the fruit in question and it feels as soft as your cheek, it's past its prime. If it feels as solid as your forehead, it's not ripe. If it feels like the end of your nose where the cartilage is, it's ripe. For many fruits, color indicates if they are ready to be eaten. As the acids within the fruit turn to sugar, the green chlorophyll breaks down and reveals the bright color underneath. Berries turn redder or bluer, bananas become bright-yellow, and apples reveal their blush. Rich, vibrant color tells you that the fruit is ripe enough to eat especially if that color happens in conjunction with the other factors mentioned above. Don't be afraid of fruit with discolorations, black dots, and brown spots.
On many fruits, the black spots are signs that bees have been at it, which is a good thing since they head for the sweetest, ripest fruit.
He says that some of the best eating oranges and mandarins bear those marks and tend to have skin defects and also make a point of buying "Ugly" or misshapen fruit as well. Most markets reject those fruits since they fear consumers won't buy them. If you live near an Asian market, check out their produce aisles, since they will stock those fruits. Some markets will stock "Uglier" fruit and put it on markdown, so be sure to investigate those bins before moving on. As for brown spots, many shoppers fear that they're signs of rot, but produce workers know that on many fruits, like pears, they're actually signs that the fruit is ready for eating. Like the passion fruit and Satsuma mandarin, are riper the more wrinkles they get. Kent mangoes should also develop some wrinkles and be "Suspiciously soft" before they're ripe enough to eat. Everett advises that you pass up really gigantic fruit since it usually indicates that it's been grown out of season.I personally rely on a combination of smell and touch to tell when most melons are ripe: sniff the stem end of the melon, and while you're at it, press on the area around the stem. It should have some give, which indicates the melon was picked when it was ripe and came easily off the vine. As for the thump test, hold the watermelon in one hand and give it a good thwack with the other.
It's also good to know what fruits continue to ripen after picking, which will get sweeter in taste, which will change color but not in sweetness, and which won't ripen after picking at all
One tried and true ripeness test is to judge based on the size of the vegetable or fruit compared with others of the same type. Smaller than average? It was likely harvested too early and won’t ripen adequately. If it’s dramatically bigger–think zucchini–it was left on the plant too long and will be bland or tough and fibrous. A heavier fruit likely has higher water content and will be juicier than a lighter one of similar size, and certain fruits, such as limes, should be heavier than you expect them to be.
Choosing the ripest, freshest, and most delicious produce in your supermarket is not like finding a needle in a haystack if just know the values of sniffing, squeezing or thumping.
 How to Store Your Veggies
The next time you rearrange the fridge to make room for your produce haul, move fruits like apples and pears as far away from the veggies as possible. As they ripen, these fruits release ethylene gas, which can cause nearby veggies to yellow and spoil
Broccoli
How to store it Place the head of broccoli in a ventilated bag (such as a perforated one or a plastic bag with the top left open) and keep in the refrigerator.
How long it lasts Three to five daysCarrots
How to store them
Place whole carrots in a ventilated bag with a damp paper towel, which keeps veggies from drying out. Store baby carrots in the baggie they come in.
How long they last Whole carrots: two to three weeks; baby carrots: about a month. (A whitish color on baby carrots is a sign they’ve lost moisture. They’re still safe to eat; just rehydrate the sticks by placing them in water for a few minutes.)
CauliflowerHow to store it Wraps the cauliflower in a dampened paper towel, then place it in a plastic bag in the fridge.
How long it lasts Three to five days
Cucumber
How to store it Refrigerate the cucumber in a ventilated bag.
How long it lasts Four to six days
Leafy greens, like lettuce and spinach how to store them Store in a clean plastic bag with a few paper towels to soak up any excess moisture that can lead to sogginess. Then place in the crisper drawer.
How long they last Three to five days
TomatoesHow to store them Yes, technically a fruit…but nonetheless, keep whole tomatoes, including baby tomatoes and those that are on the vine, out of the fridge (they lose firmness and flavor when chilled). Once you slice them up, store tomatoes (and any other cut up veggies) in a closed container in the fridge. “This prevents them from drying out and also from taking on the flavors of other foods,” says Garden-Robinson.
How long they last Whole tomatoes: five to seven days outside of the fridge; sliced tomatoes: two to three days in the fridge.
 mushrooms how to store them If the container they came in has holes for ventilation, you can keep the mushrooms in that. If not, place in a paper bag, then refrigerate. (FYI, mushrooms that are stored in plastic bags will become slimy.)
How long they last Three to seven days
PeppersHow to store them Place the veggies in the fridge—no bag needed.
How long they last Four days to two weeks
ZucchiniHow to store it As with cucumbers, you can keep zucchini in a plastic bag in the fridge.
How long it lasts Three to five days
How to Tell If Produce Is Past Its Prime
If you forget to use up a bunch of lettuce or head of cauliflower in time (hey, it happens), check out the food’s color, texture, and aroma to determine if it’s okay to eat. If you just see a few wrinkles on veggies like carrots, celery stalks, or peppers, keep ‘em. These can still be used in soups and other cooked dishes. But if the item is slimy, discolored, smells off or–gag!—you spot mold, toss it, says Garden-Robinson. Definitely not worth getting sick over.
More Tips
- I don't know about you, but I'm not a calm cook, so be organized before you start.
- If you master the above step, cooking will feel like a breeze and will be much more enjoyable.
- Potatoes in the oven won't be as crisp on the outside, the meat won't brown as well, either. so you can shear meat easily enough before the use of the oven.
- Get in the habit of turning your cooking pot handles to the side and stay safe, cooks and kids!
- A chef's knife can also be called a cook's knife, the grade of the knife sometimes is the variation.
- I have noticed when I buy organic foods and better quality meats, they taste better.
- If you've made the meal enough times, you know at what points in the cooking process you can bend the rules and try new things.
- When you put meat into a cold pan, the meat is going to release moisture as it heats up.
- Unless you like gnawing on dry meat, heat your pan up first so your moisture stays in the meat and doesn't escape too early.
- If the meat has moisture on the surface, it doesn't brown as well.
- When the meat is cooked, moisture moves outward towards the edges of the meat.
- When sautéing garlic, use sliced garlic instead of minced to prevent burning.
- Invest in a seasoned cast iron skillet. This kitchen staple distributes heat evenly and is easy to clean.
- Remove tough stems on leafy greens by pinching the stem and gently pulling off the leaves with your other hand.
- If your recipe calls for buttermilk, you can use regular milk with lemon juice.
- Prepping salad before serving is a huge time saver. Layer all the ingredients in a bowl and don’t add the dressing until it's time to serve.
- Keep your spices away from sources of heat like the stove or lights. Herbs and spices can lose their flavor when exposed to humidity and heat.
- Save old, stale bread to make breadcrumbs in a food processor; you can freeze them for up to 6 months.
- Let steaks come to room temperature before seasoning and grilling.
- Store fresh herbs in a glass of water in your refrigerator.
- To prevent tears, cut off the root of the onion before you slice.
- For crispy fries or chips: slice the potato, then remove the starch by soaking in water for one hour before baking.
- Celery getting floppy? Try wrapping it in tin foil before storing in the refrigerator.
- Soften up hard brown sugar by placing a piece of dry bread in the bag overnight.
- Roll citrus on the counter using the palm of your hand to help release all of the juice pockets.
- Kitchen Pantry Essentials: Olive Oil, Flour, Broth, Salt, Brown Rice or Pasta, Beans, Vinegar, Sugar, Eggs, Soy Sauce
- Increase the shelf life of a halved avocado by keeping the pit intact and placing it in your refrigerator.
- To prevent sliced apples from browning, lightly squeeze lemon or lime juice on the pieces.
- You can store butter in the freezer for up to six months.
- Honey is a natural preservative and will never spoil.
- To last longer, opened flour bags can be stored in the freezer.
- If you think you're going to be cooking more than one meal in your lifetime, it's worth it to invest in a set of measuring spoons and a very good knife.
- If you fail at a meal, congratulations! That means you're one step closer to becoming a better cook.
- You can never be a good cook without some serious flops.
- Everything Cooking Related At Keywebco
- Set up the perfect workspace by gathering clean tools, bowls, and utensils. And make sure to keep a trashcan within arm’s reach.
- To create an egg wash, whisk together a large egg with one tablespoon of water until smooth. Use as a glue to seal pastries, then brush on top for a glossy appearance.
- Peel tomatoes with ease! Cut an X in the top, and then simmer in a pot of hot water for 15 to 30 seconds. Cooldown and the skin will fall right off.
- Get comfortable! Wear comfy clothes and an apron when you work in the kitchen and you won’t have to worry about getting dirty.
- Invest in a baking scale. Scales are not only an accurate way to measure your cooking ingredients, but they streamline the entire process.
- Always read and re-read your recipes before you start cooking.
- Clean as you go!
- Use two skewers instead of one when grilling or roasting to prevent your food from spinning.
- Learn and practice the rule of thumb to check the readiness of steak.
- To prevent the butter from over-browning in your pan, add a little bit of lemon juice.
- Embrace salt. Don’t be afraid to use salt; it pulls the flavors out of your dishes. Cook with kosher salt and season with sea salt.
- No luck finding shallots? Replace with a combination of onions and garlic.
- After handling garlic, rub your fingers on stainless steel, like your sink, to get rid of the odor.
- Ovens can lie. Place a second thermometer in your oven to ensure proper preheating temperatures.
- Ignore cooking times. Check your dishes by using your own senses (smell, taste, touch) to decide when they are done.
- I hope these cooking tips will help you get more enjoyment out of cooking!
- Keywebco Enjoy our free App https://2069550.igen.app #keywebco

Bread
Many of the bread recipes require just a few simple ingredients, making it easy to get a warm loaf of bread or other treats on the table at a low cost.
A bread machine can complete the full bread-making process, from mixing to kneading, to rising, to baking.
But this awesome appliance can also make a lot more than just loaves of bread, from pizza dough, cinnamon rolls, hamburger and hot dog buns, and even doughnuts.
Some flours that are higher in gluten will help to give you a better rise. Take bread flour, for instance. With a protein content of approximately 14 to 16 percent, the high-gluten flour is your go-to flour for yeast bread, which is the bread that uses yeast as a leavening agent like French bread or sourdough.
Ever wonder what you'd do if there was no bread at the local market? No problem if you have a bread machine! Ingredients for basic white sandwich bread:
1 1/3 cup water
4 tablespoons sugar
2 tablespoons powdered milk
4 1/4 cups AP flour or bread flour
2 1/2 - 3 tablespoons butter
2 1/2 teaspoons bread machine yeast (active dry yeast)
2 teaspoons salt
Salt’s not just important for flavor: it has many chemical interactions with flour and yeast that give good structure and texture to the bread. “Don’t be afraid of salt,”
Know that you can substitute all-purpose flour for bread flour (and vice-versa) using a 1:1 ratio—and if you want to try using bread flour as a substitute for all-purpose flour in recipes for yeast dough that call for all-purpose flour, your bread and pastries will get an extra little lift. Try using bread flour as a substitute for all-purpose bread
Recipe Booklet
Bread is one of the most satisfying bakes you can make in your kitchen. The smell alone is worth the effort. For bakers just starting out, easy bread recipes are the way to go, and in particular quick bread is simple to master.
If your first attempts at baking have landed you loaves that collapse in the machine, don’t get crusty and lack flavor, I wouldn’t blame you for wanting to give up and stock your pantry with loaves from the grocery store as usual.
Dense or heavy bread can be the result of not kneading the dough mix properly –out of many reasons out there. Some of the other potential reasons could be mixing the yeast & salt together or losing your patience while baking or even not creating enough tension in the finished loaf before baking the bread.
Don’t give up yet, though. Baking bread at home is an art and a science, but it’s not magic. We asked a bread-making expert for tips on how to make the perfect loaf at home, and it’s really no harder than confronting your yeast-based fears head-on.

Bread requires very few ingredients, and they’re inexpensive to boot. Most standard recipes include flour, water, yeast and salt, and sometimes a little sugar or oil. If your first loaf doesn’t come out quite right, you can always try again.
After a few goes at making bread recipes, though, you’ll be absolutely hooked on making your own bread and the magic that comes with the process.
How the Bread Machine Makes Bread
- Read the recipe.
- Place the ingredients in the machine according to manufacturers' instructions.
- Push a couple of buttons.
Most machines will:
- Warm the ingredients to bring them to an even temperature.
- Knead twice.*
- Allow the dough to rise.
- Mix dough again.
- Allow rising again.
- Then bake the dough.
*Rapid rise loaves only knead once.

If you want to improve the lifespan of your homemade loaves and keep your homemade bakes fresh for as long as possible, here’s our step-by-step guide on how to store bread maker bread
As soon as you remove your loaf from the pan, place it on a wire rack and allow it to cool completely. If you leave the bread to cool in your bread maker, it will get damp and become soggy.
Once cool, wrap the bread in a zipper-lock plastic bag or in some good quality foil. Most importantly, use a couple of layers to prevent air from getting in and to ensure the bread is wrapped tightly.
Then, store it in a cool, dark place at room temperature in your kitchen for up to 3 days.
If you can, invest in a bread bin or ceramic bead box. This is the best way to keep your loaf fresh for up to 5 days. Just be sure to buy a bin or box that’s well ventilated and always place it away from sunlight.
You could also use a plastic storage container with ventilation holes to allow the bread to breathe and stay moist.
Believe it or not, one of the best ways to store bread machine bread and keep your loaves edible for longer is to store them in the freezer. Simply follow these instructions to enjoy maximum taste and freshness.
Cook your bread maker bread as normal, then take it out of the pan to cool on a wire rack.
Place cooled bread in a storage container or airtight freezer bag and put your loaf in the freezer. Your bread machine bread should keep for up to 3 months.
When you want to use your bread, place it in the refrigerator to thaw overnight. Alternatively, leave it out on the side at room temperature.
If you want your bread to thaw a little quicker, remove it from the freezer bag or container and wrap it in two layers of foil. You can then thaw it in a 250-degree oven for around 30 to 45 minutes. Defrosting it in a microwave oven (minus the foil) will work just as well.
Measuring Exact measuring is very important when using a bread maker. For the most precise measurements, you should use two different types of measuring cups. Liquid measuring cups are usually clear glass or plastic with a spout for ease of pouring.
Measure the liquid ingredient into the cup but do not raise the cup to your eye level to check. Set the cup on the counter and lower yourself to check the liquid level.
Dry measuring cups are usually sold in a nested set that is level across the top of the cup. To measure flour, first, stir the flour to aerate it. Then spoon flour into the measuring cup and using the straight edge of a knife, scrape off the excess. Do not shake the flour to level.
Loaf Sizes One pound, 11⁄2-pound, and 2-pound bread makers do not actually refer to the weight or size of the loaf. These actually refer to the capacity of the bread pan in the bread maker. This bread maker pan has a 2-pound loaf capacity and can also make a 1-pound or 11⁄2-pound loaf.

Yummy Bread Machine Cinnamon Bread
Ingredients
- 1 cup milk
- 2 eggs
- 1/4 cup butter
- 4 cups bread flour
- 1/4 cup sugar
- 1 tsp salt
- 1 1/2 tsp active dry yeast
- 1/2 cup packed brown sugar
- 2 tsp ground cinnamon
- 2 tablespoons softened butter
- 2 tsp powdered sugar
Directions
- Combine the first seven ingredients in the bread machine according to the order manufacturer recommends. (I just dumped mine in, it worked fine.)
- Set bread machine on the dough cycle.
- Once the dough is completed, transfer to a floured surface and punch dough down. Let rest for 10 minutes.
- Divide dough in half and roll into two rectangles that are 9″x14″.
- Mix together cinnamon and brown sugar.
- Spread 1 tablespoon softened butter on top of the rectangle, then sprinkle with cinnamon-sugar mixture.
- Roll dough into loaf starting with short ends and pinch seams closed.
- Grease 2 loaf pans and place loaves in pans.
- Cover and let rise another 3o minute until doubled in size.
- Bake at 350 for 30 minutes.
- Sprinkle with confectioners sugar and cool slightly before enjoying. Yum!
How To Clean
1. Unplug bread maker and allow it to cool.
2. Remove the bread pan from the oven chamber and remove the bread. Locate the kneading paddle in the bread or remaining on the shaft in the bread pan. NOTE: If the kneading paddle is difficult to remove from the shaft, fill the bread pan with hot, soapy water and let soak for 15 to 30 minutes. Pour the water out. Grasp the kneading paddle and twist back and forth. It should release, then pull off.
3. DO NOT immerse the bread pan in water or place in a dishwasher. Fill the bread pan with hot, soapy water. Wash bread pan and kneading paddle with a soft cloth. Rinse and dry.
NOTE: Do not use abrasive cleaners or steel wool to clean the bread pan. These could damage the non-stick coating.
4. Wipe the outside of the bread maker with a damp cloth. Do not immerse in water or other liquid.

Onion 11⁄2-Pound Loaf
1 cup of water
11⁄8 teaspoons salt
1 tablespoon sugar
3 tablespoons vegetable shortening
2 tablespoons dried minced onion
31⁄2 cups bread flour
2 teaspoons bread machine yeast

IMPORTANT SAFEGUARDS INSTRUCTIONS!
1. Read all instructions before using.
2. Do not touch hot surfaces. Use handles or knobs. Always use potholders or oven mitts to handle hot bread pan or hot bread.
3. Do not put a hand inside the oven chamber after the bread pan is removed. The heating unit will still be hot.
4. To protect against electric shock, do not place cord, plug or appliance in water or other liquid.
5. Close supervision is necessary when any appliance is used by or near children.
6. Unplug from outlet when not in use and before cleaning. Allow cooling before putting on or taking off parts and before cleaning appliances.
7. Avoid contacting moving parts.
8. Do not operate any appliance with a damaged cord or plug or if the appliance malfunctions or has been damaged in any manner. Return appliance for examination, repair, or adjustment.
9. The use of accessory attachments not recommended by the manufacturer may result in fire, electrical shock or personal injury.
10. Do not use outdoors.
11. Do not let cord hand over the edge of the table, counter, surface areas, or touch hot surfaces.
12. Do not place an appliance on or near a hot gas or electrical burner, or in a heated oven.
13. Do not use the appliance for other than intended use.
14. To disconnect, turn any control to OFF, then remove the plug from the wall outlet. Never pull on the cord.
15. Extreme caution must be used when moving appliances during operation.
Air Fryer Recipe Links and Tips
Air fryers are taking the country by storm because their high-heat engines are good for cooking so many kinds of foods, many of which you'd never even consider frying in the first place.
Essentially a small convection oven, an air fryer works by circulating hot air up to 400 degrees around your food, transforming it into crispy perfection without all the oil or butter you'd normally need.
So, what can you make in an air fryer? The possibilities are limitless and you can use an air fryer to make comfort food favorites that are normally deep-fried, sauteed, baked, or grilled. Whether you've craving onion rings, French toast, or cheesy loaded potatoes.
If you haven't purchased an air fryer yet, the first decision to make is arguably the most important: size. They're often measured in quarts, the smallest being around 2.75; the largest, about 6.
Everything you need to know about air frying so that you can feel comfortable and confident making all kinds of foods using the newest kitchen appliance in your kitchen.
Below are delicious air fryer recipes to show you how to make the most of this amazingly versatile kitchen tool.
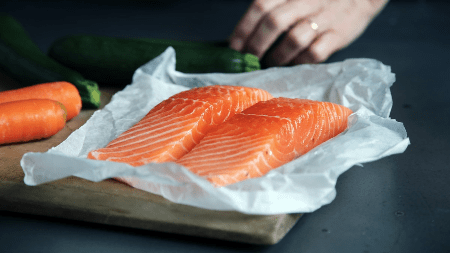
Instant Pot Salmon with Garlic Potatoes and Greens — Making a perfect salmon filet can be difficult. Cook it for too long, and it becomes chewy and rubbery. Cook it for not long enough, and there are portions that are still raw. With this recipe, you’ll get a wonderfully cooked fish every time.
Pressure Cooker Vietnamese Caramel Salmon — The only thing better than salmon filet is salmon with a Vietnamese cuisine twist. This recipe packs in distinct Asian flavors that are sure to wow any dinner crowd.
Instant Pot Fish Stew — Sometimes, there’s nothing better than stew on a cold evening. This savory fish stew is the perfect dish to help you warm up while packing in tons of nutrients
An air fryer is a great option for anyone who craves the crispness of french fries, chicken nuggets, and melted crisped mozzarella sticks but wants to avoid the guilt and calories from the extra oil and fat the deep fryer or seems to sadly miss the mark when baked in the oven.
If you want to use olive oil in your air fryer, avoid extra-virgin varieties, which have smoke points between 350⁰ and 410⁰F, and go with regular (or light-tasting) varieties that have smoke points between 390⁰ and 470⁰F.
To make sure your items are cooking evenly, give the basket a few shakes during cooking. You can keep the air fryer running and just remove the basket without any problems. This is especially useful for small items that you want to crisp all over, like fries or small roasted veggies. A few shakes should be enough, and it'll help ensure everything turns out crisp and consistent.
For super-messy items like wings coated in a sticky sauce, you can place them on a sheet of tinfoil or parchment paper on top of the air fryer basket to make cleanup easier. The force of the hot air circulating can cause the sheets to fly around, so just make sure the food is heavy enough to weigh it down.

Pressure Cooker New York Cheesecake — Think making a cheesecake is difficult? Think again. This Instant Pot creation provides a set-it-and-forget-it recipe that will let you enjoy creamy cheesecake without doing much work at all.
Instant Pot Chocolate Lava Cake — The chocoholic in you will love this runny lava cake that’s filled with chocolate, chocolate, and more chocolate. Oh, and it’s all cooked in an Instant Pot, so you’ll barely have any post-baking clean-up to do.
Instant Pot Cupcakes — Got a kid’s birthday party coming up? Planning to contribute something at your community bake sale? Make these delicious cupcakes without turning on the oven once.
Compared to oil-fried foods, cooking in an air fryer is definitely going to come out healthier than deep-fried foods.
But limiting air fryers to just cooking the usual oil-fried foods is a missed opportunity for cooking foods quick, easy, and healthfully.
Cooking foods like broiled or baked fish, chicken, vegetables, and even cakes and muffins can all be done in the air fryer too.
Items that render off a lot of fat (such as burgers, bacon, or meatballs) might cause your air fryer to start smoking, because of the fat that collects in the air fryer pan and heats up. If this happens, you can turn off the machine, drain the fat, and start cooking again, Or you can add water to the tray before you start cooking to prevent it from happening. The water will prevent the grease from getting too hot and smoking.
The direct comparison of deep‐frying and air‐frying technologies with different vegetable oils shows that air‐frying process presents health benefits for consumers, with less fat ingestion and less fat oxidation, particularly when using olive oil, but also economic and ecological advantages due to reduced amount of oil used and no dripping oils after frying.
If you add too many items to your air fryer basket, the air won't be able to circulate properly and your food won't get crispy. If you're making a large amount of something, cook items in batches instead of all at once. This advice is especially important for fries, diced veggies, and other small items you want to get super crispy.
Instant Pot Vegetarian Chili — There’s something really satisfying about chili, and you can enjoy the deliciousness even when you’re a vegetarian. This chili is the perfect savory meal on a cold evening or at your neighborhood chili cookout.
Instant Pot Chicken Stew with Farro — Who says stew has to have beef? Swap out the beef for chicken by following this healthy recipe. The addition of farro adds even more nutrients to this delicious dish.
Best Ever Instant Pot Beef Stew — Beef can be hard to cook on the stovetop. In this Instant Pot recipe, you’ll get tender, fall-off-the-bone beef every time. Let the Instant Pot appliance do the work for you
Our Favorite New Gadget: The Air Fryer! Have you gotten your hands on an Air Fryer yet? It's the "skinny way" to cook crispy meals in no time at all. Media Chef, Erin Woodbury, gives Chalene Johnson a tutorial on the SkinnyTaste Air Fryer. The two of them make French Fries and Crispy Chickpeas too (and discuss all the recipes we've made so far, like crunchy chicken and muffins)! Learn why we love this kitchen gadget, how it saves time and how it's possible to cook crispy dishes with little to no oil. Unlike other kitchen tools we like (but that can be a little fussy and intimidating for novices), the Air Fryer is super easy every single time. You really can't mess it up! It's also a snap to clean, which we also love, because, hey-we know you're a busy girl!
Download Recipe App

This programmable countertop multicooker earned a spot in my kitchen. If you get one you’ll probably start relying on it more than any other cooking appliance. The specific functions of your Instant Pot will vary based on which model you purchase, but these are the basic programs that will be present in most models and this is the model I purchased. Below are a few models available:
- Slow Cooker
- Pressure Cooker (most models let you cook on high or low pressure, or choose specific pressure setting like poultry or meat/stew)
- Rice Cooker
- Steamer
- Sauté/Browning
- Yogurt Maker
- Warmer
Many models also come with additional programs, including egg maker, cake maker, and sterilizer. Depending on the size and type of your model, you can insert certain types of dishes directly into the appliance, including cupcake molds or springform pans. You can also use aluminum foil to separate certain ingredients in your instant pot, which allows you to cook veggies and meats at the same time for recipes like fajitas
When using electrical appliances, basic safety precautions should always be followed, including the following:
1. READ ALL INSTRUCTIONS.
2. Do not touch hot surfaces. Use handles or knobs. Use oven mitts or potholders.
3. To protect against electric shock do not immerse cord, plugs, or appliance in water or other liquid. 4. This appliance is not intended for use by persons (including children) with reduced physical, sensory or mental capabilities, or lack of experience and knowledge unless they have been given supervision or instruction concerning use of the appliance by a person responsible for their safety. 5. Children should be supervised to ensure that they do not play with the appliance.
6. Unplug from outlet when not in use and before cleaning. Allow cooling before putting on or taking off parts, and before cleaning the appliance.
7. Do not operate any appliance with a damaged cord or plug or after the appliance malfunctions, or has been damaged in any manner. Bring it to a qualified technician for examination, repair, or electrical or mechanical adjustment.
8. The use of accessory attachments not recommended by the appliance manufacturer may cause injuries.
9. Do not use outdoors.
10. Do not let cord hang over the edge of table or counter, or touch hot surfaces.
11. Do not place on or near a hot gas or electric burner, or in a heated oven.
12. Extreme caution must be used when moving an appliance containing hot oil or other hot liquids. 13. To disconnect, turn both the timer dial and temperature dial to OFF. Then remove the plug from the wall outlet.
14. Do not use the appliance for other than intended use.
15. Make sure the frying basket is locked into the front of the drawer – both frying basket handle tabs must be fully inserted into the notches on the top of the basket drawer.
16. Always make sure frying basket drawer is fully closed, with frying basket handle locked securely in the drawer, while Air Fryer is in operation.
WARNING: Air Fryer will not operate unless the frying basket drawer is fully closed. CAUTION: After hot air frying, the frying basket and frying basket drawer and the cooked foods are hot. Extreme caution must be used when handling the hot Air Fryer basket/drawer.
FOR HOUSEHOLD USE ONLY
Recommendations
- The Best Instant Pots of 2019
- Create more healthy meals with the 11-in-1 Instant Pot Duo Crisp and Air Fryer
- What is an Instant Pot? Here’s everything you need to know
- Which Instant Pot should you buy? All of the models compared
- Instant Pot launches 10 new multi-functional space-saving cooking appliances
Dinner
We all want quick and easy dinner recipes, but we also want something delicious, easy, and inexpensive, which all family members enjoy. We have quick dinner recipes. These recipes are as I make them.
Chicken and hot potatoes
Get a precooked chicken from a delicious local grocery store and a bag of potato chips from the Frozen Foods section.
Add a pre-washed salad bag, medium yellow onion, and a jar of red bell pepper to your shopping cart.
Fry the potatoes with a little pepperoncini juice and leave them golden brown.
Remove bones from the chicken and add it to the potatoes.
Cook it for about 10 minutes and serve directly from the pan. Take the salad bag, cut the corner, and add the salad sauce.
Shake the bag and have an instant shot salad.
Meatloaf
Preheat oven to 450 ° F.
Meanwhile, mix two teaspoons of Worcestershire sauce, one teaspoon of salt, one large egg, and one-third of a cup of tomato sauce in a large bowl, and mix to obtain a smooth, creamy texture.
Now add lean ground beef with ½ cup dry breadcrumbs and 1/3 cup green onion to the mix and mix well with four 4 x 2-inch loaves.
Decorate the top of the bread with two teaspoons of tomato sauce and bake for half an hour. Serve hot with fries or accompany your choice.
Worcestershire Sourdough Burgers
Take a can of minced meat, cheddar cheese, sliced sourdough bread, and yellow onions.
Add a bag of frozen fries and a bottle of Worcestershire sauce to your list. Fry some burgers with the addition of researcher sauce after turning the burgers for the first time. Put the frozen potatoes in a saucepan with a little vegetable oil.
While cooking the pancakes, put the sourdough bread into a toaster.
Put a slice of cheese on the pancakes, spread the sourdough with butter, and add the potatoes to your plate. Decorate your burger with tomato sauce, mustard, and mayonnaise. Quick and easy!
When it comes to dinner there are some great recipes that a person can try. They are easy to make and will feed the family.
Mexican Baked Fish
Ingredients:
1 ½ pound cod or similar fish
1 cup of salsa
½ cup crushed tortilla chips
1 sliced avocado
¼ cup sour cream
Preheat the oven to 400 degrees so it will be warm.
Grease a baking sheet and put the fish on it. Top the fish with salsa and cheese. Top with the tortilla chips. Bake for 15 minutes. Serve with the avocado and sour cream.
Tip: Lining the baking sheet with aluminum foil can make it easier to clean up
Garlic Chicken
This recipe is easy and tasty. The following ingredients are needed:
1 ½ lb chicken breasts, cut in half
¼ cup butter
6 cloves garlic, crushed
2 cup bread crumbs
Heat the oven to 350 degrees.
In a saucepan over medium heat melt the butter. Add the garlic. Drip the chicken into this mixture and then coat in bread crumbs.
Put the chicken in a baking pan and top with remaining sauce. Bake 45 minutes to 1 hour or until the chicken is no longer pink.
Tip: The bread crumbs can be seasoned or some parmesan cheese can be added for more flavor.
Thai Turkey Burgers
This recipe is filled with flavor and easy to make.
1 egg, beaten
2 tbs. soy sauce
1/3 cup cilantro, minced
2 green onions, sliced
1 ½ tbs ginger, minced
2 cloves garlic, minced
Salt
Pepper
1 lb ground turkey
1/3 cup bread crumb
Mix the egg and the soy sauce. Add the cilantro, green onion, ginger, and garlic. Season with salt and pepper. Add the turkey and the bread crumbs. Shape into four patties.
In a skillet over medium heat put the patties down. Cover. Cook 15 minutes or until they are no longer pink.
Tip: This recipe can also be made with gluten-free products. Ground beef or ground chicken can also be used in place of the turkey.

Butter Chicken
This recipe is tasty and easy to make.
2 eggs, beaten
1 cup crushed buttery crackers
½ tsp garlic powder
Black pepper
4 chicken breasts, cut in half
½ cup butter
Heat the oven to 375 degrees. Put the egg in one bowl and the crackers in another bowl. Add the garlic and pepper to the crackers. Drip the chicken in the egg mixture and then in the cracker crumbs. Put the chicken in a baking dish. Put butter around the chicken. Bake for 40 minutes or until the chicken is no longer pink.
Tip: This can also be done with pork chops only the cooking time may need to be adjusted.
These are some easy and tasty recipes. They will make the family happy and satisfied at dinnertime.
Beef Skillet Pie
Preheat oven to 400 ° F.
Meanwhile, cook one pound of ground beef in a saucepan until golden brown over medium heat. Pour 15.25 ounces of dried corn granules and 21 ounces of ranch beans into the skillet.
Stir ingredients well and let cook for 2 minutes.
Now serve a set of cornbread mix in the beef broth and add it with a pinch of ½ cup pepper jack cheese. Bake the mixture in the oven for 15 minutes, then remove it when a wooden stick comes out on the cake.
Salt and Pepper Pasta
1 package pasta
Salt to taste
Pepper to Taste
1/2 cup butter
This creamy recipe is great for a kid that has an upset stomach. Boil the pasta according to instructions. Then drain and add in the rest of the ingredients. The secret to this dish is using real butter.
Below are some easy to make meals that I make often. I think you will enjoy them too.

Beef and Broccoli (Asian)
Ingredients
- Chinese-beef-with-broccoli-recip2 tablespoons cornstarch
- 4 tablespoons soy sauce
- 2 teaspoons sugar
- 5 tablespoons peanut oil
- 1 pound flank steak, thinly sliced against the grain
- 1 tablespoon oyster sauce
- 1 1/4 cups low-sodium chicken broth
- 4 thin slices peeled ginger
- 1 head broccoli, cut into florets
- 1 large onion, halved and sliced 1/2 inch thick
- 3 plum tomatoes, quartered lengthwise
- 2 cloves garlic, minced
- Cooked white rice, for serving (optional)e
Description
- Whisk 1 tablespoon cornstarch, 3 tablespoons soy sauce, 1 teaspoon sugar, and 1 tablespoon peanut oil in a large bowl. Add the steak and toss to coat; refrigerate until ready to cook.
- Whisk the remaining 1 tablespoon each cornstarch and soy sauce, the oyster sauce and chicken broth in a small bowl; set aside.
- Heat 1 tablespoon peanut oil in a large skillet over high heat. Add the ginger, broccoli, and the remaining 1 teaspoon sugar and stir-fry 3 to 4 minutes; transfer to a plate. Heat 1 more tablespoon peanut oil in the skillet, add the onion, and stir-fry 2 to 3 minutes. Add the tomatoes and cook, turning gently, 2 minutes. Transfer the onion and tomatoes to the plate with the broccoli.
- Reduce the heat to medium-high; add the remaining 2 tablespoons peanut oil to the skillet. Add the garlic and steak and stir-fry 1 minute. Whisk the sauce mixture, then add to the skillet and simmer 1 minute. Return the vegetables to the skillet; cook until the meat is cooked through, 3 to 4 minutes. Serve with rice, if desired.
24 Dorm-Friendly Microwave Meals
Mexican Beef Casserole
Ingredients
- 1 lb. (450 g) extra-lean ground beef
- 1-1/2 cups Cracker Barrel Shredded Creamy Mexicana Cheese, divided
- 1 pkg. (35 g) 30%-less-sodium taco seasoning mix
- 1 cup long-grain white rice, uncooked
- 1 cup frozen mixed vegetables (carrots, corn, peas)
- 1-3/4 cups undrained canned no-salt-added diced tomatoes
- 1 cup of salsa
- 1 cup 25%-less-sodium chicken broth
Description
- Heat oven to 375 degrees F.
- Brown meat in a large nonstick skillet. Reserve 1 cup cheese. Add remaining cheese and all remaining ingredients to meat in skillet; mix well.
- Spoon into a 13x9-inch baking dish sprayed with cooking spray; cover.
- Bake 40 to 50 min. or until rice is tender. Top with reserved cheese; bake, uncovered, 5 min. or until melted.

Greek Taco
Ingredients
- 1 tablespoon olive oil
- 2 pounds ground lamb
- Kosher salt and freshly ground black pepper
- 1/2 red onion, minced
- 1 teaspoon dried oregano
- 4 cloves garlic, minced
- 1 tablespoon tomato paste
- 2 tablespoons dry red wine Feta Mint Tzatziki:
- 1 English cucumber
- Salt
- 1 cup whole-milk Greek yogurt
- 1/2 cup crumbled feta cheese
- 1 clove garlic, minced or pressed
- 2 tablespoons minced fresh mint Cucumber Tomato Relish:
- 1 tablespoon extra-virgin olive oil
- 1 tablespoon red wine vinegar
- 2 firm tomatoes, seeded and diced
- 1 English cucumber, seeded and diced
- 1/2 red onion, diced
- Freshly ground black pepper
Description
- For the lamb: In a large skillet, heat the oil over medium-high heat. Add the lamb, sprinkle with salt and pepper, and cook until the meat gets nice and golden brown, 10 to 12 minutes. With a slotted spoon, remove the lamb and reserve. Lower the heat to medium and saute the onions in the lamb juices until soft, about 5 minutes. Add the oregano and garlic and cook until fragrant. Season. Add the tomato paste and cook until it caramelizes. Deglaze with the red wine and scrape any bits up that have adhered to the pan. Add the lamb back in, stir, and set aside.
- For the tzatziki: Grate the cucumber on the large holes of a box grater and place in a fine-meshed strainer or cheesecloth fitted over a bowl. Salt the cucumber and let sit 10 minutes. Then squeeze out any excess moisture. Add the strained cucumber into a bowl with the yogurt, feta, garlic, and mint. Adjust the seasoning if necessary.
- For the cucumber tomato relish: Toss the olive oil, vinegar, tomatoes, cucumbers, and onions in a bowl and adjust the seasoning if necessary. Cover and let sit at least 1 hour to marry the flavors.
- For the sandwich build: Schmear the tzatziki on the pitas, then place on the lamb and top with cucumber tomato relish.
One-Pot Chicken and Vegetables
Ingredients
- 2 tbsp clarified butter or olive oil
- 1 tbsp Celtic seas salt
- 1 tsp fresh cracked pepper
- 1 lb boneless skinless chicken breasts, sliced in half to make 2" thick across
- 8 oz cremini mushrooms, cleaned, stems removed, and sliced thin
- 1 cup cherry tomatoes
- 1 crown broccoli, trimmed and cut into small bites
- 2 tbsp Italian seasoning blend
- 2 tbsp white wine or stock
Description
- In a large pan, add butter or oil and heat on medium-high until shimmery.
- Generously season chicken with salt and pepper.
- Add chicken to pan, and cook to a golden brown, turning often to prevent burning (about 6 minutes).
- Add vegetables to the pan, stir.
- Cook vegetable and chicken on medium-high until chicken is golden brown and cooked to 150 degrees internal temperature and vegetables are soft and browned.
- Season with Italian spices, mix well to coat.
- Add wine or chicken stock to the pan and let fully reduce about 4 minutes. The chicken will be 165 internal temperature when done.
- Remove from heat and serve with salad, pasta, rice, or any other side dish you love!
French Cuisine Recipes By Gordon Ramsay - Medeliene & Tuna salad
During this Cooking Video, You will see the startup point for Ramsay's success where he started. French recipes are always the best, there are even the rumors that delicious eating was founded in France's kitchens. Anyways, during this videos thing that you will be learning are :
1. French madeleine Recipes By Gordon Ramsay 01:06 .
2. Amazing Tuna salad Recipe By Gordon Ramsay 08:49 .
Mushrooms
They are a member of the fungus family and have been used in recipes since the early Roman and Greek times.
Mushrooms are very low in fat, packed with nutrients, and delicious too. It takes just a bit of understanding as to how to get the most out of them.
Follow these tips for cooking with mushrooms to ensure that every meal in which you use them as an ingredient will turn out perfectly.
Mushrooms are very sensitive to light and temperature, so they are normally found growing on a decaying matter near trees and other plants.

It is hard to believe that a fungus can actually taste so good! There are many varieties of mushrooms, but whether you choose the plain white button type, ora spongy shitake mushroom common to Asian cooking, the preparation is similar.
Checking them is not always easy since mushrooms are often sold wrapped with cling wrap.
If packaged, look for signs of slime, mold, or shriveling which indicates age.
Choose firm, evenly colored mushrooms, and this is easier if you select them personally.
Most mushrooms do not require cleaning but do look for dirt or grit. Nothing is worse than biting into a stuffed mushroom that has a bit of grit in it! Just wiping with a damp cloth is normally all that you will need to do.
Although the nutritional info varies according to the type chosen, a half cup of raw mushrooms has a mere 9 calories, about 0.4 gram of fiber, 0.7 gram of protein and only 0.1 gram of fat
If you are a person who likes mushrooms I have added some really awesome recipes here. Please enjoy them.
Cream of Mushroom Soup
Stuffed Mushrooms with Sausage
Ingredients
- 24 medium mushrooms
- 2 tablespoons butter, melted
- 1/4 pound bulk pork sausage
- 1 cup Pace Picante Sauce
- 1/2 cup dry bread crumbs
- 3 tablespoons chopped fresh cilantro leaves or fresh parsley
Description
- Heat the oven to 425 degrees F. Remove the stems from the mushrooms. Chop enough stems to make 1 cup. Brush the mushroom caps with the butter and place top-side down in a shallow baking pan.
- Cook the sausage and the chopped mushroom stems in a 10-inch skillet over medium-high heat until the sausage is well browned, stirring often to break up the meat. Pour off any fat.
- Add 1/2 cup Picante sauce and the bread crumbs to the skillet and mix lightly. Spoon about 1 tablespoon sausage mixture into each mushroom cap.
- Bake for 10 minutes or until the mushrooms are hot. Top each with 1 teaspoon Picante sauce and sprinkle with the cilantro.
- Serve immediately with steamed rice.
Simple Sautéed Mushrooms
Mushroom Appetizers
Ingredients
- 1/2 of a 17.3-ounce package Puff Pastry Sheets (1 sheet), thawed
- 2 tablespoons butter
- 8 ounces portobello mushroom, cut into 1/2-inch slices
- 1 small zucchini, thinly sliced crosswise or 1/2 cup sliced drained roasted peppers
- 3 tablespoons chopped fresh basil leaves
- 9 slices deli mozzarella cheese, cut in half and rolled up
Description
- While the pastry is thawing, heat the oven to 400 degrees.
- Unfold the pastry sheet on a lightly floured surface. Cut the pastry sheet into 3 strips along the fold marks. Cut each strip into 6 rectangles, making 18 in all. Place the pastry rectangles onto a baking sheet.
- Bake for 15 minutes or until the pastries are golden brown. Remove the pastries from the baking sheet and let cool on a wire rack for 10 minutes. Split the pastries into 2 layers, making 36 in all.
- Heat the butter in a 10-inch skillet over medium heat. Add the mushrooms and zucchini and cook until tender and the liquid is evaporated. Season to taste. Stir in the basil.
- Place 18 bottom pastry layers onto a baking sheet. Divide the mushroom-zucchini mixture among the bottom pastry layers. Top with the cheese and top pastry layers. Bake for 5 minutes or until cheese is melted.
 Vegan Southern-Style Collard Greens With MushroomsIngredients
- 1/4 cup plus 3 tablespoons (105ml) extra-virgin olive oil, divided
- 1 pound (450g) cremini mushrooms, stems trimmed and caps sliced
- 2 quarts (1.9L) Hearty Vegetable Stock, rehydrated dried mushrooms reserved
- 1 medium yellow onion (about 8 ounces; 225g), sliced into 2-inch lengths
- 1 teaspoon (4g) smoked paprika
- 3 pounds (1.3kg) collard greens, woody stems trimmed and leaves cut into thick ribbons
- Kosher salt and freshly ground black pepper
- Apple cider vinegar, to taste (optional)
Directions
-
In a large, heavy-bottomed pot or Dutch oven, heat 3 tablespoons (45ml) oil over medium-high heat until shimmering. Add cremini mushrooms and reserved re-hydrated mushrooms (from stock) and cook, stirring, until lightly browned about 8 minutes. Add onion and cook, scraping up any browned bits, until softened, about 3 minutes; lower heat if necessary to prevent scorching.
-
Stir in smoked paprika followed by the stock. Bring to a simmer, then add collard greens, pushing down to submerge. Return to a simmer and cook, uncovered, until greens are very tender, about 30 minutes. Season with salt and pepper and add remaining 1/4 cup (60ml) olive oil.
-
Add vinegar to taste, if desired, then serve. (You can add vinegar to the pot, or let individual diners season their greens with it at the table.)
Garlic Mushrooms
RELATED SEARCH ONLINE
- What Are Some Good Mushroom Recipes?
- What Are Mushrooms Used For
- Best Mushroom Recipes
- What Mushrooms Are Edible
- Are Mushrooms Good For You
- Some Good Recipes For Dinner
- What Are Mushrooms Drugs
- Recipes Using Mushrooms
Salads
I really enjoy eating salads of all types so below I have found a few awesome recipes that are pretty easy to make.
Healthy Salad Recipes For Weight Loss
Ranch Potato Salad
This potato salad recipe is yummy. Loaded with eggs, peppers, and a couple of zesty add-ins.
Ingredients
4 pounds red-skinned potatoes, washed
6 hard-cooked eggs, chopped
1 red bell pepper, minced
4 celery stalks, diced
2 cups mayonnaise
1-1/2 teaspoons chili powder
1 teaspoon salt
1/2 teaspoon black pepper
1 (4-ounce) can be chopped up green chilies, drained
Directions
1. Place potatoes in a large pot and add enough water to completely cover them. Bring to a boil over high heat and cook 25 to 30 minutes, or until potatoes are fork-tender. Drain and let cool.
2. Cut potatoes into 1-inch chunks and place in a large bowl; add remaining ingredients and mix gently until potatoes are completely coated.
3. Serve warm, or cover and chill until ready to serve.
 Basic Macaroni Salad
Basic Macaroni Salad is a picnic staple. This macaroni salad has the same classic taste you love and remember growing up with.
Ingredients
1 pound elbow macaroni
5 hard-cooked eggs, chopped
1 cup chopped celery
1/2 cup finely chopped red onion
2 cups mayonnaise
1/2 teaspoon garlic powder
1 teaspoon salt
3/4 teaspoon black pepper
Directions
1. In a large pot of boiling water, cook macaroni over high heat 7 to 9 minutes, or just until tender. Drain, rinse and let cool.
2. Place macaroni in a large bowl, add remaining ingredients and mix well. Cover and refrigerate at least 1 hour before serving.
All-in-One Chicken Potato Salad
It’s a great fill-ya-up type of potato salad that the whole family will enjoy!
Ingredients
6 potatoes, peeled and cut into 1-inch chunks
1 (10-ounce) package refrigerated cooked, sliced chicken breast (see Tip)
6 fresh asparagus spears, cut into 1-inch pieces
4 radishes, thinly sliced
1 cup ranch dressing
1 teaspoon salt
1⁄2 teaspoon black pepper
Directions
1. In a large soup pot, cover potatoes with water and bring to a boil over high heat. Cook potatoes for 15 to 20 minutes, or until tender; drain well.
2. Place the potatoes in a large bowl and add the chicken, asparagus, radishes, dressing, salt, and pepper; toss well. Serve warm, or cover and chill until ready to serve.
 Gazpacho Pasta Salad
Fresh cucumber, tomatoes, and herbs add color and flavor to our Gazpacho Pasta Salad.
Ingredients
1/2 pound elbow macaroni or any medium pasta shape
4 ripe tomatoes seeded and chopped
1/2 cup sliced scallion
1/2 cup cucumber, peeled, seeded, and chopped
1/4 cup grated Parmesan cheese
Dash of hot pepper sauce
1 garlic clove, minced
2 tablespoons chopped parsley
1/2 cup vegetable oil
1 tablespoon wine vinegar
1 teaspoon salt
1/2 teaspoon black pepper
Cayenne pepper to taste
1 can (6 ounces) spicy vegetable juice
Directions
1. In a large pot of boiling salted water, cook the pasta to the desired doneness; drain and place in a large bowl.
2. Add the remaining ingredients and combine until thoroughly mixed.
3. Cover and chill at least 1 hour, then mix again before serving.
 Pasta Fruit Salad
It's not only simple to make but healthy too!
Ingredients
1/2 pound corkscrew pasta
1 cup cantaloupe or honeydew cubes
1/4 cup honey
1 (8-ounce) carton low-fat peach yogurt
1/4 cup sour cream
1 cup fresh strawberries, hulled and halved
1 (8-ounce) can pineapple chunks, drained with 2 tablespoons juice reserved
1 cup seedless green or red grapes, cut in half
Directions
1. Cook pasta according to package directions; drain and place in a large bowl. Add pineapple, melon, and grapes.
2. Combine reserved pineapple juice, the honey, yogurt, and sour cream; toss with pasta mixture. Top with strawberries, and serve.
Satisfying Salads That Don't Suck
Chickpea Spinach Salad
390 calories (1 serving)
Ingredients
4 oz chicken breast
1 tsp olive oil
1tsp paprika
1/4 tsp cumin
1/4 tsp oregano
2 oz spinach
3 oz chickpeas
6 grape tomatoes
1 tbsp white vinegar
1/2 tbsp mustard
salt and black pepper
Directions
Preheat the oven to 350°F (180°C)
Drizzle the breast with olive oil and season both sides with cumin, oregano, paprika, salt, and bake in the center of the oven for 20-25 minutes until cooked through.
Combine spinach, chickpeas, grape tomatoes, in a large bowl. in a small bowl stir together mustard, white vinegar, salt, and black pepper and add to the spinach, toss gently to coat.
Arrange spinach mixture on a plate top with chicken slices.
Stuffed Peppers
I really enjoy stuffed peppers and have selected a few recipes of my favorite types! Stuffed Peppers are Colorful with nutritious bell peppers and are loaded with seasoned ground beef, hearty rice, and mildly sweet tomatoes. They're delicious, easy to make, and extremely flexible because you can make the filling with whatever ingredients or leftovers you have available. Stuffed peppers also cover all your bases for a healthy and complete meal. You get your vegetable intake from the bell peppers, starch from the white rice or brown rice, protein from the ground beef or other meat, dairy from the cheese, and fiber if you're adding beans.
Please enjoy the recipes I have added to this blog.
Mexican-Style Stuffed Peppers
Ingredients:
- 1 tablespoon olive oil
- 1/2 cup chopped onion
- 2 cups cooked Spanish-style rice (usually sold in packets)
- 15-ounce can black beans, drained and rinsed
- 14-1/2-ounce can chili-style diced tomatoes
- 1 teaspoon chili powder
- 1 teaspoon garlic salt
- 1 / 2 teaspoon ground cumin
- 1/2 teaspoon salt or more as desired
- 4 large red or yellow bell peppers, tops, seeds and membranes removed
- 10 ounces shredded Mexican cheese blend
Directions:
- Heat oven to 350 degrees.
- Heat olive oil in a skillet over medium heat; cook and stir onion in the hot oil until softened, 5 to 10 minutes.
- In a large bowl, mix rice, black beans, tomatoes, and cooked onion. Add chili powder, garlic salt, cumin, and salt; stir until well combined.
- Fold half of the Mexican cheese into rice mixture. Stand peppers up in large muffin tins and fill each with the rice mixture.
- Sprinkle peppers with remaining Mexican cheese.
- Bake until cheese is melted and bubbling about 30 minutes.
Stuffed Peppers Ingredients
- 2/3 cup long-grain white rice
- Salt and freshly ground black pepper
- 6 bell peppers, any color (medium-large size)
- 1 Tbsp olive oil
- 1 1/4 lbs lean ground beef
- 1 small yellow onion, finely chopped (1 cup)
- 3 garlic cloves, minced (1 Tbsp)
- 1 (14.5 oz) can petite diced tomatoes, drained
- 1 (8 oz) can tomato sauce
- 3 Tbsp minced fresh parsley, plus more for garnish
- 2 tsp Italian seasoning
- 1 cup shredded mozzarella cheese
Instructions
-
Preheat oven to 400 degrees. Cook rice according to package instructions.
-
Meanwhile, trim about 1/4-inch from tops of bell peppers and then remove stems, ribs, and seeds. Fill a baking dish large enough to fit peppers with about 1/2-inch of water.
-
Place peppers upside down in the water, cover with foil and bake 20 minutes.
-
Meanwhile, heat olive oil in a large non-stick skillet over medium-high heat. Add onion and saute 3 - 4 minutes. Move onions to one far side of the skillet. Add beef in chunks, season with salt and pepper then let sear until browned on the bottom, about 3 minutes.
-
Break up beef and toss with onions and continue to cook 2 minutes, add garlic and cook until beef is cooked through, about 1 minute longer. Remove from heat, drain off excess fat.
-
Stir in tomatoes, half of the tomato sauce (about 1/2 cup), cooked rice, parsley, Italian seasoning and season with salt and pepper to taste.
-
Reduce oven temperature to 350. Turn peppers upright, sprinkle inside peppers lightly with salt and fill with beef filling. Pour remaining tomato sauce over peppers. Cover with foil and continue to bake 20 minutes.
-
Remove from oven, sprinkle with cheese, return to oven and bake until peppers have reached desired tenderness, about 10 - 20 minutes longer. Sprinkle with parsley and serve warm.
Bell peppers have countless varieties depending on the way the peppers are cut, the way it is cooked, and, most importantly the ingredients. From regional variations to vegetarian options, peppers can be stuffed with any combination of meat, beans, starches, and sauces, which makes them perfect for using up any leftovers sitting in the fridge as well.

There are two ways you can slice you bell peppers:
- Some folks like to keep them whole with only the top cut off and the seeds removed. Helpful tip: use a paring knife, which is smaller to carefully remove all of the seeds.
- If you want to change it up a bit, try slicing your bell peppers in half. This cuts down the baking time and makes it easier to fill each bell pepper.
STUFFED PEPPERS: 8 Large Bell Peppers (Multi-Colored) 1 cup Onion - chopped 2-3 cloves Garlic – chopped/minced ½ cup Fresh Parsley – chopped ¼ cup Fresh Basil – chopped 1 cup Peeled Tomato (in Stuffing Mixture) 1 lb Ground Beef 2 cups Partially Cooked Arborio Rice (or your favorite type of rice) 1 cup grated Pecorino Romano Cheese 8 oz. Whole Milk Mozzarella – shredded 16 oz. Peeled Tomato (in a baking dish - approx.) 1 tsp Oregano Olive Oil Salt and Pepper to taste
Looking for an easy, family-favorite dinner idea? Classic stuffed peppers to the rescue! Ok so my boys just eat the filling out but the hubs and I love these! It’s a VERY basic stuffed peppers recipe that you can truly customize to your liking. I like to use this dish to get rid of leftover veggies and meats because just about anything tastes good smothered in cheese! These classic stuffed peppers are full of savory rice, sausage and lots of cheese. Pair with a basket of garlic french bread and dinner is ready!

If you're not slicing your bell peppers in half and using them whole, you can also use the tops of peppers as a lid. This adds to the presentation of the stuffed peppers and you can also eat the lids, minus the stem.
Chicken Stuffed PeppersIngredients
- 3/4 cup dry brown rice (2 cups cooked)
- 5 medium red, yellow, orange or green bell peppers
- 1 medium yellow onion, chopped (1 1/2 cups)
- 2 cloves garlic, minced
- 2 Tbsp canola oil, divided
- 1 lb chicken, diced into 3/4-inch pieces
- 1 tsp chili powder
- 1 tsp ground cumin
- 1/4 tsp paprika
- Salt and freshly ground black pepper
- 1 (10 oz) can tomatoes with green chiles
- 1 cup canned black beans, drained and rinsed
- 1 cup of frozen corn
- 3 Tbsp fresh cilantro, plus more for garnish
- 1 Tbsp fresh lime juice
- 2/3 cup shredded Monterey jack cheese
- Sour cream
- Mexican style hot sauce (such as Tapatio or Cholula, optional)
Instructions
-
Prepare brown rice according to directions listed on the package. Halfway through brown rice cooking, preheat oven to 375 degrees and begin making the filling and boiling peppers.
-
Bring a large pot of water to a boil. Cut peppers in half through length (top to bottom), seed and devein peppers, then boil 4 - 5 minutes (fully immersing them in the water), just until tender. Drain well and align in baking pans, set aside.
-
Heat 1 Tbsp oil in a large and deep skillet over medium-high heat. Add onions and saute until golden about 5 minutes, then add garlic and saute 30 seconds longer, transfer onion mixture to a plate.
-
Add remaining 1 Tbsp oil skillet, and add chicken, sprinkle with 1/2 tsp chili powder, 1/2 tsp cumin, the paprika, and season with salt and pepper.
-
Cook, stirring occasionally until cooked through, about 5 minutes. Reduce heat to medium-low, add tomatoes, onion mixture, black beans, corn, cooked brown rice, remaining 1/2 tsp chili powder, 1/2 tsp cumin, cilantro, lime juice and season with salt and pepper to taste. Cook just until heated through.
-
Add a heaping 1/2 cup of the mixture to each pepper half (and slightly press as filling to fit). Pour enough water into the bottom of baking dishes to reach 1/8-inch in height (careful not to pour it in peppers).
-
Cover baking dishes with foil and bake 30 - 35 minutes, until peppers are soft. Remove from oven, sprinkle tops evenly with cheese then return to oven to bake until cheese has melted, about 3 minutes longer.
-
Serve warm topped with more cilantro, sour cream, and hot sauce if desired.

While I'm making the filling, like to pre-cook my bell peppers in a baking dish with a little water, broth or tomato sauce on the bottom of the pan in a preheated oven.
Another way to pre-cook your bell peppers is by placing them directly over the flame. This is done on medium-high heat on the grill or stovetop, just keep an eye on them.
A little short cut to cut down the prep time use a good quality chunky salsa, it has spices, peppers, onions, tomatoes with tomato sauce.
Hold the rice because this is not your mama's same ol', boring Stuffed Pepper recipe. These moist and tender, meat stuffed bell peppers make for some good eating at the Pit. And this recipe is easy to do. Print the recipe at https://bbqpitboys.com/stuffed-peppers/ YouTube's #1 Cooking Show for Barbecue and Grilling. #BBQPITBOYS #BBQ #RECIPES Are you looking for barbecue and grilling recipes to serve up at your Pit, family picnic, or tailgating party? Then put your Barbecue Shoes on because we're serving up some delicious, moist and tender, and real easy to do cooking on the ol' BBQ grill
Desserts
Chocolate Mousse Cheesecake
Ingredients
for 8 servings
Crust
20 chocolate sandwich cookie 1⁄4 cup brown sugar
7 tablespoons butter, melted
Cheesecake
32 oz cream cheese, softened 4 oz semi-sweet chocolate chips
1 tablespoon cocoa powder
1 1⁄2 cup sugar
2 teaspoons vanilla extract 4 egg
1 1⁄2 cup heavy cream
1⁄4 cup powdered sugar
Chocolate Ganache
16 oz chocolate chips
2 cups heavy cream, hot
Preparation
1. Place cookies in a plastic bag and crush them into a fine crumb using a rolling pin. Alternatively, a food processor can be used to crush the cookies.
2. Pour the cookie crumbs into a medium bowl with the melted butter and brown sugar. Mix until the crumbs take on the character of coarse, wet sand.
3. Pour the crumbs into a 9- inch (23 cm) spring pan. Press the crumb firmly into the pan, making sure to coat the bottom evenly.
4. Once the crust has been formed, place it in the refrigerator to firm up.
5. Add cream cheese, melted chocolate, cocoa powder, and sugar to a large bowl and whisk, either by hand or with an electric mixer, until all the ingredients are incorporated. 6. NOTE: If mixing by hand, it is recommended to microwave the cream cheese slightly before whisking in order to soften it up.
7. Add vanilla extract and eggs, and continue to whisk until the mixture is smooth and glossy.
8. In a separate bowl, combine heavy cream and powdered sugar. Whisk until the cream develops a mousse-y texture and soft peaks form.
9. Adding a small amount at a time, carefully fold in the whipped cream into the cream cheese batter, being careful not to let the air out of the fluffy mixture. Fold just until incorporated.
10. Once combined, pour the batter over the prepared cookie crust inside the springform pan. Use a spatula to smooth out the top. Give the pan a slight jiggle to release any large air bubbles that may be trapped in the batter.
11. Preheat oven to 300 ̊F (150 ̊C).
12. Place the filled pan on top of a sheet of aluminum foil and fold the foil up the sides on the outside of the pan. Then place the wrapped pan into a larger baking pan or dish lined with 2 paper towels at the bottom.
13. NOTE: The aluminum foil will keep water from seeping into the bottom of the pan and the paper towels ensure that the heat is distributed evenly along the bottom of the pan. 14. Fill the larger pan with about 1 inch (2 1⁄2 cm) of hot water.
15. Bake at 300 ̊F (150 ̊C) for 60-70 minutes--checking every 15-20 minutes to add more hot water to the larger dish, as necessary.
16. Once out of the oven, immediately run a small sharp knife around the outside of the cheesecake to release it from the pan. Allow the cheesecake to cool completely before removing it from the pan.
17. Prepare the ganache by combining chocolate chips with hot cream. Stir until chocolate is completely melted and ganache is smooth and glossy. 18. Pour ganache evenly over the cooled cheesecake.
19. Refrigerate the ganache covered cake for 30 minutes before cutting and serving.
20. Enjoy!

Vegan Honeycomb Toffee
Ingredients
for 5 servings
2 cups of sugar
1⁄2 cup light corn syrup
1⁄3 cup water
1 tablespoon baking soda 2 cups dark chocolate
1 cup of sea salt
Special Equipment
candy thermometer
Preparation
1. Line a 9-inch (22 cm) baking tray with parchment paper and grease thoroughly.
2. Set aside a metal whisk and one tablespoon of baking soda.
3. In a large saucepan (the bigger, the better, as this will more than triple in size) over medium-high heat, combine sugar, corn syrup, and water.
4. Stir to incorporate, then leave to boil. Insert a candy thermometer and continue to heat without stirring until the mixture reaches 300 ̊F (150 ̊C).
5. Remove from heat, and working quickly, add the baking soda and quickly whisk into the sugar syrup (whisking for no more than five seconds to prevent deflating the toffee). The mixture will begin to expand. Quickly pour it into the prepared pan and leave to set. Do not move it for 1-2 hours.
6. Once the toffee has cooled and set, remove from pan. Using a blunt object, shatter the toffee into bite-size pieces.
7. Melt chocolate in a microwave-safe bowl for 75-90 seconds. Make sure to stop and stir after every 30 seconds.
8. Dip the toffee pieces in chocolate and place on a lined baking tray. Finish with a sprinkle of sea salt and place in the refrigerator to cool for 15 minutes.
9. Enjoy!

Neapolitan Brownie Bomb
Ingredients
for 12 servings
2 packages brownie mix, divided
2⁄3 cup vegetable oil, divided 2⁄3 cup water, divided
2 egg, divided
1 1⁄2 qt strawberry ice cream, softened
1 qt vanilla ice cream, softened 1⁄2 qt chocolate ice cream, softened
cocoa powder, for dusting
Preparation
1. Preheat the oven to 350oF (180oC). Line 2 baking sheets with parchment paper and line a large bowl with plastic wrap.
2. In a medium bowl, mix 1 package of the brownie mix, 1⁄3 cup (80 ml) oil, 1⁄3 cup (80 ml) water, and 1 egg until just combined. Pour the mix onto a prepared baking sheet and spread with a spatula until even. Repeat with the remaining brownie mix, oil, water, and egg. Bake for 13-15 minutes, until the brownies are fudgy, yet firm. Remove from the oven and let cool.
3. Once cool, cut 1 pan of the brownies in half lengthwise, then into 8 equal rectangles. Cut 4 of those rectangles diagonally to make a total of 8 triangles and 4 rectangles. Configure the brownie pieces in the lined bowl so that they cover the sides and the bottom. Once the inside is covered, press down firmly on all the brownies, especially the seams, to create a shell. Make sure there are no openings in the outer layer.
4. Scoop the strawberry ice cream onto the brownie shell and smooth with a spatula. Cover with plastic wrap and press a medium bowl into the ice cream so that it rises up on the sides until flush with the top of the bowl. Freeze for 3 hours, until the strawberry layer is solid.
5. Unwrap and add the vanilla ice cream. Cover with plastic wrap and press a small bowl into the ice cream so it comes up the sides and is flush with the strawberry layer. Put back in the freezer for 2 hours.
6. Meanwhile, cut a circle in the other pan of brownies the circumference of the large bowl. This will cover the ice cream layers, serving as a base when the bomb is flipped over.
7. Uncover the frozen vanilla layer and fill the well with the chocolate ice cream. Cover with the brownie circle (save brownie leftovers for later!). Press the circle into the bowl to secure it, then freeze for 1 hour.
8. Carefully remove the bomb from the freezer and flip it over onto a cutting board or serving platter. It may need to thaw a couple of minutes before it dislodges from the bowl. (Running a warm towel around the bowl will also do the trick.). Once you can lift up the bowl easily, uncover the bomb and dust with cocoa powder.
9. Enjoy!
Vegan Chocolate & Peanut Butter Fudge
Ingredients
for 25 pieces
1 cup coconut butter
1⁄2 cup maple syrup
1 1⁄2 cup peanut butter
1 teaspoon vanilla extract
4 oz dark chocolate baking bar
Preparation
1. Add coconut butter and maple syrup to a saucepan over medium heat.
2. Cook for 2-3 minutes while stirring constantly. The mixture should start out smooth then thicken into a dense paste.
3. Add peanut butter and vanilla extract to the saucepan and stir to incorporate. Continue to cook for an additional 2-4 minutes until the mixture achieves a smooth and pourable texture.
4. Remove the peanut butter mixture from the heat and allow it to cool slightly.
5. While the mixture cools, break up the baking bar of chocolate into a microwave-safe bowl and microwave it for 1 minute (stirring every 15 seconds) or until it is completely melted and smooth.
6. Prepare a 9x9-inch (23x23 cm) baking tray by spraying it with nonstick cooking spray and layering it with a piece of parchment paper.
7. Pour half of the peanut butter mixture into the baking tray and spread it out evenly.
8. Add the melted chocolate to the remaining peanut butter mixture and mix thoroughly.
9. Once incorporated, layer the chocolate mixture into the baking tray, over top of the peanut butter layer, and spread it evenly.
10. Give the tray a few shakes and taps to remove any possible air bubbles and place the tray in the freezer for 1.5-2 hours to set.
11. Turnover the baking tray to remove the fudge. Cut into small rectangular pieces before serving.
12. NOTE: Fudge should be stored in the refrigerator until ready to serve.
13. Enjoy!
Peaches ‘N’ Cream Poke 'Box' Cake
Ingredients
for 12 servings
Cake
1 box white cake batter, prepared according to package instructions
Filling
6 peach, peeled and chopped 6 tablespoons sweetened condensed milk
1 tablespoon heavy cream
Topping
2 cups whipped cream 2 peach, thinly sliced
Preparation
1. Preheat the oven to 350°F (180°C).
2. Grease a 9x13-inch (23x33cm) baking dish with nonstick spray. Pour the white cake batter into the baking dish.
3. Bake for 25 minutes, or until the center is cooked through.
4. In a medium bowl, whisk together the peaches, condensed milk, and heavy cream. Use the whisk to break up the peaches.
5. Remove cake from oven and let cool for 30 minutes or until room temperature.
6. Once the cake is cool, use the rounded end of a wooden spoon to poke 6 rows of 5 holes in the cake. Tip: Clean off the end of the wooden spoon after every other hole to prevent making cracks in the cake.
7. Pour the peach mixture over the cake and use a spatula to spread it, filling all of the holes. Some of the mixtures will stay on top of the cake. Chill in the fridge for 1 hour.
8. Remove the cake from the fridge and use a spatula to cover the cake in whipped cream. Then, arrange the peach slices on top in 5 rows of 11 slices.
9. Pairs well with Chardonnay
Breakfast
Breakfast is the first meal of the day, so you need to make sure it is outstanding. Eating a healthy breakfast is very beneficial to your body and something you must ensure at all times. Some of the benefits of a healthy breakfast include improved memory, alleviates type 2 diabetes, and helps in weight loss. But how do you prepare the perfect breakfast? If this is something you are looking to learn, then you are in luck as this article is an in-depth guide on breakfast recipes tips. By knowing this, you will be able to make yourself a healthy breakfast that will keep you energized to carry all your daily activities.
Banana Topping for Pancakes
1 package of pancake mix plus necessary ingredients to make the pancakes
Sauce
4 perfectly yellow bananas- sliced
1/2 cup butter
1/4 cup brown sugar
Topping
1 can of real whipped cream
Make the pancakes as directed. Then, put the butter in a saucepan and melt on medium heat. Then add the brown sugar.
Next, take off the heat and add in the bananas. Stir the dish until the bananas are coated and then put to the side.
Use the bananas in place of syrup for a delicious treat. Then add on your whipped cream for the piece de resistance.

Sultry Smoothies
4 scoops of collagen protein powder
2 cups of milk
1 cup of chopped strawberries
4 tablespoons of peanut butter
Crushed Ice
When it comes to smoothies, this will help to make your skin glow.
It will also give you that boost of energy that you need to get your evening winded down.
Add everything to the blender and mix. If you have a smaller blender, you might have to divide the ingredients in half and then blend.
Apples and Cheese
8 Cored Apples
8 slices of Brie Cheese
3 Tablespoons of Brown Sugar
Take the corded apples and stuff them with a slice each of cheese.
Add on the brown sugar on the top and distribute it between the apples.
Put in the oven at 325 for 20 minutes or until the apple is softened to your liking.
The key to this recipe is not to overcook.

Spicy Beef Tacos
1 package ground beef
1 packet of taco spices
1 cup grated cheese
8 taco shells
2 diced tomatoes
1/2 head of iceberg lettuce diced
1 bottle of taco sauce.
Cook the ground beef with the taco spices on medium heat in a saucepan until well cooked.
Add water instead of oil for lower fat. Assemble the tacos.
When you eat the tacos, make sure you make small bowls of taco sauce for dipping.
This will help to ensure that you get the goodness of your sauce in every morsel.
French Toast Casserole
Are you looking for a quick and easy meal to throw together in the morning? This sweet meal is great for those nights you want to make breakfast for dinner. You will already have most of the ingredients in your home. It is a great tasting meal that is incredibly cheap. If you are in a hurry and do not have the time to make a huge breakfast, French Toast Casserole is the perfect breakfast for you. You will be able to kill two birds with one stone. While the casserole is cooking, you can continue to get dressed to ensure you are not late.
Ingredients
• One pack of hot dog or hamburger buns
• 3 tablespoons of butter or margarine
• 3 to 4 eggs depending on the size
• 1 cup of milk
• 2 tablespoons of vanilla extract
• 2 teaspoons of cinnamon
• 9x9 glass pan
Directions
• Mix the eggs and milk together in a bowl.
• Add the cinnamon and vanilla extract.
• Mix everything together really well.
• Break up the entire pack of buns.
• Sporadically place little pieces of butter in the bottom of the pan.
• Pour the egg mixture over the broken pieces of buns.
• There are two ways to cook this dish that will depend on the time you have. You can cook it at 350 for about 20 minutes or so. It will look golden brown and the top will be crispy. If you do not have the time, you can cook it at 400 for about 10 to 15-minutes.
• Let the casserole sit for 5 to 10 minutes to settle and cool.
How can I make it better?
• You can cook sausage, bacon, or your favorite meat substitute in the oven on a cookie sheet. This way it will cook with your casserole.
• You could cook some fried potatoes or hashbrowns.
• Make some scrambled eggs with a little vanilla extract.
• Mix some cinnamon and butter together. Spread a thin layer over the top of the casserole while it is hot.
• Add a dash of maple extract to the egg mixture.
• Add dried cranberries, raisins, or walnuts to make it taste great.
Whether you have a large family or a small one, this dish is easy to make more. You can always add more buns and egg mixture to feed a large family. Adding more milk than 1 cup will help to stretch out the mixture if it is needed. There are so many options for this meal. It can be fun to make with the kids, too.
Crazy Omelets
8 Eggs
1/2 cup milk
Whatever is leftover in your fridge
You can customize this recipe for each member of the family. Just divide the egg and milk mixture into separate bowls. When you put in your ingredients, do it after the egg has already been spread on the pan. This will help you get a surprise inside and keep the outer shell of the omelet intact. Your kids will love this instant classic and they'll love spreading their wings with their chef skills.
At breakfast, it is crucial to eat essential nutrients that give you energy throughout the day. Delicious baking recipes will make this life simple for everyone.
Delicious bread recipes
People concerned with their health and weight can use whole wheat bread instead of white bread. This will help fill your stomach and make you feel good about your health. Today you should indeed start as a prince.
Coconut milk with bread and cheese
Coconut milk can be consumed with bread and cheese in the morning. It is healthy to include them as a healthy breakfast recipe. It is one of the simple recipes for baking breakfast. This recipe is easy to prepare and can be used in morning rituals to fill the stomach. It's also safe to make your stomach feel good and not feel overloaded. Jiggery provides natural sugar and is high in glucose.
The bread can be covered with brown sugar and butter.
The bread can be covered with brown sugar and butter; It should heat slightly in the pan. The bread becomes crisp and has a smooth texture. You can cover it with grated coconut.
The recipe contains carbohydrates and natural sugar. It is another hearty bread recipe that you can use for breakfast. This recipe is easy to prepare and can be used in morning rituals to fill the belly.
Whole wheat bread can be dipped in milk.
Whole wheat bread can be soaked in milk the whole night or for some hours using nuts and brown sugar.
The recipe is a fast and healthy favorite among the old secret grandma's recipes. It is packed with nutrition and includes milk, nuts, and bread.
Using unique constituents like cinnamon can include some spice to the ingredients.
It is a fresh choice and can be taken as a healthy breakfast. It is one of the full breakfast that has bread recipes. This recipe is simple to serve and can be used in morning routines to fill the stomach.
Bread and salad
Using bread with salads like cucumber, onion, and tomato with olive oil in a pan is healthy.
It should be placed on the food and set for a few minutes. It is one of the breakfast bread recipes that are healthy.
This recipe is easy to prepare and can be used in morning rituals to fill your belly. It is hardy to make the belly feel good and not feel overloaded.

Breakfast Pizza
A mix of all your favorite breakfast foods on a great tasting pizza. There is no wrong way to create a breakfast pizza. It is important to remember that making a pizza is like a volcano. Everything will flow to the middle. You want to start from the edges and work your way to the inside. Here is a breakfast pizza that is great for your family or a get-together.
Ingredients
- 1 package of dough in the pouch or your favorite pizza dough
- 1 pack of sausage gravy or peppered gravy
- ground sausage, bacon, Canadian bacon, smoked sausage, or any me substitute
- 3 eggs
- 2/3 cup of milk
- 2 cups of mozzarella cheese
- Use a cookie sheet or pizza pan
Directions
- Make your dough per the directions. - Depending on the directions, it may have to sit for a few minutes.
- Cook your meat or meat substitute. - Save some of the greases to add to the gravy.
- Make your sausage gravy. - Add your meat grease.
- Mix together your eggs and milk.
- Scramble the egg mixture.
- Place the dough on the cookie sheet or pizza pan.
- Gently spread the gravy all the way around the dough. You can make a crust by keeping a half on an inch around the dough's edge without gravy.
- Sporadically place the meat or meat substitute around the pizza. Be sure not to pile it too heavy in one area.
- Spread the scrambled eggs around the pizza.
- Spread the mozzarella cheese all around the pizza.
Tips for breakfast pizza
- If you do not eat traditional breakfast foods, you have other options that are healthy and delicious. You can use yogurt as the sauce. You can choose your favorite flavor or use vanilla. Add a variety of fruits all around the pizza, such as strawberries, kiwi, bananas, blueberries, mango, blackberries, and peaches. You could even serve it with traditional breakfast foods on the side.
- You can use apple pie filling or cherry pie filling as the base or sauce. Use oats or make a crisp to sprinkle on the top of the pizza. Once it comes out of the oven, you can drizzle icing over it or enjoy it with a dollop of whip cream.
Scrambled Eggs and Chicken Sausages
This meal is a high protein breakfast, and it is just what is needed to kick start your day. It is also straightforward to prepare and does not require a lot of energy. When preparing it, all the necessary ingredients are onions, chicken sausage, eggs, salt or pepper to flavor, and grated cheese. Consequently, you will be able to prepare scrambled eggs and chicken sausage,
Peanut Butter and Banana Smoothie
Smoothies are the perfect snack at any time of the day. Not only do their flavors complement each other, but they also have many health benefits. It is also easy to prepare since all you need to do is blend frozen bananas, peanut butter, soy milk, Greek Yogurt, honey, and a few ice cubes. You can have this smoothie any time of the day, and it will be of great help.
Banana And Almond Porridge
If you think you have no time to prepare breakfast, this is a very simple dish to make. You will need to use oats, chia seeds, bananas, milk, dates, and nuts. It will only take you 20 minutes to prepare this meal. It is a healthy meal, and it will keep you full for long.
Eggless Pancakes
So if you have run out of eggs or do not want to use them, there is a simple way that you can make pancakes. All you will need is 1 cup of milk, one tablespoon of sugar half, and a spoon of salt. They tend to get light, soft, fluffy, and you choose can add some honey to sweeten it.

Apple Crisp Oatmeal Squares
This is the perfect breakfast. Oatmeal is excellent for a healthy breakfast, and the best way to make it convenient is to bake it. It can easily be reheated in the microwave or oven. You can eat it as a snack or even a meal, especially if you are busy during work.
Conclusion
Eating breakfast is associated with an improvement in your overall health and well-being. Therefore, since breakfast is the most important meal of the day, you must never overlook its importance. Subsequently, you will get to experience the benefits of eating breakfast has on your mood and help you concentrate better. This helps you feel more awake and full of life. Therefore, you need not wait any longer to incorporate these breakfast recipes into your daily routine.
School Lunch
Are you stuck in a rut when it comes to school lunches? Are your kids begging you for something other than a sandwich and chips? Maybe you’re looking to save money on school lunches or for your kids to eat healthier.
School Lunch Needs To Be Eaten!
Please pack what your child will eat not just what you want them to eat!
Below are a few recipes to try that I enjoy making for my lunch too.
The Whole Enchilada For Many Kids!
24 Servings
Mexican foods are a favorite of children, and this recipe is no exception.
Ingredients:
1 teaspoon olive oil
2 tablespoons garlic, chopped
2 cups onions, chopped
2 cups green or red peppers, chopped
1⁄4 cup jalapeno peppers, seeded and chopped
3 tablespoons cumin, ground
1⁄4 teaspoon pepper
2 pounds kidney beans – soaked and cooked until tender
4 large butternut squashes (about 5 pounds each), peeled, seeded, and shredded
24 nine-inch whole-wheat tortillas
1 #10 can mild salsa
Preparation:
1. Sauté garlic in oil until golden.
2. Add onion and cook until caramelized.
3. Add pepper and spices, sauté for 5 minutes.
4. Add beans and squash and mix thoroughly.
5. Place two #8 scoops of the mixture in each tortilla and fold into a purse shape.
6. Place salsa in the pan to cover the bottom, and place enchiladas in the pan then cover with the remaining salsa.
7. Bake at 300 Fahrenheit for 30 minutes. Serve.
It's time to send the kiddies back to school, so it's the perfect time to wow your kids with a delicious packed lunch. These recipes aren't your normal sandwiches, but packed with tasty ingredients, leaving your children's classmates super jealous.
Timestamps: 00:04 - Chicken Bacon Club Shooters 00:53 - Stuffed Crust Pizza Bagels 01:39 - Giant Italian Deli Sandwich 03:57 - Chicken Fajita Wrap Bombs 05:34 - Ham And Cheese French Toast Pockets 06:26 - Fajita Kebabs 07:18 - Crispy Buffalo Chicken Lettuce Cups 08:45 - Muffin Tin Cheeseburgers 09:46 - Philly Cheesesteak Grilled Cheese Sliders 10:51 - Fajita Pasta Salad 11:49 - Pizza Taquitos 12:35 - Chicken Caesar Bacon Pasta Salad 13:36 - Big Mac Triangles 14:35 - Pizza Lasagna Pockets 15:36 - Big Mac Pasta Salad
Easy Snack Wraps
"Easy to make, these bite-sized wraps filled with turkey, cream cheese, and veggies are a great way to fill up an appetizer tray - and your hungry guests."
Ingredients
- 12 (10 inches) flour tortillas
- 1 (8 ounces) package cream cheese
- 1 head lettuce
- 1 (6 ounces) package sliced deli-style turkey
- 2 cups shredded carrots
- 2 cups minced tomato
Directions
- Spread cream cheese evenly over the tortillas.
- Top the cream cheese with lettuce leaves.
- Arrange the turkey slices in even layers on top of the lettuce.
- Sprinkle the carrots and tomato over the turkey slices.
- Roll the tortillas into wraps.
- Cut the wraps diagonally into bite-sized pieces.
- Secure with toothpicks.
We’ve pieced together some of our favorite recipes from the channel into one Back to School special – tell us below what your perfect school lunch is?
College and Home Snacks That Will Work Too!
Hot Lunch Ideas (with a Thermos):
Tips for using a thermos: *We recommend a Thermos 10 oz
*Pack hot thermos in the morning (5 hours before it’s eaten)
*Heat the thermos first: add boiling water, cover and let sit 5 min then drain. Heat food until it’s hot. Place into a heated thermos and close tightly with the lid. The food will be warm at lunchtime.
What to put in a hot lunch thermos:
1. Soup (try: chicken noodle soup or Mom’s meatball soup)
2. Pasta (try: chicken alfredo or spaghetti with shrimp)
3. Pilaf/rice, or stir fry (try: creamy chicken and rice, or shrimp fried rice)
4. Leftovers! You can really get creative with a thermos. Just avoid foods with overwhelming aromas (i.e. broccoli and cabbage).
 School Lunch Fruit:
1. Small banana
2. Grapes
3. Blueberries, strawberries or other berries
4. Fruit kabob
5. Apricot, apple,.. whatever your kids love
6. Applesauce 7. Peeled clementines
School Lunch Veggies:
1. Baby carrots with a ranch in mini cups
2. Cucumber slices
3. Snap peas
4. Salad (romaine, cheese, croutons, side of ranch)
5. Avocado slices (to prevent browning: slice flesh into bite-sized pieces inside the skin, scoop out the flesh and replace into the shell, drizzle with lemon juice, cover tightly with plastic wrap)
This week we are sharing more hot lunch ideas and no sandwiches! School Lunch Ideas What they ate Bunches of Lunches
Changing up the lunch routine is something you just have to do to keep yourself sane. By bringing in sandwiches each day life eventually starts to look even blander and if you are looking to get into a new health kick yet don’t want to sacrifice taste or lose out on enjoying some new and exciting lunches then this lunch ideas might be exactly what you needed.
How To Write A Recipe
Writing a recipe is as exacting as writing a set of instructions for constructing a building or installing a piece of equipment. It is “How To” writing, which is a specific, disciplined form of writing.

There are two main parts of almost all recipes, the Ingredient List and the Preparation Method. Below are the basic guidelines for writing both parts.
Before we get into it first comes the title, number of servings, and serving size if appropriate.
The introduction can include a bit of the history of your recipe, information about special features such as low-fat or sugar-free, and anything else you believe will entice your reader to make your recipe
Add an image here too, You should photograph your dish however Pixabay has images that are safe to use.
Images
There is no doubt that food photography is an art and a profession as well, don’t hesitate to include your own photos or drawings of ingredients, equipment, and the finished dish. Your readers will appreciate your efforts.
NEVER use other recipe images or google images.
Key Template Elements for Writing Recipes
- Title
- Image
- Introduction
- Equipment
- Ingredients
- Method
- Serving Suggestions
- Footer: Repeat Title and add Date and Page Number
The ingredient list and the preparation method, often I call my Directions. If the recipes are adapted from another recipe, a credit is included always.
spellcheck it, and re-read it many times. Get a fresh view from eyes that are not exhausted by the process you’ve just been through writing this all up. With these fresh eyes, it is easy to find errors that you missed, you may also gain valuable insights that will improve your written recipe. Even advice to consider.
Ingredient List:
- List all ingredients in order of use, as described in step-by-step instructions.
- List the most important ingredients first, if it can be consistent with the order of use.
- Spell out everything: tablespoons, ounces, etc.
- If the recipe has different elements (a pie, for example, has a crust, a filling), break up the ingredient list with headings such as “Crust” and “Filling.”
- When several ingredients are used at the same time (in the case of baking, often all the dry ingredients are sifted or mixed together at once), list them in descending order according to volume. If there is an issue over preparation, list in order, so for example if you need the zest and juice of a lemon, list the zest first and then the juice since that is the order you will do the preparation.
- Do not use two numerals together. You need to set off the second number in parenthesis. This comes up with sizes of packages. For example, “1 (8-ounce) package cream cheese.”
- If an ingredient begins with a letter instead of a number, freshly ground black pepper, for example, capitalize the first letter, as in “Freshly ground black pepper.”
- If the preparation of an ingredient is simple, place that technique in the ingredient list, as in “2 eggs, beaten” or “1 stick butter, softened.”
- If an ingredient is used more than once in a recipe, list the total amount at the place in the ingredient list where it is first used, then add “divided.” In the method part of the recipe, indicate the amount used at each step. For example “1 cup all-purpose flour, divided” then in the method “Sift 3/4 cup of the flour with the…” and later “Sprinkle the remaining 1/4 cup of flour on top of…”
- Use generic names of ingredients (semi-sweet chocolate chips, not “Nestle chips”
Preparation Method, (Directions)
- Where helpful, indicate the size of bowls and cookware. For example, “In a small mixing bowl….”
- You do not have to write complete sentences. Be as short and concise as possible.
- With instructions for the stove-top, indicate the level of heat. For example, “Simmer over low heat.”
- State exact or approximate cooking times, with descriptive hints for doneness, if appropriate. For example, “Sear 2 minutes on each side,” and “Bake 18-22 minutes, or until crust is light golden brown.”
- As in the ingredient list, if there are different elements to the recipe, as with the crust and filling of a pie, separate out each element in the method. Begin with the crust and write a header “For the Crust” and give the method. Then do “For the Filling” and give filling instructions.
- Separate each step into a different paragraph. If you are mixing dry ingredients in a bowl, for example, use one paragraph for all the instructions for that step.
- Finish with serving instructions including how to plate, what temperature to serve, how to garnish.
- The last instruction should be regarding storage, if applicable. For a cake recipe, for example, “Cake will keep at room temperature in an airtight container for 2-3 days.”

More helpful tips:
Using a commercial restaurant scale for portion control, renowned video blogger for https://www.tigerchef.com/ and chef extraordinaire Danny Dangoor teaches us how to write and record recipes. Many chefs like to create their dishes on the fly, continually tweaking the recipe until it is just right, using their finely honed taste buds as their guide. Only once the final concoction is perfect are they ready to present their dish. So how do they keep track of the recipe? Watch this instructional chef video and find out.
Learn how to make and use all the culinary bases from around the world. Learning this technique will help you create your own recipe based on a specific cuisine. This shows you how to make a French mirepoix, Italian soffrito, Spanish sofrito, the Cajun holy trinity, and Chinese GGS.
To Review:
The Recipe Title:
This is the name of your recipe using words that accurately describe the dish. Feel free to have a little fun and make it fun! You want to keep people reading and be ready to make the recipe themselves.
A Description:
Now is your chance to make the readers hungry! Give a brief background on the recipe or share a bit of history behind the dish and why it's good.
The Source:
If you are putting your name on a recipe, it should be your own work. You should never copy a recipe from a blog or website or anyplace. This goes for recipe photos as well. Never use images without the owner's consent.
Anytime you are sharing a recipe from an outside source, make sure you give credit where credit is due.
Info, Time and Servings:
Preparation time includes all the measuring, chopping and other preparation of ingredients.
Cooking time refers to the total time the food takes to cook, including any preliminary cooking needed.
Include the number of servings based on reasonable portions.
All Ingredients:
List ingredients in the logical order of use in the recipe to make them easy to follow.
Whenever possible, list items as you would buy them in the supermarket, such as “1 package (4 ounces) sliced mushrooms,” instead of “4 cups mushrooms.”
When listing ingredients, watch how they are modified. For example, when listing sifted flour in baked goods, “1 cup flour, sifted” implies the flour needs to be measured first, then sifted. If you write “1 cup sifted flour” it implies flour that has been sifted then measured. “1 cup whipping cream, whipped” or “1 cup rice, cooked” implies the ingredient is measured first.
Specify exact measurements and/or package sizes of all ingredients. For example, 1 cup sugar, or 1 teaspoon salt. Using terms like “handful” or “pinch” can vary the outcome of the recipe. This is especially helpful when you are writing down family recipes that have been enjoyed for generations. You want to make sure a favorite dish can be recreated and enjoyed for years to come!
If your recipe calls for an ingredient that many cooks may not be able to attain easily, suggest an alternative
The Directions:
Recipe directions should be numbered in logical steps.
Write preparation directions in complete sentences.
Make sure all ingredients listed above are included in the preparation directions.
Include exact sizes of pots, pans, and casseroles. For example, a large sauté pan or a 2-quart casserole dish.
Indicate exact cooking temperatures and times.
Add a tip on how you know when the food is done the cooking.
Any Notes:
Use this area to communicate anything additional information someone would need to know to recreate your recipe at home.
You can also offer ideas for alternate ingredients, tips, or serving suggestions.
Juicers
Today it's time to help you make an informed decision on a very exciting piece of kitchen appliances, the super-drink needs to pick a juicer.
Think of your juicer purchase as an investment in your long-term wellness, energy, and radiance.
Crappy juicers can produce crappy yield.
If you're going to spend money on high-quality, organic fruits and vegetables, and time preparing them for juicing, you might as well be sure that the machine you use helps maximize their nutrients and power.
In general, there are two main categories of juicers for non-commercial use.
I'll explain them more thoroughly in a moment, but the basic difference is that one works quickly and is easy to clean but isn't necessarily top-of-the-line when it comes to the longevity of your juicer.
If you're a hardcore raw foodie who wants to invest in a killer machine and you have some extra time on your hands, you might go full tilt with a masticating or twin gear juicer.
It all comes down to whether or not you'll actually commit to juicing.
So for best results, choose the juicer you'll actually use!
Since everyone has different needs and budgets, I want to show you how I evaluate the many juicers on the market today so that you can choose a juicer that fits your life.
Centrifugal juicers have a wide mouth to feed your fruits and veggies into, which means you don't have to cut produce into itty-bitty pieces beforehand.
The produce is shredded and spun, sending the juice through the mesh and into a pitcher while the pulp goes into a separate basket.
On the downside, they're pretty loud, and the high-speed spinning causes the juice to oxidize faster than it would with slower speed juicers.
For this reason, it's best to drink juices from a centrifugal juicer right away to ensure the most nutrients and best flavor and color.
If saving some juice for later means that you drink more juice, then, by all means, store your juice in an airtight mason jar and keep it in the fridge till you're ready to enjoy it-I won't tell the health police.
Popular choices for centrifugal juicers: BrevilleJuice Fountain Compact and the Omega and my favorite Vitamix 5000
These lovelies operate a bit like our teeth-they use a single gear that chews up your produce in order to break down the fibrous cell walls and extract the juice, which is gently squeezed through a stainless steel screen.
Masticating juicers tend to have a higher yield than centrifugal juicers, and therefore dryer pulp.
Score! And if noise is a concern, masticating juicers are the way to go.
Twin gear juicers operate at even slower speeds than masticating juicers, which means these rockstar machines extract the highest yield and retain the most nutrients in your liquid sunshine.
Because there's less oxidation, you'll get up to72 hours of nutrient-rich juice-provided you store your juice in an airtight container and keep it in the fridge.
The other advantage of twin gear juicers is that they make the most of leafy greens and even wheatgrass, which, as I mentioned earlier, don't yield as much juice when processed with centrifugal machines.
Both masticating and twin gear juicers are powerful, health-producing machines but they have a few downsides: the whole process of making a juice tends to take a bit longer than centrifugal
Feeding the juicer takes time because of the gears turn slowly.
Consider all of these factors when you're thinking about the juicer you want; there's no point having a fancy machine if the time you need to spend cleaning it outweighs your juice craving in the first place!
This powerful juicer provides 50 to 100 percent more juice than other machines, and the juice itself will stay very fresh for up to three days.
Because Norwalk machines are so expensive, they're used mostly at healing centers or for commercial purposes-including the cold-pressed juices you may have come across in juice bars.
How much prep time am I willing to invest in my daily juicing?
What's more important: the shelf life of my juice or the time/effort it takes to prepare it?
You can't go wrong with any of the juicers I've recommended.
Plus, if you have a pushy partner or husband like I do, cleaning the juicer right away will ensure a heavenly, lecture-free morning.
For centrifugal juicers that have a catch basket, you can line it with a biodegradable bag for no-fuss-or-muss cleaning.
Many juicers come with a scrub brush; this is essential for cleaning the basket or the nooks and crannies of the gears.
If your juicer doesn't come with a brush, grab one the next time you're at the grocery store.
You've taken your first step toward a glowing new you! Celebrate by drinking your first green juice in a champagne glass and toast to your health.
In addition to the outrageous array of delicious recipes, Crazy Juices includes literally everything I know about juicing and blending.
Instructional video for cleaning juicers
All three methods involve a similar procedure of soaking the juicer parts in a cleaning solution and then brushing them to remove the deposits.
If your juicer parts have a coating of mineral deposits or hard water scale, use a mixture of 1 part water to one part vinegar, with the juice of one lemon added to it. Allow it to soak at least an hour, and preferably overnight.
For the brown coating of dried juice particles or mold on the silicon parts, it’s better to use a solution of 2 parts water to one part Sava Original disinfectant (bleach).
If you prefer not to make your own mix, you can soak all the parts in the juice cleaner Citroclean.
For the best results, use warm water (to 50˚ C). For very stubborn build-up, use a more concentrated mixture with less or no water.

Juice Recipes FOR GREEN GODDESS JUICE:
- 3 stalks of celery
- 1/2 large cucumber, cut into quarters
- 1 medium green apple, cut into eighths
- 1 medium pear, cut into eighths
FOR GINGER ZINGER JUICE:
- 2 medium apples, cut into eighths
- 5 carrots (no need to peel)
- 1/2 inch fresh ginger
- 1/4 lemon (remove peel to avoid bitterness)
FOR TROPI-KALE JUICE:
- 1/4 of fresh pineapple, skin, and core removed, and cut into 1” strips
- 4 kale leaves
- 1 ripe banana, peeled
FOR ANTIOXIDANT BLAST JUICE:
- 2 medium beets, cut into quarters and the greens
- 1 cup blueberries
- 1 cup halved, hulled strawberries
FOR IMMUNE BOOSTER JUICE:
- 2 oranges, quartered (remove peel for less bitterness)
- 1/4 lemon (remove peel for less bitterness)
- 1 medium apple, cut into eighths
- 1/2” fresh ginger
FOR NOT-SO-SOUR APPLE JUICE:
- 2 tart apples, cut into eights
- 5 kale leaves
FOR KALE KICKSTART JUICE:
- 1 orange, quartered (remove the peel for less bitterness)
- 1 cup halved and hulled strawberries
- 2 kale leaves
- 3 carrots
- 1 ripe banana
FOR CUCUMBER COOLER JUICE:
- 1/4 ripe cantaloupe, seeds removed, cut into chunks (no need to peel)
- 2 stalks celery
- 1/2 cucumber, cut into slices
- 1/4 lemon (remove peel to reduce bitterness)

Wine Guide
Wine is used to make a regular meal and an extraordinary experience or a typical hangout into a memorable moment. Wine can, however, be very intimidating, especially if you are new to it. Wine is very different, and each has its taste, and when wrongly matched with a certain food, the result can be devastating. Wines often have very complex descriptions, some of which you need to learn. According to research, knowing the wine you are taking makes it's tastier and more enjoyable.
Whether you are a beginner or a profession in the wine industry, the following article will give you a breakdown of everything you need to know about wine and how to make the most of the wine.
 Wine basics
The most basic guide to wine is understanding wine according to its color and where it gets its color. Wines are made from grapes, and grapes contain a substance called tannin. When the grapefruit ferments, the skins may allow the tannin to get into the wine. Contact with the skin is what gives the wine the white or red color. Wines that have the coats on when fermenting will have more tannin, and they often end up red due to the contact with the skin. Wines that have no skin contact end up having less tannin, and they are white or pink as grapes are naturally white inside.
Redwine can describe as bitter or firm due to the tannin in them. Tannin also makes it smooth or soft and bolder. Tannins get bitter when cold, so it is not advised to drink chilled red wine. Some examples are merlot pinot noir and Malbec.
White wine does not have enough tannin but has some acidity. A flat wine will have small acidity, and white wine with enough acidity can be described as tart
Some popular white wines are chardony semmilion and moscato.
Rose is ordinarily pink in color. It has minimal contact with the skin; thus, the pink color and low tannin.they are more similar to white wine. Examples pinot noir and zinfandel
What Is Dessert Wine and Sparkling Wine
The rose, red and white wine typically have an alcohol percentage of 14% and below. Some different wines are however modified, and some alcohol is added in them, and this makes the sparkling wines
A dessert wine is mostly taken after a meal. Brandy is generally added to the wine. The wine retains its natural sugars, which aids in fermentation.
Sparkling wine is a type of wine that has significant carbon in it. The carbon can occur naturally during fermentation or can be added typically. The wine can be made either red or white, and the wines indicate whether they are sweet or dry. Champagne is an example of sparkling wine.
There’s no right way or wrong way to taste wine. It’s as simple as, do you like what you’re drinking or do you not like what you’re drinking? That said, there’s a formal way to taste a wine that reveals more about the wine in your glass, even before you start drinking. Before we start tasting wine let us learn a bit about it.
Wine is the fermented juice of grapes Sugar + Yeast = Alcohol + Carbon Dioxide (CO²) The sugar is in the grape juice and the yeast is present on the grape skins and in the air Fermentation ends when the alcohol reaches around 15%
Three major types of wine
• Table wine: 8-15% alcohol
• Sparkling wine: 8-12% alcohol + CO²
• Fortified wine: 17-22% alcohol (All wine fits into at least on of these categories)
Wine is an alcoholic drink typically made from fermented grapes. Yeast consumes the sugar in the grapes and converts it to ethanol, carbon dioxide, and heat. Different varieties of grapes and strains of yeasts produce different styles of wine. Wine is an alcoholic drink made from fermented grapes. ... Wine has been produced for thousands of years. The earliest known traces of wine are from Georgia (c. 6000 BC), Iran (c. 5000 BC), and Sicily (c. 4000 BC) although there is evidence of a similar alcoholic drink being consumed earlier in China (c. 7000 BC). Quoted From:

A glass of red wine (5 ounces) a day has long been praised as good for your ticker. But newer research has also linked moderate alcohol consumption — including white wine and other beverages — to lower risk of heart failure and improved blood pressure.
The Winemaking process Freshly picked grapes are sorted De-stemmed and crushed Placed into a vat with (red) or without skins (white) Fermentation occurs (4- 20 days) Pressed Barreled and aged Filtered and bottled
Most wine is made with grapes, but they're not like the ones you find in the grocery store. Wine grapes (Latin name: Vitis vinifera) are smaller, sweeter, have thick skins, and contain seeds. There are over 1,300 wine grape varieties used in commercial production but only about 100 of these varieties make up 75% of the world's vineyards.
A wine beginner might know the basic differences between a red and a white, but it’s also important to learn all the wine types and varietals. You can explore everything from Chardonnay to Viognier and Cabernet Sauvignon to Zinfandel
Top Red Wine Varietals and Taste
Cabernet Sauvignon
The two are related: Cabernet Sauvignon is a cross between Sauvignon Blanc and Cabernet Franc. But Cabernet Sauvignon is a red wine grape and has success in many parts of the world, most notably in California's Napa Valley and France's Bordeaux region, where it is blended with other grapes to make stately red wines
Taste: Dark, ripe fruits, black cherry, plum, spice, vanilla, cedar or oak from barrel-aging
Body: Heavy
Notable Growing Regions: Grown in every wine-producing country, well-known styles from California, France (Bordeaux)
Food Pairing: Grilled meats, roasted meats- beef, lamb
Pinot Noir
A good Pinot Noir is one of the safest red wines, along with Merlot, to serve a big group of people. ... Like many other regions of France, Pinot Noir producers do not refer to their Pinot Noir wine as Pinot Noir, but instead call it red Burgundy, after the region where it's made
Taste: Red fruits, bright cherries, strawberry, some spice, vanilla,
Body: Light
Notable Growing Regions: France (Burgundy), California, Oregon, Australia (Yarra Valley), New Zealand (Otago Valley), Italy (Northern)
Food Pairings: Light, flavorful meats - duck, pork, chicken thighs; mushrooms; salmon and heavy flavored fish
Bordeaux Red Blends (Meritage)
*Mimic the style of Bordeaux reds from the Bordeaux region of France. This blend is generally dominated by Cabernet Sauvignon, but also utilize other grapes like Cab Franc, Merlot, Malbec
Taste: Big, bold, dark fruits,; savory flavors; mineral flavors; tannic (drying); cedar, oak, vanilla
Body: Heavy
Notable Growing Regions: Produced throughout the world, notable from California, Chile, similar to Bordeaux blends from France
Food Pairings: Smoked meats, roasted meats; lamb; firm cheese
Malbec
Malbec is a full-bodied red wine that grows mostly in Argentina. Known for its plump, dark fruit flavors and smoky finish, Malbec wine offers a great alternative to higher-priced Cabernet Sauvignon and Syrah. However, there's more to Malbec than just value
Taste: Dark berry, cherry, black pepper spice, cocoa, wet earth
Body: Medium
Notable Growing Regions: Argentina (Mendoza), France
Food Pairings: Pasta, Barbecue or grilled meats, spicy food
Merlot
Merlot is a dark blue-colored wine grape variety, that is used as both a blending grape and for varietal wines. The name Merlot is thought to be a diminutive of merle, the French name for the blackbird, probably a reference to the color of the grape.
Taste: Raspberries, strawberries, mineral, cedar
Body: Medium
Notable Growing Regions: France (Bordeaux), Washington, California, Italy (Tuscany), Australia (South Australia)
Food Pairings: Many foods from chicken and pork to dark meats

Top White Wine Varietals and General Taste
Chardonnay
Chardonnay is the world's most popular white wine, and for good reason. It's made from green-skinned grapes that adapt to a variety of climates, and they produce versatile wines in many price points. Chardonnay can be crisp and clean, or rich and oaky
Taste: Wide range depending on style; lemon, apple, pear, bright fruits; mango, pineapple, peach, tropical fruits; vanilla, butter, baked goods, coconut
Body: Medium
Notable Growing Regions: France (Chablis, Burgundy), Italy, California, New York, Australia (South Australia)
Food Pairings: Fish, lightly seasoned chicken, soft cheeses
Sauvignon Blanc
Sauvignon Blanc is a white wine that owes much of its popularity to winemakers in Bordeaux and the Loire Valley in France. The Sauvignon Blanc taste is very different from other white wines, like Chardonnay, because of its green and herbaceous flavors.
Taste: Green fruits, lime, green bell pepper, pear; stonefruit, kiwi, peach; oaked, vanilla, coconut, butter
Body: Medium to Medium-heavy
Notable Growing Regions: France (Bordeaux, Loire Valley), Italy (Northeast), New Zealand (Marlborough, Hawkes Bay), California, Chile
Food Pairings: White meats, chicken, pork; white fish, shellfish, lobster, clams; soft, sour cheese

Pinot Grigio/Pinot Gris*
*The same grape, called Pinot Grigio in Italy, Pinot Gris in France
Taste: Italian, lime, pear, sour apple; France, lemon, honey, honeysuckle; U.S., white nectarine, ripe stonefruits
Body: Medium to Medium-heavy
Notable Growing Regions: Italy, France, U.S.
Food Pairings: Fresh fish, green salads, shellfish
Rosé
Rosé is a type of wine made from red wine grapes, produced in a similar manner to red wine, but with reduced time fermenting with grape skins. This reduced skin contact gives rosé a pink hue and lighter flavor than that of red wine.
Taste: Varying styles; Light, rose petal, underripe strawberry, limestone; Medium, strawberry, summer fruits; Heavy, ripe fruits, floral, spice hints
Body: Light to Medium-heavy
Notable Growing Regions: France, Spain, California, Italy
Food Pairings: Dependent on style anything from light salads to barbecued meats
After you’ve tasted the wine, now you have the opportunity to consider the wine’s quality. Here are some of the questions to ask yourself:
- Is the wine in balance? This is a question referencing the notes you made in the tasting section. Wines that are “in balance” have tastes that are balanced between one-another including acidity, tannin (if it’s red), and alcohol level. While different wines have different intensities, a quality wine will be in balance with itself.
- Is the wine complex? If you have a great deal of tasting notes for this wine and can still think of more, you’ve got a pretty complex wine on your hands.
- What is your opinion? Now that you’ve properly assessed the wine, what do you think of it (overall)? We use a very simple 3-point system for this assessment (ew, meh, yay!) but you can use any kind of rating system that works for you.
Reading a Wine Label
At first glance, a wine label can be confusing to those just getting started. Luckily, New World wine producers have made it easier on wine beginners by listing the grape(s) directly on the label. Old World regions have typically relied on the wine consumer to be familiar enough with the region to know, for example, that Red Burgundy is Pinot Noir.
Old World Wines might read like this:
Château Moulin de Grenet 2009 Lussac Saint-Émilion
New World wines might read like this:
Cakebread 2006 Merlot, Napa Valley
Smelling Wine
When you go to smell the wine, stick your nose all the way into the glass and close your eyes — sure you might feel silly doing it, but you’re going to notice a lot more smells this way — then breathe in deep. As you smell the wine, think about what scents you’re picking up, and keep in mind that there are no wrong answers! If it’s a white wine, maybe you smell bananas, lemon rind, pineapple or even that scent that is always in the air when you go to the beach. If it’s a red wine, you may smell prunes, cherries, strawberries, peppers, plums or tobacco. In both situations, you may say you just smell grapes, and that is totally fine too. Your brain can only pick up scents that are in your memory, meaning they are scents you’ve smelled before or smell often. That’s why ten people could be sitting around a table smelling the same wine and say they smell ten different things!
Now that you know where most wine is from, and how it gets bottled, maybe it’s time to learn How to Make Wine.

by pslifestyle.
Explore more infographics like this one on the web’s largest information design community – Visually.
How To Describe The Taste of Wine
If you are running a wine discussion, identifying the different types of wine may be just the tip of the iceberg. You have to give the wine more description, mostly how the wine tastes. Though the taste of wine sparkles a lot of debate, some certain assets are generally agreed-upon. To get the taste of the wine, you have to understand how to describe the taste you are getting full. The following are used to describe the taste of the wine
1. Sweetness. Wine can either be sweet or dry. Some are semi-dry with a little sweetness.
2. Acidity. Since you already know this is in white wine, the acidity level will determine the taste. Lower acidity makes the wine fat," and if too much, the wine tastes sour. The right level of acidity makes the wine crisp.
3. Tannin. This is for the red wines. Lower tannins in a glass of wine make it smooth and soft and more drinkable. The more the tannins, the bitter the wine is.
4. Body. The body is determined by the viscosity and the weight of the wine. Some wine is like water and feels thin while others are full-bodied and feels thick.
Something else to consider when tasting wine is the flavors. Some flavors may be present in the wine includes fruity, earthy, among others.
History
- The oldest winery that we know of is Armenian, dated to 4100 BCE.
- The Phoenicians spread wine around the Mediterranean in the tenth century BCE, introducing the drink to the ancient Greeks, who in turn inspired the Romans to become wine fanatics and grow grapes across their empire.
- The Greeks and Romans took their wine seriously, dedicating gods to their favorite fermented fruit juice. Dionysus was known as the god of the grape harvest to the Greeks, while Bacchus was the deity of choice for Roman oenophiles.
- People have been drinking too much wine for centuries. Everything from the Odyssey to the Bible mentions the perils of overconsumption.
- Thomas Jefferson may be responsible for the California wine boom. After being sent to France, Jefferson brought vine cuttings back to the United States.
- 2017 saw a drop in global wine production to a level not seen in sixty years thanks to poor weather conditions.
- 2020 Due to Corvin 19 wine sales hit very high sales numbers while people were social distancing.
Bottle Sizes
187.5 ml Piccolo or Split: Typically used for a single serving of Champagne.
375 ml Demi or Half: Holds one-half of the standard 750 ml size.
750 ml Standard: Common bottle size for most distributed wine.
1.5 L Magnum: Equivalent to two standard 750 ml bottles.
3.0 L Double Magnum: Equivalent to two Magnums or four standard 750 ml bottles.
4.5 L Jeroboam: Equivalent to six standard 750 ml bottles. (In sparkling wines a Jeroboam is 3 liters)
4.5 L Rehoboam: A sparkling wine bottle with six standard 750 ml bottles.
6.0 L Imperial: (aka Methuselah) Equivalent to eight standard 750 ml bottles or two Double Magnums.
9.0 L Salmanazar: Equivalent to twelve standard 750 ml bottles or a full case of wine!
12.0 L Balthazar: Equivalent to sixteen standard 750 ml bottles or two Imperials.
15.0 L Nebuchadnezzar: Equivalent to twenty standard 750 ml bottles.
18.0 L Solomon: (aka Melchoir) Equivalent to twenty-four standard 750 ml bottles.

Temperature
All wine is stored at the same temperature, regardless of its color. But reds and whites are consumed at quite different temperatures. Too often people drink white wines too cold and red wines too warm, limiting how much you can enjoy the wine. A white that’s too cold will be flavorless and a red that’s too warm is often flabby and alcoholic.
Ideally, whites should be between refrigerator temperature (40°F) and storage temperature (55°F) and reds should be somewhere between storage temperature and room temperature, which is often as high as 70°F. If your wine is in a temperature-controlled unit, at 53-57°F, pop your bottles of white wine into the refrigerator half an hour prior to service and take your reds out of storage half an hour prior to service. This allows time for your whites to chill and your reds to warm up. If you have yet to invest in a wine storage refrigerator and your wines are kept at room temperature or in the refrigerator, you’ll do the opposite. Put your reds in the refrigerator for half an hour and take your whites out of the refrigerator for half an hour. Dessert wines, sparkling wines, and rosés are best enjoyed at a cooler temperature than whites. The refrigerator temperature will do the trick.
Wine handling and serving
People often forget the basics of handling the wine when opening it. To successfully open a wine, you need to carefully insert the screw in the cork and twist about six half turns. Lever the cork out slowly and wipe any sediments
It is vital to serving the wine in the correct glassware. A wine glass needs some space to gasp the tastes and the aromas properly
• Small bowled glasses are best for serving white wine. They help maintain a cold temperature while preserving the aromas.
• Large glasses are suitable for serving bolder red wines. The expansive space helps the wine taste smoother while allowing ethanol to evaporate.
• Standard glasses can serve regular red wine. The small vase allows you to taste the flavors when drinking the wine.
A Few Tips:
Invest in decent stemware. Look for glasses with medium-sized bowls, which are versatile enough for all wines, and thin rims, which always make the wine taste better. Hand washing will keep them looking their best, but if the stems are dishwasher safe, use only the top rack.
Be sure to pour the proper amount of wine into your glass to get the best possible wine experience.
- When drinking red wine, bring the bottle to the glass and gently pour your red wine until your glass is half full. ...
- When serving a white wine, wrap a napkin around the neck of the bottle for insulation before pouring.

Add yourself to the store’s email list to stay informed about in-store events and sales. Attend free tastings to “try before you buy.” Ask for bargain wine suggestions—clerks are happy to share great finds.
Any time a wine is topped with a cork, it should be stored on its side. Cork is used as a topper because it expands in the neck of the bottle to protect wine from oxygen. But if the cork starts to dry out, it will start to let air inside, causing premature oxidation.
No Drip Method
Rotate the bottom side of the bottle away from you as you deliberately stop pouring. This trick does require some practice for perfection but it should throw any last tiny drips off route to the back of the bottle. You can also use a napkin or paper towel to catch drips.
What makes a wine have strong or weak tannins depends on how long the juice sits with the grape skins, seeds, and stems after the grapes have been pressed. The longer the skins, seeds, and stems soak in the juice, the more tannin characteristics they will impart. This explains why red wines have stronger tannins than white wines. When producing red wine, the winemaker wants the skins to impart more color, thereby adding more tannins to the juice. Further, by extracting the characteristics of tannins, they are able to add deeper complexity to the wine.
Keep experimenting. Tasting is the key to learning about wine. So continue to try new ones, in addition to sticking with tried and true favorites.
The ability to sniff out and untangle the subtle threads that weave into complex wine aromas is essential for tasting. Try holding your nose while you swallow a mouthful of wine; you will find that most of the flavor is muted. Your nose is the key to your palate. Once you learn how to give the wine a good sniff, you’ll begin to develop the ability to isolate flavors—to notice the way they unfold and interact—and, to some degree, assign a language to describe them.
To drink wine, start by pouring it into a wine glass so that it's about half full. Then, swirl the wine around in the glass to intensify the aroma. Next, take a small sip of the wine and swish it around in your mouth to absorb the flavors. After 5 seconds, swallow it and take note of the taste it leaves in your mouth.
A Question of Taste shows the proper way to taste wine and a little bit about the anatomy of grapes

by adolfux.
Explore more infographics like this one on the web’s largest information design community – Visually.
Food and wine pairing
To properly pair the wine and the dishes, you need to balance the components of the wine and the foods. You can choose to contrast the taste of the wine and the nutrition or you can consider the intensity of the food and the wine you want to serve.
Some tips to successfully pair your wine with the food include
• The acid in the food should be less than in the food
• The wine should be more sweet compared to the food
• Red meat is best paired with red wine while white wine is good with fish and chicken
• Rose and sparkling wines are mostly not the best wine to pair your dishes with
• It is more important to use the sauce to make the pairing other than utilizing the meat
The above are the necessary steps that you need to learn when it comes to wine. This vast knowledge is beneficial, especially if you are looking to make something extraordinary from the ordinary routine. The above tips are enough to make sure you weigh in in the next wine debate.

The pairings suggested in the infographic are mere guidelines, there is no set in stone rules for wine pairings, everyone’s taste buds are different, and matching food and wine is a matter of personal taste.
The truth is, there are myriad factors to consider when evaluating and buying wine. Apart from the obvious fact that each person will have his or her own preferences and opinions on what makes a good wine, each bottle will vary depending on the geography and climate that the grapes were grown in, the type and generation of grapes used, and how the grapes were treated from the time they were harvested until they entered the bottle.
Top 10 Brands Of Wine
- 1) Barefoot
- 2) Concha Toro
- 3) Gallo
- 4) Changyu
- 5) Yellow Tail
- 6) Sutter Home
- 7) Robert Mondavi
- 8) Hardys
- 9) Beringer
- 10) Great Wall
Recipes
Party Punch
Ingredients
- 2 bottles Sauvignon Blanc
- 1/2 bottle Peach Wine
- 3/4 bottle Cranberry Wine
- Bag of cranberries
- Bag of frozen peaches
- 1-liter Sprite or 7up
Instructions
Mix ingredients and allow to sit in the refrigerator for 6-12 hours prior to serving. Serve chilled.
Peach Passion
Ingredients
- Peach Wine
- good quality vodka
- fresh-squeezed ruby red grapefruit juice
- club soda
- peach slices for garnish
- mint for garnish
Instructions
- Fill a tall Collins-style glass with ice.
- In a cocktail shaker mix equal parts wine, vodka, and grapefruit juice
- Pour the combined wine, vodka, and juice over the ice, then top off the glass with sparkling water or club soda.
- Garnish with a slice of peach or a sprig of mint.
Quotes:
As I ate the oysters with their strong taste of the sea and their faint metallic taste that the cold white wine washed away, leaving only the sea taste and the succulent texture, and as I drank their cold liquid from each shell and washed it down with the crisp taste of the wine, I lost the empty feeling and began to be happy and to make plans.
Ernest Hemingway, A Moveable Feast
I pray you, do not fall in love with me, for I am falser than vows made in wine.
William Shakespeare, As You Like It
am not sure I trust you."
"You can trust me with your life, My King."
"But not with my wine, obviously. Give it back.
Megan Whalen Turner, The King of Attolia (The Queen's Thief, #3)
There are days when solitude is a heady wine that intoxicates you with freedom, others when it is a bitter tonic, and still others when it is a poison that makes you beat your head against the wall.
Sidonie-Gabrielle Colette, Oeuvres complètes en seize volumes
Wine is one of the most civilized things in the world and one of the most natural things of the world that has been brought to the greatest perfection, and it offers a greater range for enjoyment and appreciation than, possibly, any other purely sensory thing.
Ernest Hemingway
Meatballs
Meatballs are one of my favorite things to eat and make. Try these awesome recipes.
 Swedish Meatballs
Ingredients
1 cup fresh breadcrumbs
2 1/3 cups low-salt beef stock, divided
4 tablespoons unsalted butter, divided
1 cup minced onion
2 thick slices bacon, minced
1 pound ground beef
3/4 pound ground pork
3 large eggs, lightly beaten
1 tablespoon kosher salt
1 1/2 teaspoons freshly ground black pepper
1 1/2 teaspoons sugar
1 teaspoon ground allspice
1/2 teaspoon ground nutmeg
2 tablespoons all-purpose flour
2 tablespoons sour cream, whisked
PREPARATION
- Mix breadcrumbs and 1/3 cup stock in a small bowl. Set aside. Melt 1 tablespoon butter in a medium skillet over medium heat. Add onion and sauté until browned, about 10 minutes. Transfer onion to a large bowl.
- Wipeout pan and return to medium heat. Add bacon and cook until crisp. Using a slotted spoon, transfer bacon to bowl with onion. (Reserve bacon fat.) Add the next 8 ingredients to bowl with onion mixture, mixing with your hands to blend. Fold in breadcrumb mixture. Using a 1 tablespoon measure, roll meat mixture into balls; transfer to a rimmed baking sheet.
- Melt 1 tablespoon butter with reserved bacon fat in a large heavy pot over medium-low heat. Working in 3 batches and adding 1 tablespoon butter between batches, brown meatballs on all sides, about 6-8 minutes per batch. Transfer meatballs to a plate. Drain all but 2 tablespoons drippings from pot. Whisk in flour until smooth paste forms. Stir in 2 cups stock; bring to a simmer, whisking often. Return meatballs to pot. Cover; simmer until meatballs are cooked, 5-6 minutes. Remove from heat, whisk in sour cream, and stir to coat meatballs.
These meatballs are juicy, light, and the flavor is off the charts. It's all about using the 3 different types of meat for this meatball recipe and soaking some bread in milk to help lighten the meatball texture. I like to sear these homemade meatballs in a hot pan to help form a tasty crust before finishing them in some homemade marinara sauce. I
Meatball & Sauce Recipe: https://www.flavcity.com/meatballs-sa... Turkey Meatballs: https://www.flavcity.com/low-fat-turk... Chicken Meatballs: https://www.flavcity.com/chicken-meat... Low Carb/Fat Meatballs: https://www.flavcity.com/low-fat-meal... Lamb Meatballs: https://www.flavcity.com/whole-30-bre...
Quick And Easy Meatballs
"These meatballs are significantly faster than a traditional recipe because there is no chopping or pan-frying for the base mixture and they are small, so they cook fast."
Ingredients
- 6 cups prepared the tomato sauce
- 1/2 cup dry bread crumbs
- 1/4 cup milk
- 1 large egg
- 2 teaspoons Italian herb seasoning
- 2 teaspoons olive oil
- 1/2 teaspoon garlic powder
- 1/4 teaspoon red pepper flakes
- 1 pound ground beef
- 1 pound ground veal
- 1 1/2 teaspoons salt
- 1/2 teaspoon freshly ground black pepper
- 1/4 teaspoon ground white pepper (optional)
- 1/3 cup finely grated Parmigiano-Reggiano cheese
Directions
- Pour tomato sauce into a large stockpot and bring to a simmer over medium heat. Reduce heat to low to keep sauce warm while preparing meatballs.
- Preheat the oven's broiler and set the oven rack about 6 inches from the heat source. Line a baking sheet with aluminum foil and brush lightly with oil.
- Whisk bread crumbs, milk, egg, Italian herb seasoning, olive oil, garlic powder, and red pepper flakes in a small bowl to form a thick slurry. Set aside.
- Combine beef and veal in a large bowl. Season with salt, black pepper, and white pepper; sprinkle with Parmigiano-Reggiano cheese. Pour in slurry and mix until combined.
- Use a small portion scooper to form meat mixture into about 48 meatballs. Place on the prepared baking sheet.
- Bake meatballs under the preheated broiler until browned, about 4 to 5 minutes. Turn meatballs and broil until browned on both sides and no longer pink in the center, 3 to 4 additional minutes.
- Transfer meatballs to the stockpot with the simmering tomato sauce. Increase heat to medium and cook for 5 to 10 minutes, or longer if desired.
INGREDIENTS: ►bread (i used a sourdough baguette) ►shredded cheese - Monterey jack or mozzarella & parmesan FOR THE MEATBALLS... ►ground meat (i used beef, pork & veal) ►ricotta ►parmesan ►bread crumbs ►garlic powder ►kosher salt & pepper ►red pepper flakes ►minced parsley ►egg
FOR THE TOMATO SAUCE - https://bit.ly/2erL4Lj ►olive oil ►yellow onion ►garlic ►canned whole peeled tomatoes ►tomato paste ►balsamic vinegar ►red pepper flakes ►sugar ►dried oregano ►kosher salt & pepper
 Easy Vegan Meatballs
Ingredients
1/2 onion, chopped finely
7 shitake mushroom tops, chopped small
Small handful parsley, chopped finely
2 cup lentils, cooked
1/4 cup pecans, finely chopped
2 1/2 tsp garlic powder
2 tsp onion powder
1 tbsp nutritional yeast
Pinch red pepper flakes
1 tsp dry basil
1/2 tsp oregano, dried
15 Ritz crackers, crushed into crumbs
Other
1 cup all-purpose flour
Oil for frying
Instructions
Add onion into a pan with a touch of oil and saute until slightly soft.
Add mushrooms and season with a pinch salt and pepper. Cook on medium-high until lightly browned.
Place cooked lentils into a large mixing bowl and add in the onion and mushroom mixture.
Into the mixing bowl add in all the remaining ingredients EXCEPT for the flour and oil.
Mix well and lightly mash the mixture with a potato masher to help the mixture stick together. Do NOT turn the mix into mashed beans.
Form mixture into heaping spoonful balls.
Roll balls into flour, and fry in a small amount of oil until golden brown.
Serve alone or with marinara sauce with pasta and ENJOY!
Pina Colada

Tequila Sunrise

Bahama Mama

Salty Dog

Long Island Iced Tea

Dandelions? Yep LOL
Everything you need to know about buying, storing, prepping, and cooking dandelions.
The nutritional content of dandelion extends to all parts of the plant. It’s a rich source of many vitamins, minerals, and fiber.
Dandelions are a rich source of beta-carotene and polyphenolic compounds, both of which are known to have strong antioxidant capabilities that can prevent aging and certain diseases.
Small animal and test-tube studies suggest that dandelion have significant anti-inflammatory capacity, though more research is needed to better understand how dandelion affect inflammation in humans
Cooked Dandelion Greens
- Cut the roots from the greens and discard (or use in other recipes).
- Wash well in cold water.
- Bring a large pot of water to a full boil and put the greens into the water by the handful.
- Bring water quickly back to the boil and cook just until wilted, two or three minutes.
- Drain and run cold water over to stop the cooking.
- Squeeze as much moisture out as possible.
- At this point you may wrap well in plastic wrap and freeze for future use, 8 to 10 ounces per package is a useful size.
Tip
These greens may be used as a substitute for spinach or Swiss chard in any number of recipes, from ravioli or lasagne fillings to a simple sauté in olive oil with garlic as a side dish.
SAUTÉED DANDELION GREENS WITH EGGS INGREDIENTS
- 4 cups chopped dandelion greens, thick stems removed (about 1-2 large bunches)
- 2 tablespoons unsalted butter, clarified butter
- 1 large leek, white and light green parts only, finely chopped
- 4 large eggs
- 1/4 cup crumbled feta cheese
INSTRUCTIONS
- Bring a large pot of salted water to a boil. Add the chopped dandelion greens and blanch for 1 to 2 minutes. Drain the greens thoroughly, drain and press out as much liquid as possible.
- Melt the butter in a 10-inch sautés pan set over medium heat. Sauté the leeks until tender, about 5 minutes, stirring occasionally. Add the drained dandelion greens one handful at a time. Cook each handful until wilted, then add more.
- When the greens are wilted, crack the eggs into the pan on top of the greens. Top with feta cheese and cook uncovered until the whites of the eggs are set about 5 minutes.
Compared to spinach, one of our present-day “superfoods,” dandelion leaves have eight times more antioxidants, two times more calcium, three times more Vitamin A, and five times more vitamin K and vitamin E
The dandelion plant contains bio-active compounds that have been shown to reduce blood sugar in animal and test-tube studies. More research is needed to determine if the same effect would be seen in humans.
Some animal studies have shown reduced cholesterol levels after consuming dandelion. More research is needed to understand how this plant affects levels in humans.
DIY: How to make DANDELION HONEY (great old recipe)
This is a very old recipe - the way that our grandmothers used to make it. Dandelion honey they also used it as a medicine when they had a sore throat, helps with coughs, detoxifies the liver, and its blood depurative. It is great when you have an allergy to bee honey... This recipe will become a tradition in your family from now on!
Dandelion may lower blood pressure due to its diuretic effect and potassium content. However, very little formal research has been conducted to support this claim.
Animal studies have shown that dandelion protects liver tissue from toxic substances and oxidative stress, but more research is needed to determine their effect on liver health in humans.
Dandelion Salad Vinaigrette
Makes approximately 2/3 cup
Ingredients
- 1/2 cup extra virgin olive oil
- 3 tbsp. red wine vinegar
- 1 tsp. salt
- 1/2 tsp. dry mustard
- 1 large peeled and smashed garlic clove
- Freshly ground pepper
Directions
- Put all ingredients into a jar with a tight-fitting lid.
- Shake well and let steep at least an hour before use.
- This will keep under refrigeration for a week.
- Bring to room temperature before using it.
Tip
You may wish to add a sprig or two of fresh herbs as available. Occasionally substituting freshly squeezed lemon juice for the vinegar makes a pleasant dressing.
Dandelion Smoothie For Anti-aging and Liver Support.
Ingredients:
- greens
- 1 Cup Frozen mango
- 2 Bananas
- 2 Tbls Hemp seeds
- 1 Cup filtered water
Some animal studies have shown that bioactive components in dandelion may support weight loss, but no human studies have evaluated this effect.
Several test-tube studies have found that dandelion is effective in reducing the growth of cancer cells in various organ tissues.
More research is needed to draw conclusions about its efficacy for preventing or treating cancer in humans.
Dandelion Bread
I was SO happy with the way that this came out you guys! It is a really cool thing to make...and it tastes yummy! I hope you try it!
Ingredients
- 4 cups of flour
- 4 tsp baking powder
- 1 tsp salt
- 1 1/2 - 2 cups dandelion petals
- 1/2 cup vegetable oil
- 3/4 cup of honey
- 2 eggs
- 2 2/3 cups of milk

Directions
- preheat oven 400
- Combine all dry ingredients in a bowl
- combine all wet in a bowl
- Put your wet ingredients in your dry ingredients and mix well.
- Once mixed well put in a bread pan.
- I put mine in a large double pan for bread.
- spray and flour two pans
- bake for 25 minutes if not done reduce the oven to 350 and check every five minutes. To tell if baked through take a toothpick and stick it in the bread if it comes out clean it is done.
“A weed is just a plant whose virtues have not yet been discovered.” - Ralph Waldo Emerson
Research indicates that dandelion may increase contractions and movement of your gastrointestinal (GI) tract, acting as a treatment for constipation and indigestion. This effect is likely due to the prebiotic fiber inulin.
Early research indicates that dandelion has antiviral and antimicrobial properties, though clear applications for medicinal use have yet to be determined.
Animal and test-tube studies indicate that dandelion may protect against harmful sun rays, aging, and skin irritations, such as acne. Currently, reliable human studies are unavailable.
Research directly relating dandelion to bone health is lacking, though some nutritional components of the plant are known to support the maintenance of strong bones.
Currently, there are no clear dosage guidelines, as very little human research has been conducted on the dandelion as a supplement.
According to some available data, suggested dosages for different forms of dandelion are (4Trusted Source):
- Fresh leaves: 4–10 grams, daily.
- Dried leaves: 4–10 grams, daily.
- Leaf tincture: 0.4–1 teaspoon (2–5 ml), three times a day.
- Fresh leaf juice: 1 teaspoon (5 ml), twice daily.
- Fluid extract: 1–2 teaspoon (5–10 ml), daily.
- Fresh roots: 2–8 grams, daily.
- Dried powder: 250–1,000 mg, four times a day.
Gardening
Have you ever felt that the great ideas you're dreaming about can work for your home garden as well? Size is never the underlying factor in planning to transform your garden into a living work of art. Daydreaming about the garden that you saw in a program about the rich and famous need not be the case, because creativity is what's in the way of transforming your dreams into reality. Creativity is not a fort for the chosen ones; if you dig a dip inside yourself, you will find that you have a creative heart and mind. All you have to do is stretch your imagination beyond the conventional and predictable design approach and embrace the ultra-modern ideas you can put into your little garden. The following are tips on growing food in a small garden.
Adding wall fountains to your small garden
Wall fountains are good additions to any type of gardens that are confined to space. The variety of wall fountains to choose from is boundless. From classical Greek figures to modern forms of art, the choice is yours. Most of the wall fountain is pouring water into a basin below which a small pump is located. Made of terra cotta, plastic, fiberglass, cast concrete, or metal, you can choose the right material to blend into your little garden. A great hint is to install a wall fountain on a wall where you can turn the wall fountain on and off from the inside of your home. Although it's going to be more work for you, the end result is fantastic, and you're going to save yourself some trouble.
Adding a tree to your small garden
It is often said that nothing can make the atmosphere of a garden faster than a tree, and that goes for small gardens as well. It is, therefore, of paramount importance to choose the right tree. Otherwise, you're going to spend years complaining about your poor decision. Since your garden is on a small scale, don't go for large trees. Choosing the right trees is often a good idea to see what thrives locally in other parks and gardens. Most likely, they'll do well in your garden if they thrive in your neighborhood. If you don't know the name of the trees you've seen, it's a good idea to take a few pictures of them and visit some public parks and arboretums to identify them. Most of these places label their trees, making your task easier. Another tip is to ask the small garden owners about the trees in their garden.
Create an illusion of space, perspective, and depth
This can be achieved by using color and textural contrast. This can be achieved by keeping bright colors and rough textures in the foreground and softer textures and colors in the background. This technique creates a visual distance between the foreground and the background, making space appear larger. Water features such as swimming pools, fountains, and ponds reflect the features of the garden surrounding them, which enhance the functionality and aesthetics of the garden.
Choose selected flower plants
Get a limited number of plants, shrubs, and trees planted on your lawn. Be selective about your choice. You can consider options such as Lobelia, Petunia, SnapDragon, Achillea, Bell Flower or Campanula, Smokewort, Blackberry Lily, Primrose, etc. to enhance the appeal of your landscape.
Give sufficient space between the plants and the pathway
You need to create some space between the plants, the trees, and the path. With proper spacing, you're going to create an elegant look. To separate the plants as well as the pathway, you can make it a point of bordering the plants with the pebbles.
Create borders around the plants
Bordering the plants is essential to maintain the esthetic appearance of the garden as well as to help the plants get trampled. When it comes to bordering your plants, you can see red bricks as a standard option. Get these bricks planted in a slanting manner by the landscaping pro, and they should be placed one after the other. It's going to make the landscape look more organized.
Control weed efficiently
Proper weed control is a must to ensure that the small garden landscape of your home enjoys a healthy glow for a long time to come. You need to get the weeds trimmed by the pro on a regular basis so that people can enjoy a free view of the weeds in your garden whenever they make a jaunt in it. Make sure you don't overuse water sprinklers as they help grow weeds. Use wood chips, sawdust, and various varieties of mulches to remove weeds from the garden.
Garden accessories
You can revive the appeal of your front yard and give it a fascinating look if you can exude a unique and magnificent collection of garden accessories, such as statues, gazing balls, decorative fencing, stones, lighting, etc.
Get retaining walls installed
By installing retaining walls in your lawn with the help of an efficient landscaping service, you can make sure that the small landscape looks completely renovated. These walls are much better choices than ordinary straight walls, both visually and functionally.
Use flower beds as fences
A flower bed is a very effective way to make your garden look in a true sense. You have the leverage to be innovative and let your imagination run free when you work on the design of a particular flower bed. You can consider mixing a variety of colors when you set up a flower bed. Perennial flowers are the right choice for flower beds. Before you set up flower beds on your landscape, you need to make sure the soil is soft enough. You should avoid those parts of your garden with heavy clay soil.
In conclusion, nature has an invisible and inherent effect on human beings. Nature cleans the air we breathe, and it also attracts a vast array of creatures which, in effect, reveal the natural and environmental distinctiveness of the garden. It is up to us to set up and maintain our garden space for functionality and esthetic purposes.
Starting a new garden on your own seems like an exciting idea, right? However, to get a healthy harvest, you must be familiar with the various tips and tricks. It may seem obvious, but not all plants grow everywhere, and their growth depends on where they live. If you start from scratch, you should start by visiting some plant nurseries in the United Kingdom, talking with a botanist, and learning which plants are best grown in the unexpected climate of the country. The following points will guide all aspiring gardeners to begin their gardening projects. Let's take a look
Know your area:
Like the real estate project site, it is the most important. Whether you are planning to start a patio garden directly, or choose a plot, study the area thoroughly. This includes the weather to exposure to sunlight and everything else. It is crucial to help you understand the limits and possibilities. If possible, talk to a factory development expert who can inform you about this aspect.
Test your soil:
For you to know your soil details, a sample should be sent to your local nursery. Also, there are some practical test kits that you can do at home. Soil tests will also help you know how acidic the earth is. Not all plants remain at the same pH level, so a soil test will help you determine what to harvest.
Proper irrigation is crucial:
Never to give water until it is needed. When watering a plant, you must bring water to the roots, and this is how the plant drinks water. What you want to do is make the roots as deep as possible in search of moisture. Therefore, you must give enough water to penetrate the soil with sufficient depth.
Draw a plan and investigate:
If you're right. Even gardening requires a lot of research. Gather information about the plants you want to grow. It involves many factors, such as how much they grow for their lives, as well as the required space and many other things. Whether a perennial or creeping plant, different plants have different types of growth. While some may survive from their homes, others need to be exposed to the sun regularly. Knowing more about them will prepare you to start with confidence.
Start with easy, growing plants:
Of course, you don't want to be disappointed after having spent a lot of time and effort and, therefore, begin to harvest the easy plants. In this sense, growing vegetables is a great option, and if you like flowers, sunflowers, and wonders, it's a great thing at the beginning of the game. Success at the beginning is a true inspiration, and you will feel motivated to move to complex plants.
Ask for expert advice:
A keep in constant contact with a professional horticultural doctor. You will be asked to get advice on the garden of such an expert person to guide you in the right direction. Many times you can ask the expert to visit your garden and help you see if something went wrong.
Scan your garden:
You must spend time in your garden every day. It is necessary to verify if your plants are affected by insect pests. It will help you treat them before things go wrong.
Add more tropical plants
It doesn't matter if you are an amateur gardener or a professional; The only thing that will make your garden look fresh and lively throughout the year are tropical plants. The Sansevierias and Xanadu plants are easy to grow indoor fertility plants that are characterized by fertility and internal toxin cleansing while being very attractive.
Be patient:
The vulgar phrase "patience is worth it" applies only in terms of gardening. It is self-observation that you should always remember and follow. You give life to something, and this is no different than caring for your children. Do not immerse them with water in the hope that your plants grow sooner. Proper maintenance is the key.
conclusion
Gardening can also be cheap and fun, and if done regularly, you don't need to spend much time. Many people think that because all the plants were put in place during the summer and that their perennial plants bloom in the past, there is no more work to be done. No, there is always work to do.
Growing Strawberries & Tips
Strawberries are the most attractive and exquisite fruits. Everything about them is appealing, whether color, texture, or taste, which is why many people enjoy growing strawberries in their home garden. Strawberries are very diverse fruits and used in many delicious preparations such as jams, tarts, cakes, ice creams, jellies, etc. In your home garden, you can try growing strawberries and enjoy picking bountiful produce during harvest time. Many important things to remember when planning to grow strawberries in your backyard.
Choosing plant
Strawberries come in many varieties and are commonly known as June Bearing, Everbearing and Day Neutrals. June bearing varieties grow a single crop annually with the largest berries. Neutral varieties can be harvested up to 3 times a year. The fruits they produce are smaller than June strawberries. Everbearing and Day Neutrals are perfect if you have a small yard, as they yield lesser runners. All these different types of strawberry plants are on the market, so you can choose the ones that suit your needs.
You should select a place that gets full sun to plant strawberries as they grow in a sunny area. The field should have no perennial weeds. Strawberries grow in an environment with strong air circulation and well-drained soil. It is not recommendable to grow strawberries in an area where tomatoes, eggplant, or potatoes have recently grown as your crop may become contaminated with diverticulum rot.
Preparing soil
Preparing the soil is important before planting strawberry. Strawberries can grow in various soil types, but loamy and sandy soils work best. Soil should be rich in organic matter and well-drained. The optimal range for strawberries is 5.5-6.5. Check the soil in a laboratory before developing the plants. If not rich, you can apply fertilizers and manure to improve soil quality.
Planting strawberry plants
You can plant strawberries once you've prepared the soil. They should be planted in the spring season as soon as the soil is ready. Sample enough soil to fit roots and grow strawberries. Ensure there is enough spacing between plants to produce runners. If you plant them closely, then they couldn't grow properly.
Mulching
Strawberry plants are prone to cold weather. In the winter season, the soil should be covered with mulch to avoid freezing. Mulching is important to save plants from severe winter damage. You may use Hay, Straw, Coarse Wheat, and Crushed Cob for mulching.
Care and Maintenance
You can remove all flowers from the plant during the first year because it helps to reinforce roots and stem. Deflowering ensures plants are strong and stable in the coming seasons for better fruit growth. Watering plants in adequate quantities is essential for growing good quality fruit. Also, regularly check if there are any unnecessary weeds that grow along with the strawberry plants. Uproot the weeds as they use soil nutrients necessary for your plant growth.
Harvesting
The fruits should be picked as soon as they are ripe because if you allow them to stay on the plants for a long time, they will be eaten by insects and birds. Overripe fruits attract rodents and insects to avoid leaving overripe plant berries.
Soft, succulent strawberries are difficult to find store-bought but they are very easy to grow.
This member of the rose family isn’t really a fruit or a berry but the enlarged receptacle of the flower. Choose medium-sized berries that are firm, plump, and deep red; once picked, they don’t ripen further.
First cultivated in ancient Rome, strawberries are now the most popular berry fruit in the world. In provincial France, they were regarded as an aphrodisiac. These red jewels may be good for your heart in more ways than one. Strawberries are a high-value crop in the United States. The U.S. is, in fact, the world’s largest producer of strawberries, accounting for nearly one-third of the world’s total production
This potent little heart-shaped packages protect your heart, increase HDL (good) cholesterol, lower your blood pressure, and guard against cancer.
Packed with vitamins, fiber, and particularly high levels of antioxidants known as polyphenols, strawberries are a sodium-free, fat-free, cholesterol-free, low-calorie food. They are among the top 20 fruits in antioxidant capacity and are a good source of manganese and potassium. Just one serving -- about eight strawberries -- provides more vitamin C than an orange. - Via WebMD
Strawberries’ carbs consist mainly of fibers and simple sugars. They have a relatively low GI and should not cause big spikes in blood sugar levels.
The nutrients in 3.5 ounces (100 grams) of raw strawberries are:
- Calories: 32
- Water: 91%
- Protein: 0.7 grams
- Carbs: 7.7 grams
- Sugar: 4.9 grams
- Fiber: 2 grams
- Fat: 0.3 grams
 Strawberry allergy is rather common, especially among children. Individuals who are sensitive to birch pollen or apples may experience symptoms after consuming strawberries.
Strawberries are low in calories, delicious, and healthy.
They are a good source of many vitamins, minerals, and plant compounds — some of which have powerful health benefits.
The health benefits include reduced cholesterol, blood pressure, inflammation, and oxidative stress.
Furthermore, these berries may help prevent big spikes in both blood sugar and insulin levels.
Strawberries are an excellent addition to a healthy diet.
Checklist for establishing your strawberries
• Choose a good site.
• Eliminate all perennial weeds prior to planting and annual weeds as they appear.
• Choose a cultivar(s) suitable for your needs and site.
• Choose a planting system.
• Prepare the soil by adding organic matter and lime, if necessary, and by forming raised beds if desired.
• Apply fertilizer, if necessary.
• Till the soil.
• Purchase certified disease-free plants.
• Plant in the spring, setting plants to the correct depth.
• In the hill system or plants in containers, remove all runners as they form.
• In the matted row, train runners to the row (12–18 inches wide); remove all runners that form after September
• Irrigate as required.

Types of strawberries
June-bearers
June-bearers are among the most productive of strawberries. They have a main crop of berries in June or July and produce lots of runners from which new plants are started within the strawberry bed. June-Bearers form flower buds in the fall and bear one heavy crop the next spring or early summer. After harvesting, renovate strawberry beds by mowing off the leaves, taking care not to damage the crowns. Renovation stimulates new plant growth and reduces disease problems.
• One crop per year (in June and July)
• Produce many runners
Everbearers
Everbearers and day-neutrals have the same general culture. Because day-neutrals set fruit all season long and total yields are higher, their cultivars are replacing ever bearers. In very cold areas, day-neutral cultivars offer an option as they bloom over a long period of time. Everbearers bear fruit twice during the growing season, generally during the spring and in late summer.
• Two crops per year (June–July, and fall)
• Produce few runners
Day-neutrals
Day-neutrals will set fruit the year they are planted. Because these cultivars set flower buds regardless of day length, they set fruit from spring to fall. They produce few runners and can be planted either in short rows or in hills. Day-neutrals are sensitive to extreme heat so fruit production generally drops during July and August. They are often replaced after 2 fruiting years as vigor and the fruit size declines.
• Crop almost continuously (late May until frost)
• Produce few runners
You can choose from various cultivars (varieties) available for each type of strawberry.
Capping or hulling a strawberry fruit means removing the green stem and leafy part attached to the berry. You can do this by hand (long fingernails help) or use a strawberry huller, available in most kitchen supply stores.
Note: Some cultivars are easier to cap than others or the cap stays on the plant when you pick the ripe fruit. If you make a lot of preserves or freeze a lot of berries, you may want to consider this when you select a cultivar.

Planting systems choice
• In the matted row, the runners produced are allowed to fill in a space 12 to 18 inches wide
• In the hill system, you must remove all runners that are produced.
• Grow ever-bearers and day-neutrals in a hill system, as these types produce few runners and won’t form a nice matted row. You can grow June-bearers in either system.
Matted row versus hill system
• The matted row requires less labor to maintain and is productive. However, if you let the row get too dense, diseases such as fruit rot may become more of a problem, and fruit will be smaller.
• The hill system can produce both high yields and large fruit, provided you diligently remove all runners that are produced before they root. The plants will branch and become very productive.
Planting Strawberry plants should be grown on raised beds to avoid wet feet and root rot conditions; it also makes them much easier to pick. Beds should be raised as high as possible, 12-18", and formed to 2'wide on top, with 40'' between beds, center-to-center. After beds are raked smooth and pre-irrigated, open a V-shaped hole about 6-7' deep with a trowel. Place a level teaspoon of slow-release fertilizer or ammonium sulfate in the bottom of each hole and cover with approximately 1' of soil to prevent root burn. Spread the roots out in a fan shape in a fan shape in the hole and cover with soil, firming it around the roots. Set plants at the exact level that they were growing in the nursery, not too high nor too deep. Plants set too high will be weak, and plants set too deep will rot. Evenly space plants from 8-15' apart in the bed, depending upon the ultimate size of that particular variety

Strawberries grow well in a variety of sandy or loam soils. These soils provide good drainage and warm up more readily during the day, which is especially important during cooler parts of the growing season.
When strawberry fields are being prepared for planting, the soil is fumigated using an approved broad-spectrum pesticide to kill soil organisms that can harm the growing plants or lead to decay of the fruit.
Raised beds are then created and covered with plastic liners that limit plant and berry contact with soil. Protecting the plants and berries from contact with the soil and standing water helps to prevent decay, pest damage, and contamination. The liners also trap heat from the sun, allowing for the extension of the growing season, and they limit weed growth. There are various colors of opaque liners that are used in different regions and provide different degrees of heat absorption.

Watering is one of the most essential parts of getting initial plant growth started no matter what you might be planting, and the watering phase is also what inspires new plant growth from there. Berries are one of the juiciest fruits out there, and this should already be an indication for newer gardeners that they are going to require a bit more water than some of their counterparts – but this doesn’t mean you should overwater them, either.
Strawberry plants have shallow roots and require consistent moisture throughout the growing season. Newly planted plants are generally overhead irrigated at one-week intervals (1" of water) to get good initial vegetative growth and then switched over to drip irrigation as the season progresses. Overhead irrigation can be used during the growing season but should be monitored carefully to minimize the time period that the plants and fruit are actually wet. Drip irrigation keeps the moisture away from the fruit and prevents fruit rot. It is generally run every day during the summer for 1-2 hours.
Water sources used to irrigate strawberry fields are many from underground wells to surface water. The source type depends on the growing region and resources available to the farmer. Irrigation water is most often delivered to the strawberry plants via drip irrigation systems. These systems use rubber or plastic tubing buried in the raised beds to deliver water to the roots where it is needed. Drip irrigation also protects the fruit from contact with irrigation water, which could transmit plant and human pathogens or cause mildew and premature softening.

Pests, wildlife, and rodent control on strawberry farms are part of a good strawberry safety program. Controlling these pests helps protect the quality and safety of the berries. This is common on many produce farms, not just strawberry farms.
During the growing season in some regions, temperatures can drop below freezing. When this happens, it is sometimes necessary to apply water to the growing strawberry plants to protect them from frost.
Most home garden strawberry plantings are mulched. Any organic material free of weed seed makes a good mulch. Hay, straw, and pine needles are most frequently used. Mulch should be applied 2 to 4 inches deep over and around the plants after the first freezing weather in the fall. This protects them from heaving and freezing injury during the winter. After the danger of frost is over in the spring, about half the mulch should be raked off the plants into the area between the rows. Mulch left around the plants will help keep the berries clean, conserve moisture and check weed growth.
Checklist for taking care of your mature plants
• Protect the planting from frost if possible. Avoid planting in frost pockets, or use row covers.
• Control weeds.
• Irrigate as required.
• In the hill system, remove all runners that form.
• In the matted-row system, train runners to the row (12–18 inches wide); remove all runners that form after September
June-bearers
• Pick fruit from June to July.
• Renovate the planting after harvest or remove it if it’s no longer productive.
• Fertilize in late summer.
• Irrigate if necessary.
Everbearers and day-neutrals
• Pick fruit in June and July and in the fall (for day-neutrals, pick throughout the season).
• Remove the planting if it’s no longer productive.
• Fertilize; make three or four applications from spring through early August.
• Irrigate if necessary.

Insects
Weevils- several attack strawberries, both above and below ground. Most insecticides are ineffective, and so abandoning the planting and moving to a pest-free area is recommended. Spider mites- these tiny insects produce webbing and stippling of the foliage, stunting the strawberry plants and reducing yields and fruit quality. Dusty conditions contribute to spider mite populations. Overhead watering, especially when combined with insecticidal soap, is effective in controlling most mites by washing them off the plants and destroying their habitat.
Aphids- can damage foliage, stunt plants, and cause damage to the fruit during the early, cool part of the season. Generally, insecticidal soap applied at weekly intervals provides adequate control.
Leaf rolling caterpillars- the salt marsh caterpillar and cutworm will feed on strawberry plants. These can be effectively controlled with Bacillus thuringiensis (BT), Dipel, Thuriside, etc.
Slugs and snails- feed on foliage and fruit. They can be controlled with applications of Metaldehyde with repeated applications.

Fertilizing
Before planting, incorporate 2 pounds of 5-10-5 or 5-10-10 fertilizer or 3/4 pound 21-0-0 ammonium sulfate per 100 square feet into the soil. Beginning before bloom in April, side dress with a one-eight pound of ammonium sulfate (21-0-0) per 100 square feet per month until mid-August.
At Keywebco we use our own compost and very lightly use any chemicals.
Commercial growers almost exclusively use chemical fertilizers. The use of compost is rare. Fertilizers can be added by injection into the soil, through the irrigation system by injecting into the water (also known as chemigation), or added as a side dressing in the furrow which is then distributed when it rains.
there’s a lot to be gained from the plant’s harvest. Including a long list of health benefits owing to the fact that they’re much higher in vitamins and minerals compared to fruits that are twice their size.
What could be better than picking strawberries out of your very own garden? Any gardener knows that few things are as satisfying as literally picking the fruit.
Harvesting In the garden, strawberries should be allowed to attain an overall red color and become fully ripe before harvesting. It is at this stage that the sugar content is highest and the flavor is best. It is necessary to harvest every day or every other day during the peak of the season.
Harvest the berries carefully by the stems to prevent bruising. Pick all that is ripe, since they will not keep until the next harvest. Ripe strawberries may be held for a day or two in a refrigerator.

Here are tips for your strawberries
1 – If your strawberries grow in sunny places, you'll get the best flavor.
2 – Strawberries like air, so to say. Give them at least one foot of soil depth and 8 inches between each row of plants.
3- Strawberries don't like waterlogging. Under these conditions, they'll rot easily, so your soil drains well.
4 – One of the best places to grow strawberries is in elevated beds, as you have more influence over the weather.
5 – Try to grow your strawberries where long sunny days and cool nights benefit.
6 – One of the worst enemy strawberries is snow. The best crops will be found from plants planted in early September, but if frost is going to be an issue, then wait until mid-April for summer strawberries. Perpetual strawberries will already be planted mid-April.
7 – Avoid windy spots as it is difficult for insects to pollinate small flowers.
8 – Avoid growing strawberries on land previously used to grow grass as wireworm will make short work of any strawberries before you get a chance. You should also avoid growing strawberries in soil that were previously used to grow eggplants, tomatoes, potatoes, or peppers as this could cause a verticillium wilt problem.
9 – We like strawberries because of their bright color, and they look strange because their seeds are outside the fruit. However, this also means they are attractive to birds, so avoid them attacking your fruits when they start to form by placing wire netting over them when the fruits start to form.
10 – A great final tip is to cover the plant base with stone-secured straw or plastic bin liners when the fruit begins to grow. When they get larger, fruits appear to get weighted down and come to rest on the soil where they start rotting. By the way, if you're using plastic bin liners or similar to prevent this scenario, make sure you 're holes in it to allow drainage or your fruit will rot.
One of the key factors to remember when successfully growing strawberries in the soil. Soil make-up, composition, compositing, and fertility must be considered. The best type of soil for strawberry growing is a soil that allows not only maximum sunshine and sun rays to touch it, but also very good drainage. The best soil for strawberries is hard clay soil and sometimes sandy soil. A sloppy piece of land, as well as a rolling piece of land, will provide better circulation of air and water drainage, which will be great for strawberry plants.
These are the key things to consider when planning to grow strawberries in your home garden. Proper care and maintenance result in healthy plants producing beautiful sun-kissed berries. Use plenty of mulch and periodically change the strawberry site position to avoid the recurrence of diseases and soil-borne problems. Make sure there are no weeds and various other unwanted plants or pests and bugs in the area. There are many simple ways to build good eating habits, and there's a huge difference in how you look.
Chicken
Why I Like Chicken:
High in protein, lower in fat and cholesterol than beef or pork. It is good for us, just what the body needs.
It is bland in taste, and therefore versatile, chicken can be found around the world in dishes. It goes with most savory spices, it goes well with veggies and starches. Just check out one recipe site, go to the poultry section, and look at how many dishes can be prepared with chicken. Just more ways to make it even healthier.
There is just enough fat in it to make it available for lots of different ways to cook it, and a visit to the frozen foods section in the grocery tells you it freezes well. Also a good thing for our health, it is a clean and less germ-prone way to transport chicken to the consumer

Helps build muscles: Chicken is one of the best non-vegetarian sources of protein. It is lean meat, which means that it contains more amount of proteins and less amount of fat. A 100g serving of roasted chicken offers you 31g of protein, making it great for those who want to bulk up and build muscles.
Keeps your bones healthy: Apart from protein, chicken is rich in several minerals like phosphorus and calcium, which helps keeps bones in mint condition. Also, it has selenium which has been known to cut the risk of arthritis.
Relieves stress: Chicken has two nutrients that are great for reducing stress – tryptophan and Vitamin B5. Both of them have a calming effect on your body and this makes chicken an excellent option after a stressful day. Also, it tastes great and that too adds to its stress releasing, happiness-inducing properties. Read a mega guide on how to deal with stress.
Reduces PMS symptoms: Magnesium, a nutrient present in chicken helps soothe symptoms of pre-menstrual syndrome and fight the various mood changes that a woman might experience during her periods. Here are more tips on dealing with PMS.
Helps boost testosterone levels: Men should consume foods rich in zinc as it helps regulate testosterone levels as well as boost sperm production.
Boosts immunity: the Chicken soup has long been used as a home remedy for relieving cold, flu, and other common respiratory infections. The hot steam of chicken soup helps clear nasal and throat congestion while the thick fluid coats the throat to prevent an invasion of respiratory linings by microbes to cause infection. A study evaluating this effect suggested that chicken soup inhibits migration of neutrophils, a type of immune cells, thereby preventing inflammation during common infections and boosting immunity
Promotes heart health: Chicken, being rich in vitamin B6, plays an important role in preventing heart attack. Vitamin B6 helps by lowering the levels of homocysteine, one of the key components linked to an increased risk of a heart attack. Besides, chicken is also a good source of niacin that helps lower cholesterol, a risk factor for heart disease development. The American Heart Association also recommends the consumption of chicken over red meat since it contains less amount of saturated fats and is also a good source of omega-3 fatty acids that exhibit beneficial cardiovascular effects.
Looking for a specific recipe? Here's the list of them in order:
00:10 Creamy Chicken Bacon Pesto Pasta https://tasty.co/recipe/creamy-chicke... 01:14 Honey-Glazed Fried Chicken https://tasty.co/recipe/crispy-honey-...
02:37 Creamy Lemon Butter Chicken https://tasty.co/recipe/creamy-lemon-...
03:22 Cozy Chicken Dumplings https://tasty.co/recipe/cozy-chicken-...
04:50 Easy BBQ Chicken Ring https://tasty.co/recipe/bbq-chicken-ring
05:38 Chicken And Avocado Salad https://tasty.co/recipe/honey-lime-ch...
06:38 Sweet and Sour Chicken
07:31 Brazilian Chicken Croquettes
08:31 Easy Butter Chicken https://tasty.co/recipe/easy-butter-c...
9:26 Chicken Fajita Bombs https://tasty.co/recipe/one-pan-chick...
10:11 Creamy Mushroom Chicken Pasta https://tasty.co/recipe/one-pot-chick...
11:20 Honey Mustard Chicken Tater Tots
12:16 Chicken Parm Lasagna https://tasty.co/recipe/chicken-parm-...
13:08 Lime Chicken Black Bean Rice https://tasty.co/recipe/zesty-chicken...
13:56 Bacon Guacamole Chicken Bombs https://tasty.co/recipe/bacon-guacamo...
14:42 Chicken Pot Pie https://tasty.co/recipe/one-skillet-c...
15:37 Chicken Lo Mein https://tasty.co/recipe/chicken-lo-mein
16:22 Grilled Chicken Caesar Pasta Salad https://tasty.co/recipe/chicken-caesa...
17:00 Buttermilk Chicken Sandwich https://tasty.co/recipe/buttermilk-fr...
17:55 Cheesy Chicken Broccoli Bake https://tasty.co/recipe/cheesy-chicke... 18:30 Crispy Buffalo Wings https://tasty.co/recipe/the-best-cris...
19:25 Chicken and Veggie Stir-Fry https://tasty.co/recipe/chicken-veggi...
20:04 Halloumi Chicken
21:12 Avocado Chicken Salad https://tasty.co/recipe/avocado-chick...
21:56 Tortilla Bowl Chicken Soup https://tasty.co/recipe/chicken-torti...
This video has 10 Simply Chicken Breast Recipes at Home - How To Cook Chicken that I try collection for all of you and I hope all recipes you want to try.
Raising Chickens For Eggs
Backyard chicken keeping is increasing in popularity. There are many reasons for this. Perhaps it is to have a ready source of eggs and meat, or as a backyard help in pest control, or perhaps it is just because they are fun to watch. For me, it is all these reasons. Whatever the reason, chickens can be a great source of enjoyment if properly managed and given appropriate care.
This article is all about raising chickens. Let me start by saying I live on a farm in the Midwest. I have raised chickens many times with different degrees of success but always plentiful with eggs. This particular article is about raising chickens for eggs not for meat. Even though the extra roosters will be sold online full-grown or butchered. The primary focus of this article is raising them for eggs either for an individual family or to sell.
Picture of My Chickens

The article begins with information all about chickens the do and the don’t and how to’s tips and information. Please note that the information quoted and used in the top part of this article can all be credited to the embedded PDFs and the YouTube video information provided.
The funny part is at the bottom of the article where I share my story of this particular season raising chickens.
I had done it before but it is been five years or more since I have raise chickens so you will get to see me redo the chicken coop where I got my chickens from how much I paid and the information about the experience raising them.

Keeping a backyard flock can be a rewarding and enjoyable hobby, one that is increasing as more people recognize the many benefits of having a backyard flock. In addition to owning a pet that makes you the supplies for breakfast, by providing you with fresh eggs. you'll notice how fun it is to have chickens as pets. Before you know it, you'll quickly find a bunch of additional benefits as you embark on the journey of raising chickens.
Backyard Chickens Steps
- Check the laws and ordinances in your area.
- Set up your brooder.
- Pick your breed and get your chicks.
- Bring your babies home and take care of them.
- Set up permanent housing.
- Decide on feeding and ranging.
- Move your chickens into their coop and wait for eggs!
Tips To Raise A Flock Of Chickens
Why are some chickens so friendly and others not?
As prey animals, chickens are constantly fearful of potential predators.
To raise a flock of good chickens you need to overcome their fear by proving that you are not a predator, but rather are safe and comfortable to be around.
As chickens are innately inquisitive and sociable, the endeavor isn't difficult, although it does require time and patience. Spending time with already grown chickens works as well, but requires more time and patience than with chicks. Some chicks will hop into the palm of your hand, and some chickens will climb into your lap, of their own accord. Some chickens really like to be petted, and will either jump into your lap for cuddling or beg to be picked up and petted. Although some chickens will befriend you with little or no effort on your part, others may take a good deal of time and patience. The more chickens you have, the more likely they are to be content to interact with one another and ignore you.
 The fewer chickens you have, the quicker they are likely to want to include you as a member of the flock.
For a family, I think 4 to 6 hens is a good amount to have for a backyard flock, or at least 5 hens a rooster (Chickens are social creatures.). Roosters also crow in not just a morning, but throughout the day. They're loud and I tend to hear them well. But they protect the girls really well. I have a lot of hawks and dogs where I live and they warn others.
One of the best fringe benefits of having a friendly flock is that it's a super stress reliever for both you and your chickens.
History Of Chicken
Feed Quality Is Important
• Feed quality will affect feed consumption. Ensure that the feed is not stale, rancid, or moldy.
• Immediately remove obviously moldy, rancid smelling or any other questionable feed. Such feed will, at best, not be eaten; and at worst, cause disease or nutritional deficiencies if consumed.
• Purchase feed as fresh as possible. Vitamins will start to degrade if the finished feed is stored for prolonged periods. Plan your schedule so that new feed is purchased at least every 2 months.
• Always store feed away from heat, moisture, and direct sunlight. Protect from rodents.
The most important factors affecting food intake are the following:
body weight
growth rate
egg production
feed quality
environmental situation

Chicken breeds All over the world, more than 300 breeds of the domestic chicken species (Gallus domesticus) exist. We distinguish three main categories of chicken breeds: pure commercial breeds, hybrid breeds resulting from cross-breeding, and local breeds or landraces. We can roughly divide commercial breeds according to their main production aim:
egg-laying, mainly with lightweight laying breeds or layers
meat production, mainly by heavyweight breeds or broilers
both egg-laying and meat production by so-called dual-purpose breeds. Layer, broiler, and dual-purpose breeds can be distinguished according to their shape.
Egg-Laying Chicken Breeds
Hybrids, such as California White, Cherry Egger, Hy-line Brown, Golden Comet, and Indian River, are the most productive egg layers. But if you would rather raise heritage breeds, Rhode Island Reds and Whites, Leghorns, White-faced Black Spanish, Australorps, and Plymouth Rocks are good choices. Some chicken breeds lay white eggs, some lay brown eggs, but Ameraucaunas and Araucaunas lay eggs that are various shades of blue, green, and cream. The egg color does not affect the nutritional value of the eggs, but you may choose what breed, or breeds, you raise based on your own personal egg-color preference.
Another consideration for choosing what breeds you raise is egg size. The heritage breeds that lay the largest eggs are Jersey Giants, Plymouth Rocks, Rhode Island Reds, Australorps, and Orpingtons. A number of hybrid breeds actually lay mostly extra-large eggs. If this is your goal, check into Hy-line Browns, Cinnamon Queens, Brown Sex Links, ISA Browns, and Golden Comets.
One more thing to think about is how quickly you want your hens to start producing eggs. Hybrid breeds - Indian Rivers, ISA Browns, Cherry Eggers, Golden Comets, and Pearl Leghorns mature quickly and can begin laying eggs as early as 17 weeks old. Leghorns and Leghorn hybrids are nearly all quick to mature. Other heritage breeds, such as White-faced Black Spanish, Red Caps, Minorcas, and Anconas, can start giving you eggs as early as 21 weeks. Pullets of some breeds don't mature enough to lay eggs until more than 26 weeks old.
What Is A Strain Of Chickens?
Each strain of purebred chickens has all the traits that define its breed, but with additional unique traits that make the strain clearly distinguishable from other strains of the same breed and variety.
The name of a well-known strain tells you quite a bit about the characteristics of the birds within that strain. Further, once you are familiar with a particular strain, you can readily recognize individual birds from that strain without being told the strain's name. If you acquire chickens of a named strain, your vision for breeding the flock may be different from that of the original developer.
After the first generation in your own breeding program, the original strain name no longer applies.

Free-range chickens In the free-range system, chickens are free to roam the farm in search of food. Eggs are laid outside in simple nests and are mainly used to maintain chicken numbers. In many cases, up to 75% of the eggs have to be hatched because the mortality rate among baby chicks is high. Few eggs remain for consumption and the chickens themselves do not give much meat.
The advantages of this system are that little labor is needed and waste food can be used efficiently. Very low costs can offset low production levels so that keeping chickens around the house can be profitable if certain improvements are made.
The free-range system is most suitable if you have a lot of space, preferably covered with grass. At night, the chickens can be kept in any kind of shelter, as long as it is roomy, airy, and clean. This will minimize the loss of chickens to illness or theft.
Advantages of the free-range system
Exercise in the open air keeps chickens healthy.
Feed, even if it is not well balanced, presents a few problems.
Parasitic infections can be kept to a minimum if there is enough space.
Little or no labor input is needed.
The chickens help limit the amount of rubbish in a productive way.
The direct costs of the system are low.
Disadvantages of the free-range system
Free-range chickens are difficult to control.
The chickens, especially young chicks, are easy prey for predators.
Chickens may eat sown seeds when looking for food.
A large percentage of the eggs can be lost if the laying hens are not accustomed to laying nests. Mortality rates are usually high.

Baby poultry cannot generate enough heat to sustain itself. That is the reason the mother hen keeps the young under her wings. The process of getting chicks off to a good start is called brooding. The brooding period is roughly the first 3 to 4 weeks of a chick’s life. By then, most breeds are fully feathered and can generate enough heat on their own to get by.
Transition From The Brooder To Outdoors
Basic needs for brooding chicks are:
• Heat source, such as a 250 watt infrared light. Keep a temperature gradient from 110°F under the heat source to 84°F at the edge of the brooder ring. Decrease temperature of about 5°F each week. However, if chicks appear too cold or hot, adjust accordingly.
• Clean water.
• Good quality chick starter feed.
• Clean litter (pine or cedar shavings are recommended).
• A circular confined area to keep the chicks from wandering away from the heat source.
Successfully transitioning young poultry from their brooder to permanent outdoor facilities requires following a few common-sense guidelines.
Within the birds' comfort zone, a temperature slightly on the warm side will result in slow feathering, while a temperature slightly on the cool side will increase the rate of feathering. An often-stated rule of thumb is that the brooding temperature should start at 95ºF and be reduced 5ºF per week for the first six weeks, or until the brooder temperature is the same as the daytime temperature outdoors. On the other hand, if the outdoor temperature is higher than brooding temperature and conditions are dry, young poultry may be moved out of the brooder sooner. A big factor in successfully moving young poultry from the brooder is to make a gradual adjustment to let the birds get acclimated to outdoor conditions. Never abruptly move poultry from a heated brooder to permanent outdoor facilities. Another acclimation option is to furnish brooded birds with a sunporch fully enclosed with hardware cloth, where they can choose to spend time outdoors during the daytime. After the birds are moved to the outdoor coop, keep them confined inside for the first few days before opening the door to the outside run. Additional transitional measures relating to the number of young birds in relation to the size of the outdoor housing. By gradually transitioning your birds - and taking into consideration outdoor temperatures, the number of birds and their degree of feathering - you can successfully move young poultry from their brooder to permanent outdoor facilities.
The chick water container should be small to prevent drowning. When you bring the chicks home and place them in the brooder, dip their beaks in the water gently so they know where to find the water. Make sure that the chick feed you give them has grit included in it. They will find the food on their own. After a couple of months, you should be able to move the chickens to the coop. If it's still very cold where you live, you might want to wait a little longer.
Once you move them to the coop (or tractor), give them dietary variety. Cracked corn in the winter will help them keep up their body temperature. Chicken feed, food scraps, insects, and grass all help feed them. You might also look into allowing your chickens to range freely in your yard (with proper precautions to protect from predators), since free-range eggs have lower cholesterol and saturated fats, as well as higher omega-3 fatty acids. Don't ever let them roam unsupervised and make sure that you close them up in the coop at night.

Housing Chickens are very adaptable and no single best way exists to house them. Creative architectural construction may even be considered in building a “designer” chicken house in order to enhance the backyard landscape. Regardless of the ultimate design, the 2 following practical considerations should be observed.
The building must:
• Be large enough for proper air circulation (i.e., ventilation), but small enough to keep from getting too cold and drafty in winter;
• Allow 1.5 to 2.0 ft2 (0.14 to 0.19 m2 ) floor space per adult chicken;
• Provide easy access to feed and water
• Provide nesting areas for hens in egg production.
Nest boxes are essential furnishings of any hen house because she will seek a secluded place to lay her eggs. Properly constructed and maintained, nest boxes provide a clean environment for laid eggs and facilitate gathering them. Again, there are no hard and fast rules for nest box construction. Commercial boxes are available from various retail sources, or you may construct your own.
• Nest box height and width should be 12 to 15 inches (30 to 38 cm); depth should be at least 12 inches (30 cm).
• One nest box is required for each four to five hens. Place nest boxes no less than 18 inches (46 cm) above the floor.
• A front panel, 4 to 6 inches (10 to 15 cm) high, is necessary to provide seclusion and keep eggs from rolling out of the nest.
• Maintain at least 2 to 3 inches of clean dry shavings in each nest box to reduce egg breakage and to minimize the number of soiled eggs.
• A perch may be attached to each box to facilitate access, running parallel to the front of the box and located 6 to 8 inches out.
Egg Production
Hens do not need roosters present to produce eggs. Increasing day length, not the presence of males, is what stimulates egg production. A rule of thumb is that four to five hens will supply two to four eggs per day during their production cycle. Pullets (young females) reach sexual maturity and are capable of laying eggs when about 5 to 7 months of age; however, this can vary considerably depending on breed and strain of chicken.
Use the following criteria to choose which eggs to hatch:
The eggs selected must, of course, be fertilized. This is rarely a problem if there is a cock present. On average, one cock is needed for every 10 hens. If a cock is not normally kept with the hens, he must be put in with the hens two weeks before the hatching period.
Use undamaged and clean eggs which are neither too small nor too large. The best results can be expected if you choose medium-sized eggs from hens that lay well.
Collect the eggs regularly, e.g. three times a day. Let the eggs cool down as quickly as possible.
If necessary, keep the eggs for a few days, but preferably not for more than a week. If the eggs have to be kept for a week, they must be stored at a temperature of between 14 and 16 °C. Storing hatching eggs at temperatures below 12 – 14 °C is not advisable. If the temperature cannot be kept at the recommended level, a shorter storage period is necessary. Eggs can be kept for only three days at 20°C. Write the date of collection on the egg in pencil, to help you remember how long the egg can be stored.
Health care For good productivity and profitability, you should keep your chickens as healthy as possible. Sick chickens do not produce, and profits will be lost if you have to buy medicines or if your chickens die. Prevention is better than cure, so try to provide good housing, nutrition and health care for your chickens, and observe them daily for any abnormalities and disease symptoms. Some diseases can spread rapidly through a poultry flock so sick-looking birds should be housed separately and given extra care. Contact your veterinary or extension agent for information about common poultry diseases in your area and the availability of chicken vaccines.
To protect against Salmonella, wash eggs that have chicken feces on them in a sanitizer with ½ oz of chlorine per one gallon of warm water. If you are using the chicken waste in your garden compost, it needs to age 45-60 days before you put it on your vegetable beds in order to avoid possible Salmonella contamination.

Our Chicken Story
What I Started With:
Not used for 5 years and many years older than that this old chicken house had to have a redone floor, roof, nesting boxes, roosts, and some wiring repair.
We ordered our chickens and began to fix up the building. Nothing was purchased to do the fixing because we used wood from old bookcases and dressers we had gathered. The metal roof we had saved after a storm blew them off. The total repair cost was about $12.00 for wood screws.
It had one partial wall dividing it in half for the nesting room. We upgraded it and changed the layout.
Start

Finished
Buying Chicks

I have ordered from other places but have always been very happy with Cackle Hatchery!
BARGAIN SPECIALS
If you’re looking for the best deals available, you’ll find them in Cackle Hatchery’s “Cheap Cheap” selection. We offer our clients a number of chicken deals, weekly specials, discounts, and sales every day of the week. This is just one page of our money-saving offerings, including our baby chicken bargain specials. These bargain specials are always available to order throughout the season as available. Be sure to check out the other categories of poultry for our every day constantly changing discounted special offerings, too! We are sure you will find a great deal on just about any type of poultry you would like to purchase.
Layers

Bananas
Banana Tips About Health

- Bananas are one of nature's superfoods and provide a host of benefits that can promote general health.
- This fruit is closely associated with the mineral potassium which strengthens the cardiovascular system and can lower blood pressure.
- Potassium is an electrolyte that manages fluids in the body and can treat dehydration.
- Bananas also contain magnesium which benefits various processes within the body, including gene maintenance and protein production from amino acids.
- Bananas do not only have a generous serving of vitamins, minerals, and amino acids but can provide a low-fat and natural sugar alternative to regular sweets.
- The fruit's smooth texture can satisfy a craving for high-fat foods and is often used in recipes as a replacement for oil and eggs.
- Potassium has been shown in studies to benefit the heart, and banana is one of nature's richest sources of this mineral.
- Potassium is responsible for powering the muscles that squeeze blood through the heart and can regulate heartbeat and cardiac functioning.
- Bananas can also help lower blood pressure, and it was found that those who consumed more potassium saw a lower systolic blood pressure numbers of at least 10 points.
- Eating bananas satisfies cravings for high-fat foods, and provide a healthy alternative for heart health.

Banana Pancakes
Ingredients
2 cups all-purpose flour
¼ cup brown sugar
2 tsp baking powder
1 tsp baking soda
1 tsp salt
2 bananas, mashed
2 eggs
1½ cups milk
1 tsp vanilla
2 bananas, sliced butter for cooking
Directions
In a medium bowl, add the flour, brown sugar, baking powder, soda, and salt. Mix thoroughly with a spoon. In another bowl, add the mashed bananas (or just mash them in the bowl), eggs, milk, and vanilla, then mix.
Add the dry mixture from the other bowl into the second bowl. Gently stir it with a spoon until everything just comes together. Tender pancakes come from not over-mixing the batter. If there are still a few pockets of flour, don’t worry about it.
Let the mixture sit for 10 to 15 minutes. Place a non-stick or cast-iron pan on medium heat.
Once it’s hot, melt a small amount of butter, about a ½ teaspoon, then ladle some pancake batter into the center of the pan. You can make your pancakes as large or small as you like. A normal amount is about 1/4 to 1/3 cup of batter. If it’s your first time making pancakes, make them smaller: they’ll be easier to flip.
As soon as the batter is in the pan, place 3 to 4 banana slices atop of the uncooked side of the pancake. Once the edges of the pancake start to dry up and you can see the middle start to bubble, flip the pancake over.
Cook until it is browned on both sides. Stack the finished pancake on a plate in a warm oven and repeat the above process until you run out of batter.
Serve hot, with butter and syrup
How To Make Perfect Chocolate Chip Banana Bread Every Time | Delish Insanely Easy
Video Recipe for Banana Bread
INGREDIENTS
2 c. all-purpose flour
1 tsp. baking soda
1/2 tsp. kosher salt
1/2 c. (1 stick) unsalted butter, melted
1 c. granulated sugar
1 large egg plus 1 egg yolk
1/4 c. sour cream
1 tsp. vanilla extract
3 ripe bananas, mashed
1/2 c. semi-sweet chocolate chips
1/2 c. chopped toasted walnuts
DIRECTIONS
- Preheat oven to 350º. Line a loaf pan with parchment paper and grease with cooking spray.
- In a large bowl, whisk together flour, baking soda, and salt.
- In another large bowl, mix together melted butter, sugar, egg and egg yolk, sour cream, and vanilla. Add mashed bananas and stir until combined. Gradually add dry ingredients to wet ingredients until just combined.
- Fold in chocolate chips and walnuts and transfer to prepared loaf pan.
- Bake until a toothpick comes out clean, about 1 hour. Let cool 10 minutes in the pan, then turn out onto a cooling rack to cool completely.
4 Desserts To Make With Ripe Bananas
BANANA FRITTERS
Servings: 4-8
INGREDIENTS
2 ripe bananas, peeled
1 cup pancake mix
½ teaspoon cinnamon
¾ cup milk Oil for frying
Powdered sugar to serve
PREPARATION
1. In a mixing bowl, use a fork to smash the bananas
2. Add in pancake mix, cinnamon & milk. Whisk together until combined.
3. Fry in oil. About 1 tablespoon per fritter.
4. Cook for about 2-3 minutes until they are golden brown and cooked through the middle.
5. Sprinkle powdered sugar Inspired

CHOCOLATE BANANA BRAID
Serves: 4-6
INGREDIENTS
2 ripe bananas, peeled and sliced
1 sheet puff pastry, thawed
¼ cup chocolate hazelnut spread
1 egg, beaten
PREPARATION
1. Preheat oven to 400°F (220°C)
2. Unfold the puff pastry. Spread the chocolate hazelnut spread onto the middle third.
3. Arrange the sliced bananas on top of the spread in a single layer.
4. Bananas may slightly overlap.
5. Cut out a triangle of the top right corner of the pastry. Repeat on the other side.
6. Cut diagonal slits along both sides of the pastry. Each will be around 1” thick.
7. Fold over the top piece of dough to partially cover the top row of bananas.
8. Alternating both sides, fold the strips of pastry over the bananas, mimicking a braid pattern.
9. Trim the excess dough on the sides, and fold over the bottom flap.
10. Brush the top of the braided pastry with the beaten egg. Transfer to a parchment lined baking sheet for and bake 15 minutes or until the pastry is golden brown. 11. Allow resting for 10 minutes before slicing.

BANANA PUDDING
Servings: 4
INGREDIENTS
2 ripe bananas, peeled
3 egg yolks
⅓ cup of sugar
3 tablespoons cornstarch
1 teaspoon vanilla
2 cups of milk
To serve Vanilla wafers
Whipped cream
PREPARATION
1. Place the bananas, egg yolks, sugar, cornstarch, vanilla, and milk into a blender and blitz until smooth.
2. Transfer mixture to a saucepan and cook over medium heat until thick stir constantly for about 8-10 minutes.
3. Pour mixture into a heat safe bowl, cover and chill for at least 4 hours
4. To serve, scoop a few spoonfuls of pudding into a serving glass.
5. Add one layer of vanilla wafers, then whipped cream. Repeat. Serve or allow to sit in the fridge for up to 4 hours.

PEANUT BUTTER BANANA BROWNIES
Servings: 8-10
INGREDIENTS
2 ripe bananas
1 cup of sugar
½ cup, plus 1 tablespoon unsalted butter, melted
1 teaspoon vanilla extract
¾ cup flour
¼ cup, plus 1 tablespoon cocoa powder
⅛ teaspoon salt
½ cup smooth peanut butter
PREPARATION
1. Preheat oven to 350°F (180°C).
2. In a bowl, use a fork to mash the bananas. Add the sugar, ½ cup of butter, and vanilla, and whisk until combined. Add the flour, salt, and cocoa powder, and whisk until fully incorporated.
3. Use the remaining 1 tablespoon of butter to grease a 9x9-inch baking tray.
4. Use the remaining 1 tablespoon of cocoa powder to dust every side of the baking tray.
5. Pour batter into prepared baking dish.
6. Use a spoon to add dollops of peanut butter on top of the batter.
7. Use a butter knife to swirl the peanut butter into the brownie batter.
8. Bake for 25-30 minutes, until center no longer jiggles when the pan is shaken.
9. Allow brownies to cool completely before cutting.
Keywebco and Roger

“The best results come from people working together to learn…because everyone has different viewpoints, experience, and ideas.” - Roger Keyserling
Who Is the Man Behind Keywebco?
I'm Roger Keyserling and my life’s story began in NYC back in 1966 with limited sight at birth. I really don’t remember much of NYC since I was just a small child when I lived there. I have, however, been back there numerous times, so the majority of my memories of the Big Apple are from later in life.
About My Family
My mother and father worked for the Federal Jobs division of the Social Security Administration until they retired. My sister is a graduate of Trinity University of San Antonio, TX. I really enjoyed living so close to her when I was working there. Now, she’s working for Social Services in New Orleans. To this day, my parents are very active in a variety of projects. In fact, my father was recently a special guest on a radio show.
My Many Likes
Music:
I like classical music, i.e. Chopin, Handel, Mozart, and Tchaikovsky.
I also like numerous types of contemporary music.
Books:
I like reading mainly topics involving astrophysics and science.
I especially like reading research documents.
Movies:
I like movies like Star Wars but also appreciate classic dramas and historical fiction.
Television:
I have a special love for classic cartoons in black and white like Felix the Cat, Betty Boop, and Popeye. In fact, I even named my dog Betty Boop.
Coast-to-Coast Moves
After attending kindergarten in New York, my family moved back to my mother's hometown of Odessa, Missouri. I ended up being one year younger than the other students in first grade. That was OK though since I was really busy both at school and with outside activities. My school activities included band, debate, drama, journalism, and photography. I was already an enterprising young man and sold cards, jewelry, Merlite jewelry, and seeds, Burpee seeds, during study hall.
My after school activities included being a member of Eagle Scouts, going on Explorer hikes, being a member of the Kansas City Ballet for a short time, attending the Kathy and Rick Murphy Dance Studio, and being a member of Youth Community Betterment. I also went on a Mid-America Orchestra Group European tour where I played with clarinet, the oboe, and the saxophone.
In 1984, I graduated from High School and then attended Northwest Missouri State University as a psychology major. After that, I decided to opt-in to a Missouri Department of Mental Health training program to start working in state facilities. I graduated after working at Saint Joseph State Hospital with multiple licenses. I continued on at St. Joseph’s for several years. Since then, the hospital has been converted to a prison. They do, however, still have a museum filled with memorabilia from when it was a state facility. It’s called the Glore Psychiatric Museum. Please note that some exhibits may not be suitable for young children.
I moved to Orlando for a short period of time and then to San Diego, CA. I worked there at the Shelby Fine Arts Gallery and sold limited edition lithographs. Today, the name has been changed to The Aristocrat Gallery. One of my favorite jobs was working in thrift stores where I bought boots, coats, dresses, gowns, and all kinds of clothing and resold them. I would also purchase knickknacks and other items that I sold at flea markets. One memorable thrift store where I worked was Family Thrift Stores.
I later moved to Kansas City, MO, and worked at the Revco Drug Company. At the same time, I also sold art and furniture privately in consignment shops. Next, I moved to San Antonio, TX, and took several corporate jobs, working at a number of small companies where the jobs were good, although quite varied. I moved to Tampa for a short time to work at a variety of other corporate jobs and also helped a close friend to set up a new business.
One day, I received a call from an old friend who lived in San Antonio. He and I both loved collecting vintage cars and the two of us often visited an Austin classic car club. At the time, I was driving a Lincoln Mark 3 and his family had a large local car dealership. He suggested that we could start a vintage limo service and I liked the idea so much that right away I moved back to San Antonio. Unfortunately, the idea wasn’t successful and I ended up working at several other jobs. During that time, I also kept buying and selling merchandise but not online as of yet.
Major Changes in San Antonio
For starters, I founded Keyhole Production Studios, which actually started as a strip-a-gram company but not for long. The “performers” involved weren’t quite used to working for a non-trashy business like mine. In addition, I rapidly learned how much they were paying in commissions, while dealing with scheduling issues, etc. On the other side of the coin were bar and club owners as well as special events. The people involved were continually upset about the unprofessional operations in the business.
So, I devised a method for doing real professional shows and my company became an instant hit with everyone due to the professional choreography, lighting, pyrotechnics, sets, theme costumes, and so much more. My prior experience in the theater was a big help and I was able to assist the set technicians with tasks like setting up backdrops. And, all my years of reselling items like clothing, I knew exactly how to go about taking care of the costumes. In addition, I had plenty of contacts for getting them custom made. One other advantage was that I had the innate ability to attract all of the top performers from all over the state of Texas as well as from out-of-state. With my company, not only were they no longer getting gouged by their promoters but they also didn’t have any of the other issues that they had to deal with before with other companies.
On the other side of the equation, the club-owners started flocking to me and booking shows. Since I was both creative and organized, I only had to do a few shows that included good choreography and performances, great lighting, and nice music. Before long, my company had 150 employees as well as shows and tours booked in more than 26 states but mainly in Louisiana and Texas.
Everything was going well for several fantastic years and I was really happy. The money that I was making meant to do everything with my business that I wanted, including marketing and growing rapidly. I had even landed a major contract where I would be touring just about every state in the country. I was making plenty of money and had a beautiful home.
I also had a beautiful 300ZX Nissan, which I loved. However, one night while at a gas station, a crook showed up, shot me, and stole my car. The bullet to my neck resulted in my dying three times and then coming back. For a very long time, I was completely out of commission and couldn’t breathe without tubes. Eventually, I healed and could finally breathe unassisted but bye-bye wealth.
There was a valuable lesson to be learned from being shot. Not only did I lose my wealth, died several times, and was incapacitated for quite a while but I also discovered that my business was so complex that it required my complete attention and really couldn't be handled by anyone else. And, when you add to that the fact that I was so young and had not properly planned the business to run without me, it was the downfall of my company.
Without proper medical coverage, all of those medical expenses had to be paid, and, believe me, it was a lot. So, the lesson is to make sure you always have adequate insurance coverage as well as a backup plan for keeping your company running if something happens to you.
To this date, I suffer from PTSD but am getting it under control. It was so bad at first that I stayed at home in San Antonio for a year following the shooting incident. Then, my grandmother became very sick and needed home care, so I packed up and moved back to Missouri so that I could care for her. She passed away unfortunately and I moved from her house to a 70-acre farm on the highway. I was on disability for a while but it didn’t take long to discover that I couldn’t survive on that and not working or doing anything was no good. So, I moved from that 70-acre farm to a 60-acre farm, which is where I live now and also where I have my business as well as a herd of cattle.
Keywebco
In 2012, I started Keywebco on eBay although I didn’t know anything about ECommerce or eBay. Or. Our original products were Barbie dolls, other new toys, and pre-owned clothing, and our sales grew. Then I discovered a number of opportunities for growing the business. Our niche included a wide range of products, fast service, and lots of inventory numbers. Basically eBay shoppers could find anything they might be looking for. Social Media Marketing became the key to my business success. Before long, I became an authority on Internet marketing and selling online, speaking at a variety of events and eCom conventions. I have even started and run six marketing groups and 25 Facebook business pages as well as multiple stores on a number of platforms.
Now I do not use Facebook, LOL
My current projects include blogging, vlogs, building websites, and publishing. I am also now selling on my own websites and several others. My keywebco.net and keywebco.com sites have more to offer each and every day, like using video chat and much more. From our blogs, where everything you could ever possibly want to know about can probably be found (topics from A to Z) to our Keywebco App, which is absolutely free and user-friendly, you can find a wealth of subjects, apps, and help all in one place. And, the Keywebco App will work on any device (even PCs) and offers you everything in one app.
Keywebco features include:
Get a website
You need to hire the best Website developers. We are known to offer the best website development serves. There are several aspects involved in website development. For example, you would like to have graphics for the website and several navigations. Ensure you get a high-quality website that will make you accomplish your given needs online. The website we will design for you will help you in the following ways:
Cost-Effective marketing
You need to look for a way you can market your e-commerce platform affordably. You need a website that ranks high in search engines. As the best experts in the field, we will help you come up with a website that will easily attract new customers. People from all ways of life would like to take several measures to ensure they have a professional website. There is no need to worry about how to get started. Our experts are dedicated to offering you the best website design. We will take into consideration several factors after which we will ensure we avail of the best website design services. We have helped people from all walks of life get top quality websites. Work with us and we will make it easy for you to have the best website.
Wider Demographic Reach
The website we will design for your company will work perfectly in reaching a wide demographic. Remember the website will represent your online presence. You need to let other people know about the services and products you offer. The best way to go about it involves getting the best experts to carry out website design services. Our experts will ensure we design for you a high-quality website that you can use to accomplish several services. We have taken several factors into consideration to ensure we avail to you the best website that will target your specific audience.
Creating Business Credibility
Your online business will be more successful if you can make people know you are credible. Many potential buyers would like to research more about the business they are about to deal with online. With a website we will design for you, we will ensure we provide all the necessary information customers need so that they can trust your business and start doing business. We have managed to work with many businesses in creating high-quality websites. The business website we will create for you will look professional so that we can make many people trust your brand and do business. From our research, several businesses we have helped create websites have achieved great success. You need to try our services for the best results.
Around-The-Clock Availability
You need to have a website that is available all-round the clock. There is no need to worry about how you can take advantage of people ready to do business online at odd hours. We know the right steps to take so that your website will be available online to serve people at any given time. You need to choose the right website host and have a reliable website so that you can remain online for most of the time. Our experts are dedicated to making life easy for you. You can count on our experts to help you create a professional website that will be online most of the time.
Consumer Convenience
People are looking for ways they can easily do business. You need to have an e-commerce website where you will easily interact with the customers. The website we will create for you will be very reliable. For instance, our experts will take into consideration several factors to ensure we avail of a top-quality website that will work perfectly to allow you to enjoy the best performance.
Increased Sales
You need to make efforts and ensure the sales increase in your business. There is no need to worry, our experts will work on your website design and ensure we avail a top-loading website that will make many people do business with you. Remember the website should be safe and reliable at all times. Our experts will work with determination and ensure your website will remain safe for the potential buyers to easily do business with you. Try to make your customers happy by making it easy for them to do business with you. We are here to help you realize the best results. Each time we work on a website design project we have helped the owners achieve great success. Our rates are very fair and we will help you realize the best results.
Get a blog
Apart from a website, you may need a personal blog where you will get to share ideas with other people. Blogs are very necessary for celebrities and influencers who are looking for platforms where they can impact the sociality positively. There is no worry, we can help you come up with a reliable blog. Here are some of the benefits you can enjoy after you let us help you with the blog development:
Express Yourself and Share Your Passions
You may like to share tips about an issue in society in a professional way. In such a case, you will have to do it on your blog. Our experts will take necessary measures and ensure we design for you a blog that will serve your given needs. We have taken time to ensure we avail of a top-quality blog that will serve you perfectly. We have been working hard to assure you the best blog for a wide range of applications. Your blog should also fast to assure you of great performance. We have experts who work with a high level of experience to assure you great performance.
Share Your Knowledge
A blog will make it easy to share your knowledge with other people. Our experts have been working hard to assure you the best experience. You can work with us at any given time and we will assure you the best blog design. Each blog we design we ensure it meets the intended purpose. For example, you may like to have a blog that can help you achieve certain needs. We start by knowing about your given needs before we start the blog development.
Refine Your Writing Skills
You may like to improve your writing skills by writing on your blog. There is no worry. We have experts who are ready to make for you a blog where you will get to enjoy the best experience as you write about what you love. A personal blog can be a great way to practice writing what you love. We have helped people from all walks of life achieve great success in their personal blogs.
Here are some more of the services we can provide. Be Sure To Use Our Menu and Look Below The Footer For More!
Make Money Online
You can use a blog to earn money online. For example, if you would like to make money in the process, then you need to work with experts who will guide you on how to make a professional blog. We work with determination to allow you to come up with a reliable blog you can apply to accomplish different tasks in your life. The blogs will also help you in building your professional network, earn more exposure, and become an authority in your industry.
Get SEO Boost
After designing a website you would like to make it rank high. Our experts know the right tactics we can apply to help you rank your blog or website high in google search pages. There are several SEO tactics you can apply. We adhere to safe practices so that we can help you rank high in search engines without the worry about penalties. There are several people we have helped and in most cases, most of them have achieved great success. We work hard to assure you several benefits through our SEO services. Here are some of the reasons why you need to try our SEO services:
Better User Experience
With our SEO tactics, we will work on both on-page and off-page tactics so that we can help you achieve the best results. The high-quality services we offer are aimed at making it easy for you to realize the best user experience. People landing on your page will easily navigate. You need to have a website that is easy to use. Our tactics are aimed at making it easy for you to realize the best experience.
Source of Leads
The SEO services we offer will be a source for the lead on your website or blog. The experts will check your website based on several ranking factors after which we will work to fix different uses on the website so that we can make it easy for your website to rank high. There are several steps that we have taken and we have managed to achieve great success in our ranking efforts. You will achieve the best experience after you decide to work with us.
Higher Close Rates
There are several factors you need to check out so that you can increase close rates on your business website. There is no doubt about how to go about it. We have experts who will utilize the latest technology to help you realize the best results. In the search engine optimization services we offer, we are dedicated to asking it easy for our customers to realize the best services ever. Our SEO experts work hard to assure you a high conversion rate.
Builds Brand Credibility
When people search about the services you offer and your site appears on top of search engines you will make them trust your services. We have taken the necessary measures to ensure we assure you the best SEO services that will contribute towards improving your brand credibility. There are several sites we have been hired to carry out the SEO services. In most of them, we have managed to assure them great results. You need to work with us and we will help you realize the best results in your SEO services.
Helps Establish Brand Awareness
Your brand should be known so that potential buyers will prefer it over others. There are several steps you need to check out so that you can improve the brand. Our experts will develop a professional website after which we will proceed to implement the best practices on your site so that we can make many people trust your site.
Enjoy our free pages loaded with content
You may like to learn a new skill in digital marketing services. Our experts share information on our free loaded pages. You can take advantage of free content and start building your site. The content on the pages is professionally created to serve the purpose. You can work with us and we will ensure we offer you the best services possible. We are dedicated to making things easy for you as far as website management is concerned.
Use our free apps and guides
There are those who would like to develop apps. Our free pages and guides will play a great role in offering you the necessary introduction to the development of the app. We are here to assure you the best experience if you can work with us. We are here to assure you the best experience in digital marketing.
Watch us live daily on YouTube
You need to get the latest information. Our YouTube videos will keep on updating you using the latest technology. You can work with us and we will help you get the right information in your learning process. Our videos are developed and made by Keywebco.
Keeping Upbeat!
As online sellers we often work many many hours very hard. We have to go back and edit things that we've already done because we found out we did them wrong. There's a lot of things that happen that can be very frustrating and aggravating. We can get returns that we know are not really returns.
Even when these things happen it's easy to maintain a very good attitude. Look back at the things you've already done to see how you overcome obstacles how you learn from your mistakes. Then look forward and figure out ways to improve on what you're doing now. If you're thinking is right your attitude becomes right. The hardest thing is when a big obstacle hits that you were unprepared for. So the best way to keep a good attitude is to try to be prepared for more things. Try to think ahead and think about what things could happen. Plan, think, and figure out ways to prepare. For example if you're selling a product don't think every single product you sell is not going to have a return or have damaged in shipping or actually just be damaged from the factory in new in the package that does happen. In your business model prepare for those things set aside a certain amount to be returned lost and shipping etc. If you're preparing your less frustrated when these things happen.
The sound of Cha Chings from doing the best you can is a good feeling too.
Most of all try to set realistic goals for yourself. Don't beat yourself up when you can't do something you thought you could. Work every day don't put your work off and then it becomes a chore. Plan it all out to be done in small increments.
It is important to remember as sellers to enjoy what we're doing. I always make a point every day to go on Facebook or a social media site and enjoy conversation, or a post for the enjoyment of the interactions available. I always make sure that I do that, then go right back to work so I can list list list.
It's important to enjoy what you do not only for your own peace of mind, but it does make you more effective at doing your job. You get more things done in less amount of time; because you enjoy what you're doing. You're not waiting, hesitating or dreading; you're enjoying your work. If you know it or not that feeling will come through in your listings, and how you as a seller appear to your buyers.
This is even more important when dealing with buyers in email. I make sure I do not show anything but a good attitude, to keep upbeat with all communications. This has helped bad situations become good on a few occasions.
Hard work and good customer service and proper business planning will make things go easier but no matter what there's going to be complications just work through them try and be happy that you can. Do it and know that you can do it!
歡迎使用Keywebco全球業務解決方案
bienvenue aux solutions commerciales mondiales de Keywebco
добро пожаловать в глобальные бизнес-решения Keywebco
bienvenido a las soluciones de negocios globales de Keywebco
مرحبا بكم في Keywebco حلول الأعمال العالمية
bem-vindo às soluções de negócios globais da Keywebco
Willkommen bei den globalen Geschäftslösungen von Keywebco
καλώς ήλθατε στις παγκόσμιες επιχειρηματικές λύσεις της Keywebco
Keywebco Offices
Don't be afraid to reach out. You + us = awesome.
Imprint
Text: Roger Keyserling
Images: Pixabay and My Images Keywebco any graphics will contain the credits or links.
Cover: Roger Keyserling
Editing: Roger Keyserling
Layout: Roger Keyserling
Publication Date: 05-20-2020
All Rights Reserved
Dedication:
To Everyone Who Likes To Cook!